
| Configuring CICS for Databases |
This chapter provides information about some of the more advanced features of CICS Option.
Within a single system using CICS Option, file data is always presented in the same codeset in which it was recorded. Between CICS Options, or between CICS Option and other CICS systems, data can be translated between EBCDIC and ASCII using the information contained in data conversion templates, which are held in an indexed file called dfhdrcnv, in the same folder as the project's resource definition file (by default mfe\config). Each data conversion template contains entries for resources that need translation and identifies which data fields require it.
You cannot edit the file dfhdrcnv directly; instead you maintain it by importing mainframe-style DFHCNV macros, and by deleting templates that you know longer need.
Mainframe-style DFHCNV macros are organised into entries and templates. An entry is a set of conversion macros that apply to the same resource; the start of an entry is marked by a DFHCNV macro that begins TYPE=ENTRY and the entry continues until the next macro that begins TYPE=ENTRY, or until the END marker. An entry can contain one or several templates, depending on the type of resource it belongs to. For more information about mainframe-style DFHCNV macros, see the following IBM manuals:
To update the data conversion file for a CICS project on the PC, open the project and select Tools>CICS>DFHCNV Maintenance to display the dialog box shown in Figure 9-1.
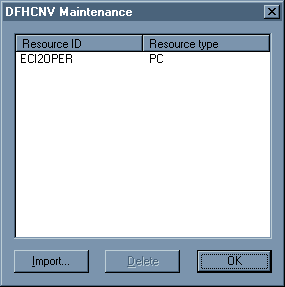
Figure 9-1: The DFHCNV Maintenance Dialog Box
Click Import. You see the Import DFHCNV Macro Source dialog box shown in Figure 9-2.
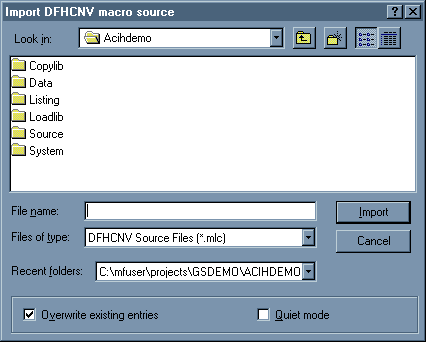
Figure 9-2: The Import DFHCNV Macro Source Dialog Box
Specify the name of the file containing the downloaded conversion macros in File name. Check Overwrite existing entries if you want to replace entries in your current data conversion templates with entries of the same name in the file you have specified. Check Quiet Mode if you want to suppress confirmation messages. Click OK to start updating the data conversion template file.
Note:
If data conversion is required for a program's COMMAREA, you must define a PPT entry for that program; see the section Adding a PPT Entry in the chapter Developing CICS Applications in your User's Guide.
To delete a conversion template that has previously been imported, highlight the desired entry and click Delete, then click Yes on the confirmation dialog box.
The following data conversion macros apply to a file (TESTFC), which has two data constructs, and to a program (TESTPC):
TITLE 'DFHCNV MACRO IMPORT'
* --------- START OF DFHCNV MACROS ---------- *
DFHCNV TYPE=INITIAL,CLINTCP=(932, 437,XXXX)
SPACE 2
DFHCNV TYPE=ENTRY,RTYPE=FC,RNAME=TESTFC,USREXIT=NO
DFHCNV TYPE=KEY
DFHCNV TYPE=FIELD,OFFSET=0,DATATYP=CHARACTER,DATALEN=8
DFHCNV TYPE=FIELD,OFFSET=8,DATATYP=PD,DATALEN=3,LAST=YES
DFHCNV TYPE=SELECT,OPTION=COMPARE,OFFSET=11,DATA='A'
DFHCNV TYPE=FIELD,OFFSET=0,DATATYP=CHARACTER,DATALEN=8
DFHCNV TYPE=FIELD,OFFSET=8,DATATYP=PD,DATALEN=3
DFHCNV TYPE=FIELD,OFFSET=11,DATATYP=CHARACTER,DATALEN=1
DFHCNV TYPE=FIELD,OFFSET=12,DATATYP=PD,DATALEN=4
DFHCNV TYPE=FIELD,OFFSET=16,DATATYP=PD,DATALEN=4
DFHCNV TYPE=FIELD,OFFSET=20,DATATYP=BINARY,DATALEN=8
DFHCNV TYPE=FIELD,OFFSET=28,DATATYP=USERDATA,DATALEN=10, X23456789
USRTYPE=B'01010000'
DFHCNV TYPE=FIELD,OFFSET=38,DATATYP=CHARACTER,DATALEN=50, X
LAST=YES
DFHCNV TYPE=SELECT,OPTION=COMPARE,OFFSET=11,DATA='B'
DFHCNV TYPE=FIELD,OFFSET=0,DATATYP=CHARACTER,DATALEN=8
DFHCNV TYPE=FIELD,OFFSET=8,DATATYP=PD,DATALEN=3
DFHCNV TYPE=FIELD,OFFSET=11,DATATYP=CHARACTER,DATALEN=1
DFHCNV TYPE=FIELD,OFFSET=12,DATATYP=USERDATA,DATALEN=2
DFHCNV TYPE=FIELD,OFFSET=14,DATATYP=CHARACTER,DATALEN=20, X
LAST=YES
DFHCNV TYPE=ENTRY,RTYPE=PC,RNAME=TESTPC
DFHCNV TYPE=SELECT,OPTION=DEFAULT
DFHCNV TYPE=FIELD,OFFSET=0,DATATYP=BINARY,DATALEN=12
DFHCNV TYPE=FIELD,OFFSET=12,DATATYP=CHARACTER,DATALEN=96
DFHCNV TYPE=FINAL
END
The External CICS Interface (ECI) enables non-CICS applications to use CICS Option services. For example, an application with an intuitive graphical user interface (GUI) front-end could use CICS Option to manage data for large numbers of users. Mainframe Express includes ECI software that enables you to use Micro Focus Net Express as the vehicle for developing and running your non-CICs applications. Instructions on how to debug such applications using both Mainframe Express and Net Express are available in the online help: click Help Topics on the Mainframe Express Help menu, then on the Contents tab click Development Environment, Debugging COBOL Programs, and Debugging Distributed Applications.
Data is passed through the COMMAREA, as with a transaction program. A program written to use ECI takes the place of a terminal and must manage the user interface itself.
An application running on the same machine as the ECI is known as a local ECI requester. Remote applications can also use ECI through a CCI gateway; such applications are known as remote ECI requesters.
ECI text arguments and results must be provided or interpreted as ANSI, even if the native character set for the ECI client and server programs is EBCDIC.
The character sets of an ECI client and an ECI server should be the same, unless you provide the necessary codeset conversion of the DFHCOMMAREA.
To make a call to the ECI, a COBOL program must include the following CALL statements:
CALL "dfhtexst"
CALL "CICS_ExternalCall" USING ECI-PARMS
The first line publishes the ECI entry point names. You must call dfhtexst before you can call any of the ECI entry points. ECI-PARMS is the ECI parameter block, through which the program communicates with CICS Option.
The ECI parameter control block is an area of a COBOL program's Working-Storage Section that is used to communicate with CICS Option.
The parameter control block is available as a copybook in \mfe\mfcics\source\dfhcbeci.cpy.
You should move x"00" into the entire contents of the parameter control block before the start of each logical unit of work.
The ECI parameter control block copybook (dfhcbeci.cpy) reflects the IBM CICS ECI, and not all the fields are currently supported. The supported fields are described here, but for information about the IBM CICS ECI you should consult the IBM manual CICS/ESA V4R1 External CICS Interface.
| ECI-CALL-TYPE | An integer value that determines whether
the call is processed synchronously or asynchronously.
The only
supported value is given by the COBOL 88-level data description entry:
|
||||||
| ECI-PROGRAM-NAME | An 8-character string containing the name of the CICS transaction program to be executed. | ||||||
| ECI-USERID | An 8-character string containing a valid user ID. If necessary, pad the string with spaces on the right. | ||||||
| ECI-PASSWORD | An 8-character string containing a valid user password. If necessary, pad the string with spaces on the right. | ||||||
| ECI-TRANSID | A 4-character transaction ID. Use this field when the transaction program you are calling uses distributed program linking, and the transaction ID under which the program runs is important. If necessary, pad the string with spaces on the right. | ||||||
| ECI-ABEND-CODE | A 4-character field in which an abend code is returned if the transaction abends. This field is initialized to spaces before the request is passed to CICS Option. | ||||||
| ECI-COMMAREA | A pointer to an area of memory not larger than 32767 bytes, which the CICS program receives as its COMMAREA. If no COMMAREA is required, use a null pointer and set ECI-COMMAREA-LENGTH to zero. | ||||||
| ECI-COMMAREA-LENGTH | The length of ECI-COMMAREA, in bytes. | ||||||
| ECI-SYS-RETURN-CODE | The error number of any system error that may occur is returned in this field. | ||||||
| ECI-EXTEND-MODE | An integer value that determines whether or not the
connection to CICS Option is terminated at the end of the call.
The valid values
are given by the COBOL 88-level data description entries:
|
A call to a transaction program using ECI can return any of the following values in RETURN-CODE. These values are supplied in dfhcbeci.cpy and can be used by moving the return code to ECI-ERROR-ID.
| ECI-NO-ERROR | The transaction finished with no errors. |
| ECI-ERR-INVALID-DATA-LENGTH | This can be caused by either of the following errors:
A positive user data length for a null user data area A zero user data length for a non-null user data area |
| ECI-ERR-INVALID-EXTEND-MODE | The extend mode is not 0, 1, or 2. |
| ECI-ERR-NO-CICS | CICS Option is not running. |
| ECI-ERR-CICS-DIED | CICS Option is no longer running. |
| ECI-ERR-TRANSACTION-ABEND | CICS Option accepted the request, but the transaction abended. |
| ECI-ERR-EXEC-NOT-RESIDENT | The program tried to cancel a previous request when there was none outstanding. |
| ECI-ERR-LUW-TOKEN | The LUW is not within the valid range or it is the wrong LUW token. |
| ECI-ERR-SYSTEM-ERROR | An internal error occurred. |
| ECI-ERR-RESOURCE-SHORTAGE | CICS Option has no space in the interval control table. |
Application programs can use ECI calls to obtain CICS Option Services from a local CICS Option system. These applications are seen by CICS Option as local ECI requesters.
You must set the CICSLOC and TXREGN environment variables for local ECI requesters before starting Mainframe Express. To do this:
SET CICSLOC=LOCAL to indicate that the CICS Option
server is running on the same machine as the requester.
SET TXREGN=region-name where region-name
is the name of the region running on the
local
CICS system.
MFE
Application programs can use ECI calls to obtain CICS Option services from a remote system running CICS Option. A remote application that uses ECI is seen by CICS Option as a remote ECI requester.
Remote ECI requesters operate over CCI communications links between the local and remote systems.
The Remote Client / Peer to Peer CCI Protocol Support fields must be set to Y in the CICS Option region's SIT for the protocol to be used. To do this you must use the character interface to resource definition (click CICS on the Tools menu and click Resource Definition).
You must set the CICSLOC and TXREGN environment variables for remote ECI requesters before starting Mainframe Express. To do this:
SET CICSLOC=REMOTE(protocol-name) to indicate
that the CICS Option server is remote. The protocol-name
indicates which protocol should be used. Possible values are: CCITCP,
CCINETB, CCIIPX. The default is CCITCP.
SET TXREGN=region-name where region-name
is the name of the region running on the remote CICS system.
MFE
The source of two COBOL programs that demonstrate the External CICS Interface is provided in \mfe\mfcics\source. The programs are:
| eci2oper.cbl | A CICS transaction that writes a data area to the system console. This transaction program performs a WRITE OPERATOR command on the field ECI-DEMO-MESSAGE using the text passed in the DFHCOMMAREA. If the WRITE OPERATOR command fails, the EIBRESP and EIBRESP2 values are passed back to the calling program in the fields ECI-ERROR-EIBRESP and ECI-ERROR-EIBRESP2. | ||
| eci-call.cbl | A batch ECI program that has three main parts: | ||
| set-up-eci-call | Sets up an entry point to the module dfhtexst that handles the calling of the ECI. | ||
| call-eci-program | Calls dfhtexst and passess it the data area and program name to run. It contains the following fields: | ||
| eci-program | The name of the program to be run by CICS Option. | ||
| eci-commarea-pptr | A pointer to the data area to be passed to and from CICS Option. | ||
| eci-error-id | If the program completes successfully this contains a value of 0. If unsuccessful it contains the value of an an error condition described in the section ECI Return Codes. | ||
| eci-error-display | Checks for any error conditions returned by the program running under CICS Option or by dfhtexst. Any errors occurring during execution of the program running under CICS Option must be handled before returning to the calling ECI program. In this case the program under CICS Option returns EIBRESP and EIBRESP2. | ||
You can run these programs in local ECI mode without adding any resource definitions to CICS Option. However, as the ECI programs use the ASCII character set and CICS Option uses the EBCDIC character set, you need to convert the displayed data using the DFHCNV (data conversion macro) import facility.
Sample data conversion macros for converting the data in the supplied program eci2oper.cbl are provided in a file eci2oper.mlc, which is located in \mfe\mfcics\source. To import these macros:
A compiled version of eci2oper.cbl is supplied with Mainframe Express.
To compile the source file eci-call.cbl use the compiler function of the IDE. You must have included the copybook dfhcbeci.cpy in the project. Right-click the file name eci-call.cbl in the File View and click Build Settings for eci-call.cbl on the popup menu. Select Non-mainframe in the COBOL dialect field and click OK.
Right-click the file name eci-call.cbl and click Compile eci-call.cbl on the popup menu.
Local ECI can run only on multi-tasking systems.
Before running the eci-call program you must enable Mainframe Express for debugging non-mainframe programs. To do this:
To run the program eci-call locally do the following:
eci-call in the Program and command-line
arguments field and click OK.The message:
Enter the message you want to send to the console
==>
appears in the Application Output window. Enter your message and it is displayed on the console.
To run the program eci-call in a remote region you must specify which remote client CCI protocol support you are using in the SIT, and re-start the region .To do this you must use the character interface to resource definition (click CICS > Resource Definition on the Tools menu).
Before running the eci-call program you must enable Mainframe Express for debugging non-mainframe programs. To do this:
To run the program eci-call do the following:
eci-call in the Program and command-line
arguments field and click OK.The message:
Enter the message you want to send to the console
==>
appears in the Application Output window. Enter your message and it is displayed on the console.
The external presentation interface (EPI) lets a non-CICS application program appear to the CICS system as one or more standard 3270 terminals. The non-CICS application can start CICS transactions, and send and receive standard 3270 data streams associated with those transactions.
The presentation of the 3270 data received by an EPI application is the responsibility of the application. The application can present the data in the normal way by emulating a 3270 terminal, or it can present a different view, for example, a graphical user interface.
The supported EPI calls are:
      CICS-EpiInitialize
      CICS-EpiListSystems
      CICS-EpiAddTerminal
      CICS-EpiStartTran
      CICS-EpiGetEvent
      CICS-EpiReply
      CICS-EpiDelTerminal
      CICS-EpiTerminate
      CICS-EpiATIState
      CICS-EpiGetSysError
For a description of these calls, see the IBM manual CICS Family: Client/Server Programming.
Your COBOL program must first issue the following CALL statement to open the necessary linkage to the External Presentation Interface:
CALL "dfhtexst"
When running in logical cancel mode the COBOL run-time system does not release the module from memory when the program is canceled. This improves performance because subsequent calls to that program do not require it to be reloaded from disk. This means, however, that new (updated) versions of that program will not be used unless the run unit is terminated and restarted.
By setting the Force program PHASEIN field on the SIT to Yes, you can ensure that an updated version of the program is loaded when running in logical cancel mode. To set this field you must use the character interface to resource definition (click CICS > Resource Definition on the Tools menu).
The default mode for Mainframe Express is for the run-time system to run in logical cancel mode. You can run the run-time system in physical cancel mode by setting the dynamic-memory-limit configuration item.
For development systems you should specify Yes for the Force program PHASEIN field of the SIT and run the run-time system in physical cancel mode.
For production systems you should specify No for the Force program PHASEIN field of the SIT and run the run-time system in logical cancel mode.
To replace a copy of a program you must use the CPMT transaction with the NEWCOPY and PHASEIN options.
Mainframe pointer emulation enables the contents of pointer items to be stored in a format that is compatible with that used on an IBM mainframe. It allows both USAGE POINTER and CICS BLL cell items to be freely redefined as USAGE PIC S9(9) COMP and for full arithmetic to be performed on the redefined data item.
Mainframe pointer emulation is controlled with the AMODE compiler directive. You must not specify the RDEFPTR or CONVERTPTR directives with the AMODE directive (this function replaces that provided by RDEFPTR and CONVERTPTR).
The AMODE directive can take the following values:
| This ensures that all pointers are stored in a 24-bit format, which is compatible with 'below-the-line' storage on the mainframe. In a program compiled with this directive, the top 8 bits of the pointer are masked off when the address of a linkage item is set from the pointer. This means that, as on the mainframe, your program can manipulate directly the top 8 bits. This is the default for OS/VS COBOL. | |
| This ensures that all pointers are stored in a 31-bit format, which is compatible with 'above-the-line' storage on the mainframe. In a program compiled with this directive, the top bit of the pointer is masked off when the address of a linkage item is set from the pointer. This means that, as on the mainframe, your program can manipulate directly the top bit. This is the default for VS COBOL II. |
CICS Option runs in 24-bit AMODE by default. You can set it to run in 31-bit AMODE by checking 31 Bit Amode Only on the CICS tab page of the Project Settings dialog box (click Project Settings on the Project menu of the IDE). You must have compiled any CICS programs that require this support with the appropriate AMODE compiler directive.
You can run transactions within the same region that use both AMODE and non-AMODE compiled programs. However, within each discrete transaction all programs must be either AMODE compiled or non-AMODE compiled. You should be especially aware of this when using supplied system transactions such as the mirror transaction (CVMI or CPMI) for inbound system communications or facilities such as the autoinstall exits, as these are non-AMODE compiled and could cause problems if executing with AMODE compiled programs.
A workaround, in the simple distributed program link case of passing a COMMAREA, is to enable COMMAREA override. The recommended method is to enable COMMAREA override at the individual program level in the PPT definition. You can enable COMMAREA override for the whole project on the CICS page of the Project Settings dialog box (click Project Settings on the Project menu and click the CICS tab).
MQSeries is IBM software that provides communications facilities between clients and a wide range of service providers, including both traditional mainframes and network servers.
CICS Option provides support for an MQSeries API that is compatible with the MQSeries for MVS/ESA API. (However, some PC specific MQSeries API commands are unavailable.) It is available for EBCDIC COBOL transactions.
You must have IBM MQSeries for Windows NT installed.
To enable MQSeries support you must define an XA interface table (XAT) entry in a group that is installed in your system startup. To do this you must use the character interface to resource definition (click CICS > Resource Definition on the Tools menu of the IDE). The entry must specify the following:
| Switch load module | dfheibmq |
| Free format open string | Queue manager name |
| Run time support | N |
The queue manager name is that specified in the MQSeries CRTMQM command. See the MQSeries System Management Guide for further information about queue manager names and the CRTMQM command.
This support turns on the MQSeries SYNCPOINT option for all gets and puts (NOSYNCPOINT is set to off if it is already on). This does not apply to gets where one or more of MQGMO-BROWSE-FIRST, MQGMO-BROWSE-NEXT, or MQGMO-BROWSE-MSG-UNDER-CURSOR is set.
You should note that:
Two sample programs, mfzqput and mfzqget, are provided in the folder \mfe\mfcics\source. Program mfzqput adds a single message to a specified queue and program mfzqget retrieves all the messages on a specified queue. The mfzqget program incorporates a delay before it completes to ensure that all messages on the queue have been retrieved.
Before you can run the sample programs you need to:
The parameters for program mfzqput are:
QPUT {queue-name} {message}
The parameters for program mfzqget are:
QGET {queue-name}
The shared pages is the shared memory resource used by a CICS Option region; each server and terminal emulator also requires its own memory which is allocated dynamically.
Use the calculation described in this section to estimate the number of shared pages to allocate to a CICS Option region. The calculation is based on the number of servers, resource definitions, and memory allocation the region requires.
Actual requirements vary according to the nature of the workload, but you are advised to over-allocate the shared memory resource. CICS Option optimizes the use of the shared memory resource by minimizing the number of physical pages used at lower than maximum processing volumes.
You set the number of shared pages for a region in the Shared Pages field of the SIT.
Calculate the answer to the sum in each row of the list below. The sum of these answers is the minimum number of bytes required for the shared memory. Divide this number by 4096 and round up to get a figure for the number of shared pages needed.
| Item
|
Calculation
|
|
|---|---|---|
| CICS Option overhead | Fixed size | = 4096 |
| Shared storage management | Shared storage size / 4096 | = |
| Trace | Number entries x 24 | = |
| Server | Number servers x 64 | = |
| Terminals | Number requesters x 64 | = |
| Remote systems | Number sysids x 96
Number sessions x 32 |
=
= |
| PCT | Number entries x 48 | = |
| FCT | Number entries x 88 + (4 x Number split key components used) | = |
| DCT | Number entries x 48 | = |
| PPT | Number entries x 48 | = |
| Programs (load hold)1 | Number active x (average length + 8) | = |
| TST | Number entries x 32 | = |
| PLT | Number entries x (56 + (8 x avg items in list)) | = |
| JCT | Number entries x 48 | = |
| ICE2 | Number active x 64 | = |
| AID3 | Number active x 64 | = |
| Getmain SHARED4 | Number active x (average length + 8) | = |
| ENQ5 | Number active x (24 + average arg length)
Number processes waiting on ENQ x 16 |
=
= |
| Buffers6 | (3270 data stream length + COMMAREA + TEUA + 64) x number servers | = |
Notes:
Buffers are short lived and stay in shared storage only if no server is available to service the request. Once a server is dispatched, the buffer is immediately moved to local process storage and the shared storage is released. Outbound buffers also stay in shared storage for a very short period of time. Outbound, the only delay is for processor dispatch to the supporting terminal process. Once the terminal process is dispatched, the buffer contents are moved to local process storage and the shared storage buffer is released.
Copyright © 1999 MERANT International Limited. All rights reserved.
This document and the proprietary marks and names
used herein are protected by international law.
| Configuring CICS for Databases |