

| Start Here for the Tutorials | TSO Applications | |
The Integrated Development Environment (IDE) is where you compile, edit and debug all your applications.
This is the first session of the tutorials in the Getting Started book. You need to work through this before you do any of the others. You need to have read the chapter Start Here for the Tutorials before doing this one.
The IDE integrates all the tools you need for editing, compiling and debugging applications written in COBOL and Assembler. It contains extensive online documentation for these tools and for the COBOL language.
Mainframe Express enables you to develop and run your mainframe applications on a PC, but it doesn't emulate a mainframe-type user interface. On the contrary it has an interface of the type common on Windows, using windows, menus, pushbuttons, toolbars, and so on. The IDE is this interface. Such an interface is known as a GUI (graphical user interface). Once you're familiar with this kind of interface, it's very fast, easy and powerful to use.
The easiest way to learn about the IDE is to complete a few simple tasks, so this session takes you through creating a project, compiling it, running it and debugging it - that is, stepping through the source code.
A project is a file detailing all the files in your application, and how they should be compiled. A project is very easy to create, and makes compiling extremely quick and easy. You should create a project for every application, even the simplest. On disk, a project is recognizable by the extension .mvp at the end of its name. However, you never need to look at a project directly because, like most things in Mainframe Express, you create and maintain it entirely using the IDE.
The folder where you keep the project for an application is called its project folder. You could keep the application's other files anywhere, since the project contains pointers to them, but it's usually convenient to keep them all in the project folder.
When you install Mainframe Express, Setup creates the system folders containing Mainframe Express, and a folder called by default d:\mfuser. This contains several folders, of which the most important is projects. This folder d:\mfuser\projects is intended as your work area, and we suggest that you put all your project folders within it.
Mainframe Express includes many demonstration applications. Setup installs them within d:\mfuser\projects, but to avoid having too many folders directly within d:\mfuser\projects, which might be inconvenient when you come to create your own, it puts them one level further down. All demos used by the tutorials in this Getting Started book are in folders within d:\mfuser\projects\gsdemo. More advanced demos - used in tutorials accessed via the online help - are in folders within d:\mfuser\projects\demo.
If, when you installed, you specified a different name for d:\mfuser, remember to use it in these sessions instead of d:\mfuser.
The demo application used in this session is a simple application that you might have downloaded from a mainframe. In this session, you get it working on your PC. It's called Vsamdemo, and it's a sales application that reads a file of sales inquiries and allocates them to sales representatives. It consists of one COBOL program with two copybooks, together with a JCL jobstream. The COBOL source file contains some simple source errors, which you find and fix in this session.
In this session you fix the source errors in one of the source files. If you should want to run the session again, you can restore the source errors by copying vsamdemo.cbl into folder d:\mfuser\projects\gsdemo\idedemo\source from d: \mfuser\projects\gsdemo\idedemo\source\original - see the appendix Windows Tips if you need help.
In this session you:
If you've entered the IDE by clicking the Run button at the end
of installing, you may still have visible the main screen of the
installation utility - the one with the Install, Installation
Notes, and Exit buttons - though it may be hidden behind the
IDE. You can close it by clicking its ![]() button, now or at any time - it won't interfere with this session
button, now or at any time - it won't interfere with this session
If not, then start the IDE as follows (this is how you will always start the IDE in future):
You may get a dialog box entitled Micro Focus Protection System, warning you that your license expires in a few days. In these sessions we will ignore this warning, but later you should load Mainframe Express again and click Help on this screen for details of how to get a full license.
If you already have a full license, you get a screen telling you what options you have installed. This disappears after a few seconds and is replaced by the IDE
When you first load the IDE you get a Welcome screen as well as the IDE window. It has a check box you can set to show whether you want to get it every time. It enables you to choose whether to look at the Help file, or go straight into Mainframe Express.
The Welcome screen closes, and you see the User ID dialog box. You only get this the first time you load the IDE.
If you ever need to change your user ID, you can get this dialog box by clicking the Options menu, then User ID.
You now have the IDE on your screen. It is shown in Figure 5-1.

Figure 5-1: The Integrated Development Environment (IDE)
The large pane is where various windows such as project windows and editing windows will be opened. The pane below it is the Output window, where messages from the IDE and compiler are displayed. It has two tabs marked Build and Find in Files. When the Build tab is highlighted (that is, white), this window displays messages to show the progress of a build. When Find in Files is highlighted it displays the results of the multi-file search function.
You can change the size and shape of the IDE by dragging the edges and corners. You can detach some panes and position them elsewhere in the IDE or separately on your screen - this is called docking or undocking them. See the appendix Windows Tips if you want to do this.
In doing the sessions in this book, be aware that if anyone has used the product on your PC before you, they might have moved panes from their standard positions.
To create a project:
The first page of the Project Wizard appears. A wizard is a dialog box with a series of pages displayed in succession, to guide you through a task.
Notice that in the Folder field the folder has defaulted to d:\mfuser\projects and this is extended with \idedemo as you type in the Project Name field. Mainframe Express assumes you want your project folder to have the same name as the project itself, within d:\mfuser\projects.
As was explained in the section Demonstration Applications, we will not accept this default. This demo application is supplied in d: \mfuser\projects\gsdemo\idedemo.
Remember that where we show d: in instructions like this, you should actually enter the drive you installed Mainframe Express on.
On this page you can specify whether you will enter details of the new project, or want it based on an existing one.
On this page you can specify where you want the catalog for this project to be created. The catalog emulates the catalog on a mainframe. In it, you will later specify the physical properties and locations of the data files used by the application. By default, the catalog is created in the project folder.
If you installed any of the Mainframe Express options, such as CICS Option or SQL Option, you now get a page asking which of them it uses. There is a check box for each option installed. This project uses none of them.
(If there is no check box for one of these options, even though you installed it, it may be that you don't have a valid license for it. You should update your license before running any of the later sessions that use that option. When you next load Mainframe Express you will see a dialog box enabling you to do this.)
The project is created, the Project Wizard disappears, and a new window appears. This is the project window, in which all details of your project are displayed. The IDE with the project window is shown in Figure 5-2.

Figure 5-2: The Newly Created Project
The panes may not be positioned exactly as shown here if you've resized or moved them. If you can't see the four tabs marked Files, Workgroup, Catalog, and Spool at the bottom of the project window, move the Output window down - drag its top and bottom borders - until you uncover them.
The four tabs give you different views on the project. Initially the Files View should be at the front - click the Files tab to ensure it is. This view shows you the files in the project, in a tree structure showing their types. At present there are none. You will add them in the next section.
To add your files to the project:
This brings up the Add Files to Project dialog box, where you can select files to add.
Within the project folder are folders for files of particular types: source files are in folder source, data files in data, and so on. We recommend this as the standard to adopt for your own projects.
You should see two files, vsamdemo.cbl and vsamdemo.jcl. If they don't seem to be there, check the following.
The files are added to the project. You'll see the project window being updated. We'll look at this in more detail in a moment.
In a project where you don't want to add all the files, you can select individual files and click Add. The appendix Windows Tips gives advice on selecting multiple files.
This closes the dialog box, and Mainframe Express parses the files in the project for dependencies - that is, it scans them to find out if any other files are needed. In parsing the COBOL source files, Mainframe Express finds references to two copybooks, so it adds these copybooks to the project.
Messages in the Output window show the progress of this parsing. There are only a few messages, but if your Output window is small some may disappear off the top. In this case, a slider appears at its right-hand side. To see the earlier messages, drag this slider up or make the Output window bigger.
The project window is now as shown in Figure 5-3.

Figure 5-3: Project with Files Added
The left-hand pane of the Files View of the project window is a tree view, showing the number of files of each type. For example, the project contains two source files, one a COBOL file and one a JCL file. Dependencies are files referenced in the source files - in this case, the two copybooks. Whichever entry in the left-hand pane is selected (highlighted), files of that type are listed in the right-hand pane. To see all the files in the project, including the two copybooks added by the parsing, click Project.
Whenever a project is updated, it is saved automatically.
Although a project is in effect an organized list of files, you can add only files that already exist. You cannot add a file to the project first and create the file later.
All the source files are now in the project, and it's ready for you to build - that is, compile all the source files. But we'll look at a few more points before we do so.
The catalog emulates the catalog on a mainframe. It gives the physical properties and locations of the data files used by the application. The JCL uses it to assign the logical files referenced by the COBOL program.
You can add the file details to the catalog before or after building. On the mainframe an administrator would probably do this for you. On your PC, you can do it yourself. To add the input files:
The Catalog View comes to the front. It's empty.
At any point when using the IDE, right-clicking brings up a popup menu. This is an alternative to using the pulldown menus or the toolbar. It has the advantage that the popup menu contains only functions appropriate to the object you clicked on.
You can type in lower case. The name is automatically converted to upper case. Generally, those parts of Mainframe Express that closely emulate mainframe features show filenames in upper case.
This displays the Open dialog box, open where you left it at the folder source.
You should see three files.
This puts this filename in the PC Filename field, complete with its path.
The file is added to the catalog. Its details appear in the Catalog View.
A list with many columns like the Catalog View is known in Windows as a list control. They are used a lot in Mainframe Express. If you want help on rearranging the layout of this kind of a list, see the appendix Windows Tips. You might, for example, find it convenient to move the PC Name column nearer the DS Name column so you can see both easily.
If you made any typing errors, right-click on the entry in the Catalog View, and on the popup menu click Delete. Ensure Also delete associated PC File(s) on the dialog box is not checked (otherwise this will delete the file itself), and click OK. This removes the file from the catalog. Then repeat the steps above.
| DS Name | PC Filename | DSORG | RECFM | LRECL |
|---|---|---|---|---|
| VSAMDEMO.SALEDATA.DATA | saledata.dat | PS | FB | 26 |
| VSAMDEMO.VSAMINIT.DATA | vsaminit.dat | PS | FB | 80 |
Remember the project is saved automatically when you update it, so there's no need to save explicitly while making these edits to the project.
You can add output files using the Allocate function, which is similar to Add Existing Dataset but assigns a PC filename for you. However, you shouldn't use Allocate for a VSAM file that you plan to transfer to the mainframe, because the catalog entry it creates includes no key information. Instead you should use the MFJAMS utility, which emulates the IDCAMS mainframe utility. To use it in the IDE, you click the Tools menu, then Interactive AMS, and then select the function you want from the submenu that appears.
However, this can also be done from within a JCL jobstream, and in this demo we have done it this way to save you further typing. Before executing the COBOL program, the JCL runs MFJAMS. It is guided by the file VSAMDEMO.VSAMINIT.DATA, one of the files you added as an input file for the run.
So you don't need to do anything in this section. You will see the files being added to the catalog in a later section when you run the jobstream.
(If you've used certain earlier Micro Focus products, you may be used to using an mfextmap.dat file to map dataset names to PC filenames. The User Guide describes how you can use an mfextmap.dat file in Mainframe Express.)
You can add data files to the Files View. Since they don't take part in the build, there's no need to add the data files, but doing so makes the Files View into a complete list of files needed for the application. We could have added them in the same way as we added the source files, but now they are in the catalog there's a quicker way.
Nothing visible happens, because the change happens in the Files View.
The tree view now has an entry Data(3), meaning there are three data files in the project. If you click this entry, you see the names of the three input files in the right-hand pane.
To build the project:
This builds all the files that have changed since the last time the project was built. Since you haven't built the project before, all the files are built.
The Rebuild All function on the same menu builds all files in the project, whether they need it or not. The Compile function on the same menu just compiles the currently selected file.
This one function carries out the entire build. The correct compiler or translator is automatically called for each source file - in this case, for the COBOL and JCL files. In Mainframe Express, the term "compilation" is generally used for any compilation, translation, conversion or preprocessing. Also, the term "source file" is used for any file that is the input to such a compilation - not just COBOL and Assembler source files and copybooks, but files such as CLISTs and JCL files.
Messages in the Output window keep you informed about the progress of
the build. The build finishes with the message "Build finished
with 2 errors, 0 warnings, and 0 notices". Our COBOL source
file contains two source errors.
If you get more than two error messages, check that you gave the correct name for the project folder when using the Project Wizard. Using the wrong folder would prevent the copybooks being found and so cause many errors.
Notice the ![]() button on the toolbar. The same symbol appears by Build on the
Build menu. Many commonly used functions on the menus have
equivalent buttons on the toolbar. It's often quicker to use these. If you
leave the mouse pointer over a button on the toolbar for a moment, a brief
explanation of that button appears. These explanations are called tool
tips. In these sessions we'll sometimes use the menus and sometimes the
toolbar.
button on the toolbar. The same symbol appears by Build on the
Build menu. Many commonly used functions on the menus have
equivalent buttons on the toolbar. It's often quicker to use these. If you
leave the mouse pointer over a button on the toolbar for a moment, a brief
explanation of that button appears. These explanations are called tool
tips. In these sessions we'll sometimes use the menus and sometimes the
toolbar.
There is no linking in Mainframe Express (except in Assembler Option, described in later sessions). Once the source files have been compiled, they are ready for execution on your PC. In complex projects the order in which files are compiled is important, since there are file dependencies. For example, a CICS BMS file must be compiled before the COBOL program that uses the copybook it produces. So compilations are always done in this order:
If some messages have disappeared off the top of the Output window, drag the slider up or make the Output window bigger. You will see two error messages: "... Operand SUBSCRIPT is not declared ..." and "...Operand SRT-FILE is not declared...".
A source view window opens, showing the source file with a red cross at the left of each erroneous line, and the cursor by the word where the first error was found. As with all syntax checkers, this may be the erroneous word itself or a little way after it.
You can get advice on fixing the error, as follows.
A window appears, explaining the error and advising how to fix it.
This compresses the source to show just erroneous lines. This is useful if errors are spread through a large source file.
There's no need to save while editing this file, because you only make a couple of changes, and it is saved automatically toward the end of this section. In any large edit, it's a good idea to save occasionally.
If you've used certain earlier Micro Focus software, you may be used to using Alt+F4 to save. In Windows, Alt+F4 closes the current session (see the system menu at the top left-hand corner of any window). If you use it in Mainframe Express, it will warn you of anything that needs saving, then close Mainframe Express.
The cursor moves to the second error. You could simply move the cursor to the error, but again, this feature is useful if errors are spread through a large source file.
"OVR" means that you are in Overtype mode. You need to be in Insert mode so that what you type is inserted before, not in place of, existing text.
This automatically saves your source file, and builds the project again. Only vsamdemo.cbl has been updated, so only this file is rebuilt. The build finishes with "Build finished with no errors".
To save space on the screen, we can close the source view window, as it is not used in the next section.
File functions such as Save and Close operate on whichever window in the IDE has focus, that is, is in front. So clicking Close here closes the source view window, not the project window.
You use the Debug menu for both running and debugging. To run the application without debugging:
The Start Debugging dialog box appears. You use it to specify where execution starts.
This dialog box appears for both running and debugging. In Mainframe Express, running and debugging use the same underlying mechanism. In running an application you are really using the debugging engine with the debugging features switched off. Consequently, running is controlled via the Debug menu, and observations we make about debugging will generally apply to running as well.
The ![]() button on the toolbar is equivalent to Run on the Debug
menu.
button on the toolbar is equivalent to Run on the Debug
menu.
Because this application was written for a mainframe, there is a JCL file to start it off. So we want to tell Mainframe Express to run the JCL file.
The name of the JCL file to run has defaulted to the one you selected.
The Run function displays this dialog box the first time you run or debug the application after loading the project or clicking a different executable file (JCL jobstream, CLIST, or REXX file). Otherwise, it assumes you want to start at the same place as previously, and goes straight into the run. (If you'd prefer it to display the dialog box always, you can click the Options menu, then Debug, and put a check mark by Step/Run displays Start Debugging dialog.)
The application runs. A new window, called the Application Output window, appears. It displays the screen output from the application. This window's title bar changes according to what is currently happening in it - for example, at times it is "Application Output", and at other times it is the name of the JCL job.
The COBOL itself does no screen output, but you see messages from the JCL, showing the progress of the job. It ends with "JOB ENDED". You may have to resize the window to see it properly.
If you see any failure messages in the Application Output window, check your catalog entries to make sure that you typed the filenames and other information correctly. Correct any errors, then try this section again.
To check that it's worked, we'll check that the output files have been created.
The output files have been created and added to the catalog. (The files with extensions starting ax are index files - in Mainframe Express the indexes of indexed files are kept in separate files.)
You can leave the Application Output window visible, as the next section uses it as well.
The Mainframe Express debugger gives you an intuitive way to trace the execution of your code. It provides an extensive set of debugging facilities. It is useful if the application isn't doing what you expect, or if you want to get familiar with an unfamiliar application. We will look at how to start and stop debugging. A later session demonstrates debugging in detail.
In Micro Focus products, debugging is sometimes known as animating. You may come across this term occasionally in the Mainframe Express documentation.
Unlike the Run function, Start Debugging always displays the Start Debugging dialog box.
The Application Output window is cleared and then shows the job steps as the JCL executes. When Vsamdemo.cbl is entered, a source view window showing its source appears again and execution pauses. The window is positioned at the line about to be executed, and that line is highlighted. See Figure 5-4.
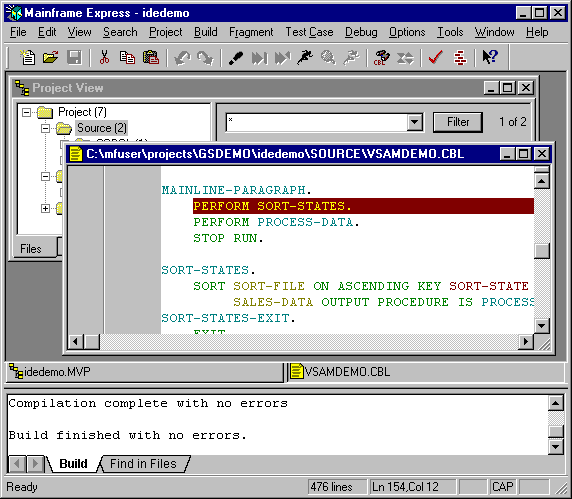
Figure 5-4: Starting Debugging of Vsamdemo
We'll step through a few lines of code.
This executes the highlighted line of code. You could alternatively have clicked the Debug menu, then Step. The two are equivalent.
This is the function that single-steps the code.
If you use the Step function without first starting debugging, it starts the debugging for you. Like the Run function, it only displays the Start Debugging dialog box the first time you run or debug the application after loading the project or clicking a different executable file. (You can change this behavior if you want, in the way described for the Run function.)
While debugging, you have extensive features available for examining data and for controlling execution. A later session covers these in detail. You can also edit the source while debugging, but you cannot execute a line that you've modified until you've built again.
We'll now continue without further debugging.
At any point while debugging you can use this function to make the application continue normally without debugging.
The source view window remains visible, but is not updated.
You've now finished getting this application running on your PC. But before we finish this session, we'll look briefly at some ways you can see more details of a project.
Let's look at some ways you can view a project's files.
The Files View comes to the front.
Double-clicking a filename opens a window displaying that file. If such a window is already open, it simply comes to the front.
A window opens, displaying the contents of the data file VSAMDEMO.INQUIRY.DATA.
Mainframe Express contains editors for several types of file. Double-clicking a file's name starts the correct editor for the file type. For a COBOL or Assembler source file, a copybook, JCL file, REXX exec, or CLIST, you get the text editor. For a data file, you get the Data File Editor. For a BMS mapset (used in CICS Option, described in a later session) you get the BMS Painter. We'll see these in more detail in later sessions.
You don't have to go via the project to start an editor. You could use Open on the File menu to open a file, regardless of whether a project is open, and you'd still get the appropriate editor for the file. However, it's usually convenient in Mainframe Express to do everything via projects.
In Mainframe Express, compiling the source files of a project is called building the project. There are many options that you can set in doing this, but usually you can use the default settings.
Let's take a moment to look at how you view these settings.
The Files View comes to the front.
This brings up a dialog box with a number of tabs. What tabs are there depends on which options of Mainframe Express you installed. The options were set according to what you entered when you used the Project Wizard to create the project, but if you needed to change any, you would do it here.
Notice that the function-name includes the name of the selected file. Because it's a COBOL source file, the dialog box that appears has only fields relevant to a COBOL compilation. Earlier, because Project was selected, the function became Build settings for project.
Many settings can be set for an individual file in this way, overriding the project settings. You can also specify settings for particular file types, for example by selecting COBOL in the left-hand pane.
Let's take a moment here to look at one way you can get help whenever you're using Mainframe Express.
A popup appears telling you what the project window is for.
Generally, whenever you see the Context Help button, normally
![]() or
or
![]() , you can use it to
get quick context-sensitive help in this way. Of course, many screens
also have a Help menu or Help button which takes you
into the main help.
, you can use it to
get quick context-sensitive help in this way. Of course, many screens
also have a Help menu or Help button which takes you
into the main help.
Most windows and dialog boxes in the functions accessible from the IDE have context help. The windows of the IDE itself (such as the Output window) do not. If you click on something that has no context help, you get "No Help topic is associated with this item".
Close the project by clicking Close Project on the File
menu. You can't close a project by clicking its ![]() button. Doing so closes its window, but the project remains loaded.
Closing a project saves it automatically.
button. Doing so closes its window, but the project remains loaded.
Closing a project saves it automatically.
You can't close the standard windows like the Application Output
window using Close on
the File menu, and they do not have ![]() buttons (unless you've undocked them). Instead,
right-click on the Application Output window and click Hide on the
popup menu. Alternatively, click the View menu, then Dockable
Windows, then on the dialog box click by Application Output to
delete the check mark, and click Close to close the dialog box.
You hide these windows rather than close them - if you open them
again, they are still displaying what was there before.
buttons (unless you've undocked them). Instead,
right-click on the Application Output window and click Hide on the
popup menu. Alternatively, click the View menu, then Dockable
Windows, then on the dialog box click by Application Output to
delete the check mark, and click Close to close the dialog box.
You hide these windows rather than close them - if you open them
again, they are still displaying what was there before.
If you're planning to go straight on to another session, you can keep
Mainframe Express open. Otherwise, either click Exit on the File
menu, or click the IDE's ![]() button.
button.
Return to the Tutorials Map in the chapter Start Here for the Tutorials and choose which session to go on to next, depending on your interests.
Copyright © 1999 MERANT International Limited. All rights reserved.
This document and the proprietary marks and names
used herein are protected by international law.
| Start Here for the Tutorials | TSO Applications | |