TouchPoint provides enhanced, testing-specific functionality from within the Mainframe Express Integrated Development environment. This tutorial covers the basic features of TouchPoint by demonstrating how to use them. It leads you step-by-step through the creation of a project and then, using a very simple application, shows you how to create and execute regression and conformance tests.
You need to have read the chapter Start Here for the Tutorials and worked through the first session, Using Mainframe Express, before you do this session.
Before attempting to use TouchPoint, you need to understand the following terms:
A fragment is a piece of code which you define by using TouchPoint to specify its first and last line within your program. Usually, a fragment performs a significant function and is either:
A fragment can be either open or closed:
You use TouchPoint to create a test. There are two types of TouchPoint test:
A fragment test is used to test closed fragments. It cannot be used with open fragments. It works by executing a single fragment over and over again, each separate execution is known as an iteration. You can supply input data to be used when running a fragment test so that the value of the input data is changed for each iteration.
An application test can be used to test one or more fragments (open or closed). It works by running the entire application.
In order to perform fragment testing, TouchPoint executes the fragment in isolation from the rest of the application and so it needs to be able to set meaningful values for all the data items used within the fragment. To this end it uses a set of initial values. These can be generated:
Initial values can be replaced by user-defined input variables. When you use TouchPoint to define a fragment you are presented with a list of all the data items contained within that code fragment and the opportunity to define those data items as either input or output variables. An input variable is a data item that is used to feed data into a fragment. If you define a data item as an input variable, you can specify values for that data item when you create a fragment test (but not when you create an application test). The fragment test is then executed once for each value that you have specified.
As well as input variables, you can also define a data item used by a code fragment as an output variable. The value of any data item defined as an output variable is recorded by TouchPoint when a test is run. For fragment tests, the value of each output variable is recorded after each iteration. For application tests, the value of each output variable is recorded each time the fragment is encountered.
When you create a fragment test you can specify any standard COBOL conditional statement to be applied to the result of any single iteration. For example, you can specify that a particular data item must be equal (or not equal) to a particular value. If the condition is not satisfied, the iteration is deemed to have failed.
A baseline provides control data, a set of results to test against. You can generate a baseline by running a test and recording the value of all the output variables. For fragment tests only, you can also create a baseline by manually entering a value for each output variable.
When you run your test it is deemed to have passed if all the output variable values match those recorded (or entered manually) in the baseline.
Now that you are familiar with this basic terminology, try running the following tutorial.
Before you can use TouchPoint to perform any kind of testing on your application, you must create a Mainframe Express project for that application.
Included with your Mainframe Express software is a very simple program, fragsamp.cbl, which is used with this tutorial to demonstrate the main TouchPoint features. The fragsamp.cbl program can be found in the mfuser\projects\gsdemo\fragdemo\source directory. To create a Mainframe Express project for fragsamp.cbl:
You need to add two files to the project (fragsamp.cbl and fragsamp.tso):
The files are added to the project.
The COBOL dialect for FRAGSAMP.CBL is COBOL for MVS, so:
You cannot use TouchPoint to create fragments for a program until that program has been compiled:
For the purposes of this tutorial, it is important that the TouchPoint Output Window is floating on the desktop:
Check that your debug options are set correctly for running this tutorial:
TouchPoint can be used very effectively to perform either:
If you need to make changes to your code you can use TouchPoint to create tests that can be run before the changes are made to your program and then again afterwards. By comparing the two sets of results you can judge whether your changes have had any adverse effect on your program.
If you need to test your program for conformance (for Year 2000 compliance, for example) you can use TouchPoint to test the value of data output by your application against validation criteria or baseline values that you supply.
In either case, the first step is to define those areas of your program that need to be tested. These may be modules that you intend to change (in the case of regression testing) or modules that perform a specific function (in the case of conformance testing). Any piece of code that you need to test must be defined as a TouchPoint code fragment.
TouchPoint makes regression testing easy by enabling you to create and run tests for the section of code that you are going to change, before you make the changes. This gives you a baseline. After you have made your changes you can run the same test again. Comparing the new results with the baseline enables you to spot regressions in your code.
CALC-TOTAL-IN-MONTH
section reads through an array of records comparing the date held in
each record to the date held in the data item, REQUIRED-MONTH.
If they match, the data items DATE-COUNT and VALUE-TOTAL
are incremented.
Using the CALC-TOTAL-IN-MONTH section, this tutorial
demonstrates how you can make changes to your code and then use TouchPoint
to perform regression tests. Each step in the process is outlined below
and described in detail in the following pages.
In this tutorial, the code to be changed is the CALC-TOTAL-IN-MONTH
section.
In TouchPoint terms, CALC-TOTAL-IN-MONTH is a closed
fragment because it has no external dependencies. This means that
regression testing can be performed using fragment tests.
The CALC-TOTAL-IN-MONTH section takes its input from
the data item REQUIRED-MONTH and writes its output to
the data items DATE-COUNT and VALUE-TOTAL.
These data items need to be defined as input and output variables
accordingly.
For fragment testing, because the fragment is executed in isolation, initial values need to be supplied for all those data items within the fragment that are not defined as input variables.
When you create a fragment test, you name the fragment to be tested and the initial values to be used. You also supply values for the input variables that you have defined. The fragment is executed once for each value that you supply.
Once you have created your test, you can record a baseline. This gives you a set of values that you can test against, after you have made the changes to your program.
You can inspect the baseline values that you have generated.
In this tutorial the CALC-TOTAL-IN-MONTH section is
updated to perform a further test on the dates held in the array. Each
date is checked against today's date and then added to the running
total for dates before today or after today, as appropriate. The
updated code includes a deliberate error.
Once you have made the changes to your code, you can run your test to catch any regressions that your changes may have introduced.
Analyzing the test results quickly highlights any errors in your code.
If necessary, make any corrections to your code. You can continue to run your tests, analyze the results and correct your code until you are happy with the results.
The first stage in regression testing is to define the piece of code
that you are going to change as a code fragment. In this case, the code
that we are going to change is the CALC-TOTAL-IN-MONTH
section.
CALC-TOTAL-IN-MONTH
section:
MOVE 1 TO ARRAY-INDEX
and then, holding down the left mouse button, extend the selection to the last line of the section:
END-PERFORM.
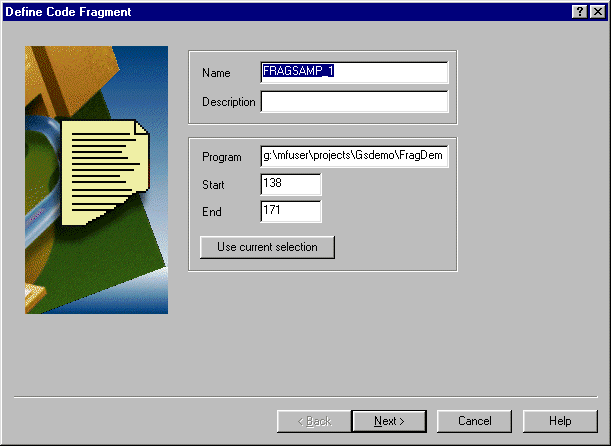
Figure 29-1: Defining a Fragment
CALC-TOTAL-IN-MONTH,
as the description.
Comment lines and section or paragraph names are invalid at the
start of a selection because the fragment must start on an executable
line. A fragment cannot end with an END-IF statement because, given an
IF, ELSE, END-IF construct, the END-IF statement will
never be executed if the condition is true. A fragment cannot end with
an END-PERFORM statement because the PERFORM loop would only be
executed once.
The currently selected code ends with an END-PERFORM statement. As
this is invalid, TouchPoint displays an error message. You can choose
to allow TouchPoint to redefine the code fragment such that it is no
longer invalid. In this case, TouchPoint would achieve this by
extending the selection to the next executable line (MOVE 0 TO
MATCH-INDEX). This would work, but it is equally effective, and
neater, to simply insert a CONTINUE statement at the end of the
fragment.
CALC-TOTAL-IN-MONTH
section.
CALC-TOTAL-IN-MONTH section again, this time
with MOVE 1 TO ARRAY-INDEX as the first line and CONTINUE
as the last line and then select New from the Fragment
menu.
You must define at least one output variable for a fragment.
In addition, for fragment testing, you must define at least one input variable.
The dialog box shown in Figure 29-2 enables you to define input and output variables.
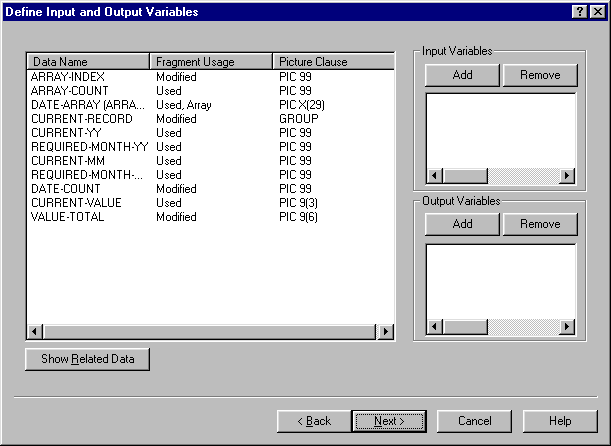
Figure 29-2: Defining Input and Output Variables
An input variable is a data item that is used to feed data into a code fragment. For fragment tests, you can specify the value of the input variables used by the fragment. You can define more than one value for an input variable - the fragment is executed once for each value that you specify. (You do not have to supply values for all the input variables that you define. If you do not specify a value for an input variable, its value is taken from the set of initial values used by the test.)
With the CALC-TOTAL-IN-MONTH section, the result output by
the fragment depends on the value fed into the fragment via the data item,
REQUIRED-MONTH. So, this fragment could be tested by varying
the values supplied in REQUIRED-MONTH and monitoring the
results.
In order to do this, you must define REQUIRED-MONTH as an
input variable but at the moment it does not appear in the list of data
items:
REQUIRED-MONTH is displayed now because it is
the parent data item of REQUIRED-MONTH-MM and REQUIRED-MONTH-YY.
REQUIRED-MONTH-MM and REQUIRED-MONTH-YY
by clicking on them (hold down the Ctrl key to select more than
one data item) and then click the Add button below Input
Variables.
DATE-COUNT and VALUE-TOTAL by
clicking on them and then click the Add button below Output
Variables. An output variable is a data item whose value is recorded
when a test is run. The result of feeding different values of REQUIRED-MONTH
into CALC-TOTAL-IN-MONTH can be monitored by recording the
values output in DATE-COUNT and VALUE-TOTAL.
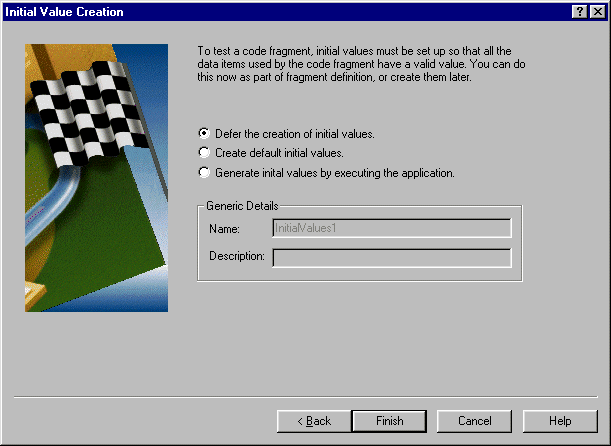
Figure 29-3: Initial Value Creation
From the Initial Value Creation dialog box you can:
Selecting this option enables you to complete fragment definition without creating any initial values.
Selecting this option enables you to generate a set of default initial values by specifying a value to be used for all numeric data items and a character to be used for all alphanumeric data items.
Selecting this option enables you to generate a set of initial values by running the application.
You can check that your code fragment (FRAGSAMP_1) has been created by clicking the Tests tab on the Project View. The new fragment is listed under Closed Code Fragments, as shown in Figure 29-4.
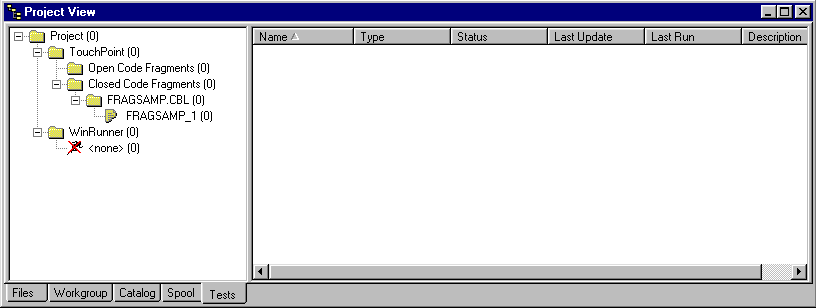
Figure 29-4: The Tests View of the Project
Note: The WinRunner details are only displayed if you have WinRunner 2000 installed.
Having deferred initial value creation during fragment definition, you must generate some initial values before you can create a fragment test.
Initial values are used when the fragment test is run to provide meaningful values for all the data items used by a fragment, enabling it to be executed in isolation from the rest of the application.
You can generate initial values manually (the fragment must be selected in the Tests View for this option to be enabled), or by running the application. To generate initial values via application execution:
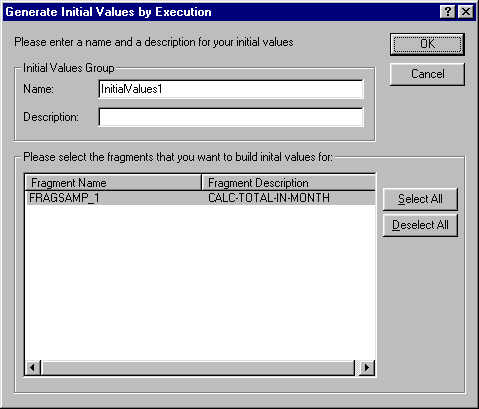
Figure 29-5: Generating Initial Values by Execution
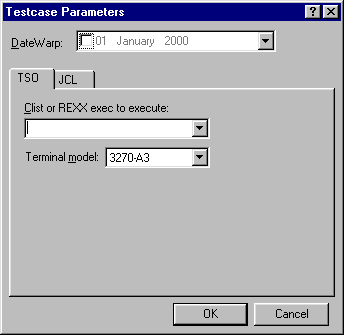
Figure 29-6: Testcase Parameters Dialog Box
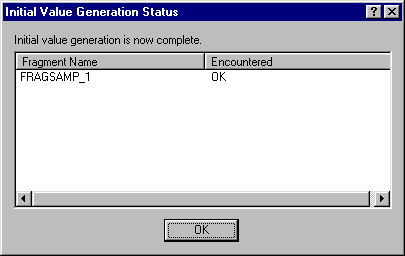
Figure 29-7: Initial Value Generation Status
Once you have defined a fragment and generated some initial values for it, you can create a fragment test:
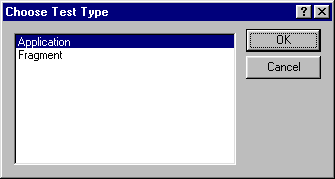
Figure 29-8: Selecting the Type of Test
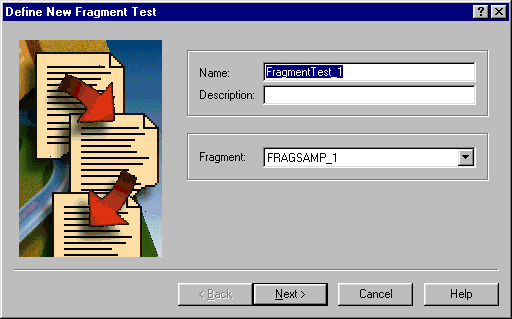
Figure 29-9: Defining a Fragment Test
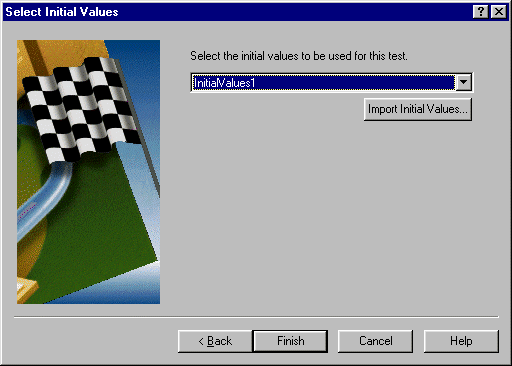
Figure 29-10: Selecting the Initial Values
The fragment test worksheet, shown in Figure 29-11 is displayed.
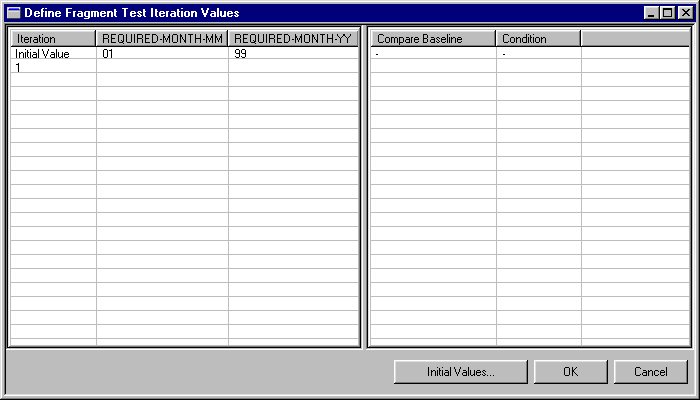
Figure 29-11: Fragment Test Worksheet
The fragment test worksheet displays the initial value that will be used
for each input variable defined (in this case, only two input variables
are defined, REQUIRED-MONTH-MM and REQUIRED-MONTH-YY,
so only two values, 01 and 99 are displayed).
The fragment test worksheet enables you to:
Note that clicking on the Cancel button on the fragment test worksheet does not delete the fragment test, which was created when you clicked on the Finish button after selecting the initial values.
You can use the fragment test worksheet to specify one or more values for each input variable defined. The fragment is executed once for each value that you specify. (The number of times the fragment is executed is referred to as the number of iterations.) To enter an input variable value, right-click in the first empty worksheet cell underneath its name.
![]()
Figure 29-12: Enter Single Value
Enter 99 and then click the ![]() button so that you can enter a value for iterations 13 to 15. Enter a
value of 00 and then click the
button so that you can enter a value for iterations 13 to 15. Enter a
value of 00 and then click the ![]() button.
button.
What you have done is to specify that the FRAGSAMP_1 fragment
(the CALC-TOTAL-IN-MONTH section) will be executed 15 times
in total using values of REQUIRED-MONTH between January 1999 and
March 2000.
The fragment test worksheet also enables you to specify whether, when this test is run, output variable values are compared to the baseline. (You can record baseline values for a test using a special TouchPoint function - see Recording a Baseline below.) Baseline comparison is the very essence of regression testing so it is switched on by default - Yes is displayed in the Compare Baseline column for all iterations.
For each iteration of the test that you want to perform, you can specify any valid COBOL condition to be tested at the end of that iteration.
Details of how to specify validation criteria are given later in this tutorial. See Validation Criteria within the section Conformance Testing for details.
Once you have entered all the information that you need, close the fragment test worksheet by clicking on the OK button.
Once you have created your test, you can record a baseline for it. Then later, when you have made changes to your code, you can run the same test again and compare the new results with the baseline.
To record a baseline:
The test is run and values are recorded for the output variables. For a fragment test, output variable values are recorded for each iteration of the test. Progress information is written to the Mainframe Express Output window. When all iterations have been run, a message box is displayed indicating that the recording is complete.
Notes:
Notice that the date and time at which the baseline was recorded are now displayed in the Tests View of the project under Last Update.
You can inspect the baseline values that have been generated:
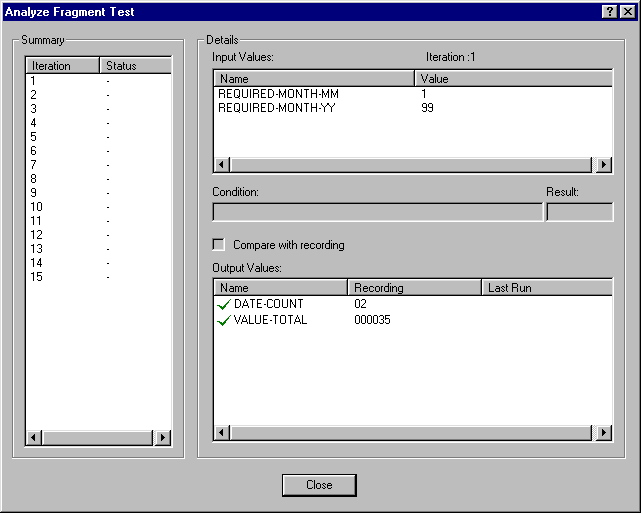
Figure 29-13: Analyzing the Baseline
In the left-hand pane the status of each iteration is displayed (at this stage, the test has not been run and so the status of each iteration is shown as "-"). You can select an iteration by clicking on it. In the top right-hand pane, you can see the value of the input variables for the selected iteration. In the bottom right-hand pane, you can see the recorded (baseline) values of the output variables for the selected iteration. By moving through the iterations one by one you can see how the value of the input variables affects the value of the output variables.
This is your baseline. If you add new features to your code you can run the same test again and compare the output variable values to this baseline to ensure that your changes have not "broken" your code.
Once you have created your test case and recorded a baseline, you can make the changes to your code:
CALC-TOTAL-IN-MONTH section and uncomment the
lines that are commented out:
MOVE 0 TO BEFORE-TODAY-COUNT AFTER-TODAY-COUNT MOVE 0 TO BEFORE-TODAY-TOTAL AFTER-TODAY-TOTAL . . . IF CURRENT-EXPIRY-DATE < TODAYS-DATE ADD 1 TO BEFORE-TODAY-COUNT ADD CURRENT-VALUE TO BEFORE-TODAY-TOTAL ELSE ADD 1 TO AFTER-TODAY-COUNT ADD CURRENT-VALUE TO AFTER-TODAY-TOTAL END-IF ADD 1 TO ARRAY-INDEX
This additional code adds new functionality to CALC-TOTAL-IN-MONTH
by comparing the date held in each record to the date held in the
TODAY-DATE data item. Depending on the result of the
comparison it then increments one of two running totals: BEFORE-TODAY-TOTAL
or AFTER-TODAY-TOTAL. Note that it also, erroneously,
adds a statement which increments ARRAY-INDEX.
After you have made fixes to your code, you can perform regression testing on your application by re-running the test that you recorded earlier. This enables you to compare the new output variable values with the baseline and spot any regressions in your code.
To run a test:
The test is run and the value of each output variable is recorded once for each iteration. In the Tests View, the date and time at which the test was last run is displayed under Last Run (you may need to scroll, or adjust the size of the right-hand pane to see this information). The test status, Fail, is also displayed:
For a regression test, a status of Pass indicates that the value of every output variable when the test was run exactly matched the value of the output variable recorded in the baseline.
For a regression test, a status of Fail indicates that the value of at least one output variable when the test was run did not exactly match the value of the output variable recorded in the baseline.
Once you have run your test, TouchPoint includes built-in analysis facilities to help you analyze the results:
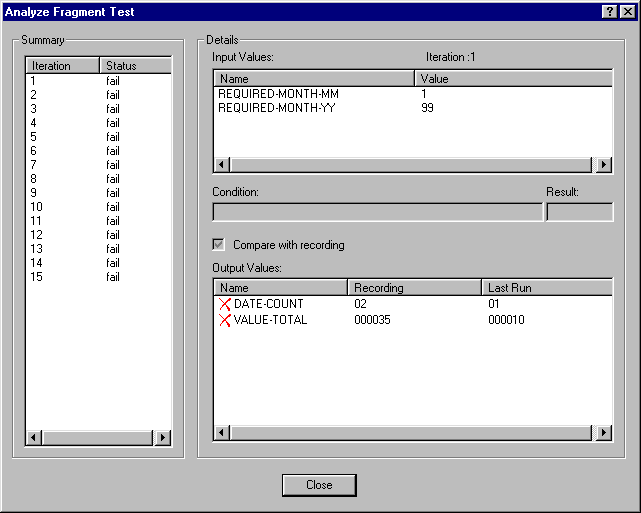
Figure 29-14: Analyzing Test Results
In the left-hand panel, a status is displayed for each iteration:
An individual iteration is deemed to have passed if the value of every output variable matches the baseline value.
An individual iteration is deemed to have failed if the value of any one output variable does not match the baseline value.
You can select an iteration by clicking on it in the left-hand panel. For the currently selected iteration the values of any input variables are displayed in the top right-hand panel and, for each output variable, the following information is displayed:
As you can see, the statement that was added in error has caused the test to fail.
You can correct your code and re-run the test as many times as is necessary to eliminate regression errors.
CALC-TOTAL-IN-MONTH section and comment out
the first ADD 1 TO ARRAY-INDEX statement.
Unlike regression testing, the expected results for conformance testing cannot be generated automatically by TouchPoint. Only someone who is familiar with the application and its data can know what the correct results should be when new data is supplied to it. Given that knowledge, however, TouchPoint can automate and simplify the testing process. TouchPoint provides two methods of performing conformance testing on your program:
You can specify any valid COBOL condition and have it applied to each iteration of a fragment test. This enables you to set validation criteria for your code.
You can edit baseline values to provide a set of "expected results" and then run a test that compares the values generated by your application with those baseline values.
If you have not done so already, take a few minutes to examine the
program FRAGSAMP.CBL and become familiar with it. The GET-NEAREST-TO-DATE
section reads through an array of records comparing the date held in each
record to the date held in the data item, REQUIRED-DATE and
then displays the record which contains the date that is nearest to that
held in REQUIRED-DATE.
Using the GET-NEAREST-TO-DATE section, this tutorial
demonstrates conformance testing by feeding in dates up to and beyond the
beginning of the Year 2000. Each step in the process is outlined below and
described in detail in the following pages.
In this case the code to be tested is the GET-NEAREST-TO-DATE
section to ensure that it copes correctly with year 2000 data.
The GET-NEAREST-TO-DATE section takes its input from
the data item REQUIRED-DATE, tests it against an array
of records containing dates and then displays the closest match in the
data item NEAREST-RECORD. So the data items REQUIRED-DATE
and NEAREST-RECORD need to be defined as input and
output variables.
For fragment testing, because the fragment is executed in isolation, initial values need to be generated for all those data items within the fragment that are not defined as input variables.
When you create a fragment test, you name the fragment to be tested and the initial values to be used and you specify values for the input variables that you have defined. You can also specify any validation criteria, or enter the baseline values, that will be used to test your program.
Once you have created your test, you can run it against your program.
Analyzing the test results quickly highlights any areas where your program does not conform to the criteria, or match the baseline values, that you have specified.
If necessary, make any corrections to your code. You can continue to run your tests, analyze the results and correct your code until you are happy with the results.
As with regression testing, any piece of code on which you need to perform conformance testing must be defined as a TouchPoint code fragment. To create a fragment:
GET-NEAREST-TO-DATE
section:
MOVE 0 TO
          MATCH-INDEX
and then, holding down the left mouse button, extend the selection to the last line of the section:
CONTINUE.
Note that this CONTINUE statement has been added to
the end of the section to avoid its ending with an END-PERFORM
statement.
GET-NEAREST-TO-DATE, as the description.
REQ-DATE and then the Add button below
Input Variables.
NEAREST-RECORD and then the Add button
below Output Variables.
The Generate Initial Values by Execution dialog box, shown in Figure 29-15 is displayed.
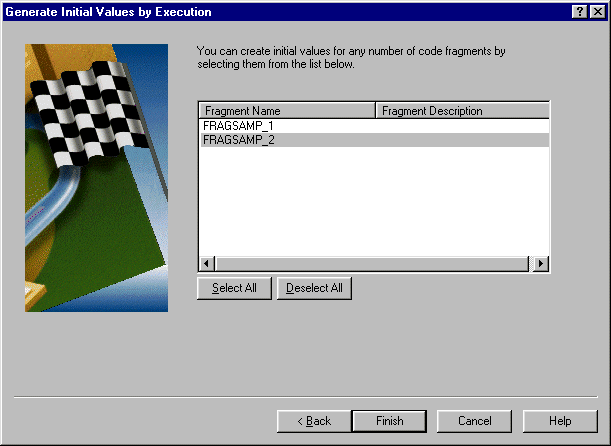
Figure 29-15: Generating Initial Values by Execution
Once you have created a fragment and recorded some initial values you can create a fragment test:
The fragment test worksheet, as illustrated in Figure 29-16, is
displayed enabling you to enter values for the input variable (REQ-DATE)
that you defined for the fragment.
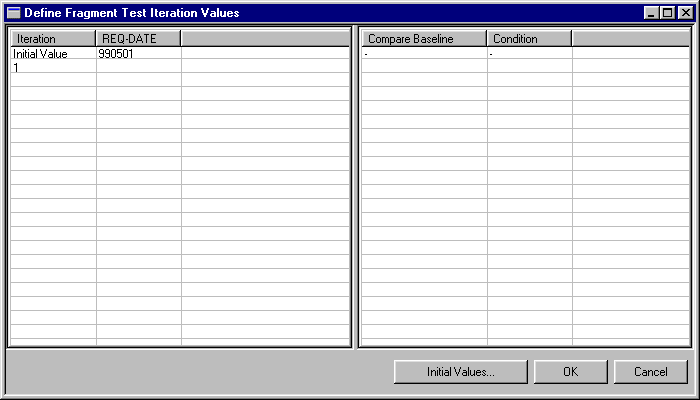
Figure 29-16: Define Input Variable Values
To enter a range of values for REQ-DATE, right-click in the cell for iteration 1 and then select Date. The dialog box shown in Figure 29-17 is displayed.
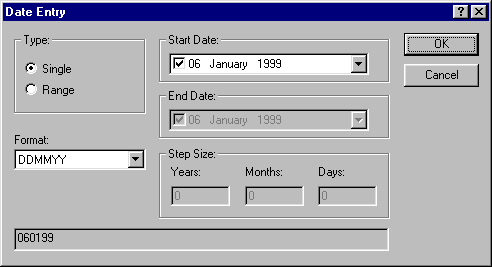
Figure 29-17: Specifying a Range of Dates
You can specify a single date, or a range of dates for an input variable. We are going to specify a range of dates, from December 25th 1999 to January 8th 2000.
Note: The date format that you select must match the picture clause of the data item. You cannot, for example, specify a date format of YYYYMMDD if the picture clause of the data item is PIC 999999.
To specify a range of dates for REQ-DATE:
By default, Compare Baseline is switched on. This feature, although essential to regression testing, is not required for conformance testing.
For each iteration of the test that you want to perform, you can specify any valid COBOL condition to be applied to the result of that iteration.
This is the essence of conformance testing - specifying a COBOL condition which, if satisfied, proves that your code conforms to the criteria that you have set. You need to be familiar with your code, and the data it uses, to be able to specify suitable validation criteria.
The GET-NEAREST-TO-DATE section reads through an array of
dates looking for the nearest match to the date held in the data item
REQUIRED-DATE. Looking at the array of dates, (these are
defined in DATE-VALUES in the WORKING-STORAGE
section), we can see that the nearest date to every date within the range
25th December 1999 to 8th January 2000, is 4th January 2000. So, in this
instance, we can test that GET-NEAREST-TO-DATE is working
correctly by specifying a COBOL condition of NEAREST-DATE = 000104.
To specify a COBOL condition:

Figure 29-18: Enter COBOL Condition
NEAREST-DATE = 000104
This specifies that, for any single iteration to achieve a pass
status, the value of NEAREST-DATE must be 000104. Notice
that the Apply to the current iteration only radio button is
selected. You can specify a COBOL condition to be applied to every
iteration in a test (Apply to all iterations), to the current
iteration (this applies to every iteration in a range if a range is
specified) or to every iteration that does not already have a
condition specified for it.
Clicking on the Browse Data button lets you view every data item in the program's WORKING-STORAGE. You can select any of the data items listed for inclusion in the COBOL condition.
Once you have created your fragment test and specified the validation criteria that will enable you to spot non-conformance within your program, you can run the test:
The status of the test is now displayed as Fail.
To analyze the results of running your test:
The Analyze Fragment Test dialog box is displayed, as illustrated in Figure 29-19.
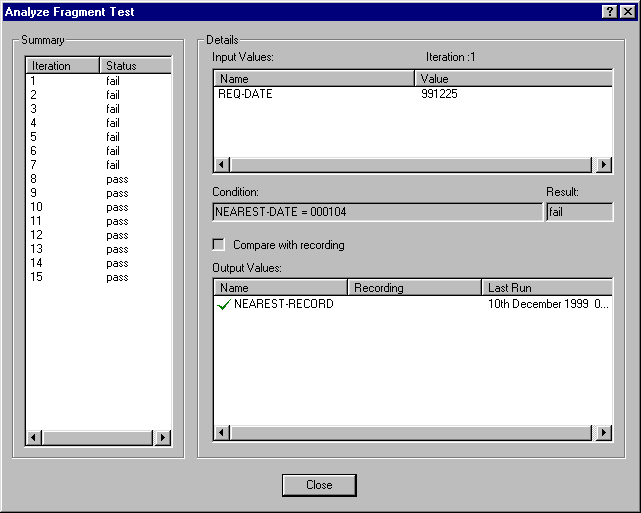
Figure 29-19: Analyzing Fragment Test Results
In the left-hand pane, the status is displayed for each iteration:
The iteration is deemed to have passed if the COBOL condition specified was satisfied.
The iteration is deemed to have failed if the COBOL condition specified was not met.
You can select an iteration by clicking on it in the left-hand pane. For the currently selected iteration the following information is displayed:
Select each iteration in turn. Note that every iteration with an
input date between 25 December 1999 and 31 December 1999 fails to meet
the validation criteria (that the nearest expiry date is 4 January
2000). This is because the GET-NEAREST-TO-DATE section
incorrectly converts two digit years to four digit years by adding
19000000 to the data item. It therefore assumes that 99 denotes 1999
and 00 denotes 1900. As the year 2000 dates are incorrectly treated as
dates in the year 1900, the greater than/less than comparisons give
incorrect results.
You can correct your code and re-run the test as many times as is necessary to eliminate errors.
GET-NEAREST-TO-DATE section and un-comment the
two commented-out sections of code:
IF REQUIRED-YY > 50
   ADD 19000000 TO REQ-DATE GIVING INT-REQ-DATE
ELSE
   ADD 20000000 TO REQ-DATE GIVING INT-REQ-DATE
END-IF
.
.
.
IF REQUIRED-YY > 50
   ADD 19000000 TO CURRENT-DATE GIVING INT-EXP-DATE
ELSE
   ADD 20000000 TO CURRENT-DATE GIVING INT-EXP-DATE
END-IF
These sections of code ensure that two digit years beyond the Year 2000 are converted to four digit years correctly.
ADD 19000000 TO REQ-DATE GIVING INT-REQ-DATE
.
.
.
ADD 19000000 TO CURRENT-DATE GIVING INT-EXP-DATE
You have now successfully used TouchPoint to find and correct compliance errors in your program.
Close the project. If you want to take a break before going on to the next session, you can close Mainframe Express.
Return to the Tutorials Map in the chapter Start Here for the Tutorials and choose which session to go on to next, depending on your interests.
Comments on the books? Click Send Us Comments.
Copyright © 2001 Micro Focus International Limited. All rights reserved.
This document and the proprietary marks and names
used herein are protected by international law.