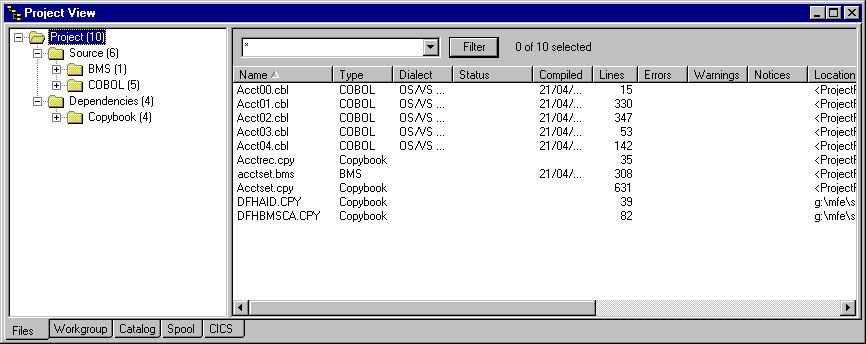
Figure 31-1: The Files View For a CICS Project
This chapter describes how to use the Mainframe Express IDE to access the functions available with the CICS Option component of Mainframe Express. It covers only the CICS Option specific aspects of the IDE interface. Information about the general IDE interface can be found in the earlier chapters of this User's Guide.
The Mainframe Express integrated development environment (IDE) incorporates all the tools and utilities required for CICS application development. The IDE lets you create, compile and test your CICS applications using the CICS Option interface. From within the IDE you can:
To be able to use the CICS Option interface to the IDE you must have created a project that uses CICS, or added CICS to the project settings for an existing project, and have the project open in the IDE.
The Files View of the IDE for a CICS project looks the same as the Files View for any other Mainframe Express project. You display it by clicking the Files tab in the Project View - see Figure 31-1.
Figure 31-1: The Files View For a CICS Project
The functions available from the Files View are the standard functions of the Mainframe Express IDE. From the tree view in the left-hand pane you can add files to the project and specify the build settings for the project. From the file list in the right-hand pane you can edit application program source files, specify build settings for individual files, and compile source files.
For CICS Option, the Files View provides additional functions for editing BMS mapsets. You can edit BMS mapsets either by using the BMS screen painter or by directly editing the BMS macro file source.
To use the BMS screen painter, double-click the BMS macro file name (.bms file) in the file list in the right-hand pane. (Alternatively, right-click the file name and click Edit.) This initiates the BMS screen painter and displays the first map in the mapset ready for you to edit. See the chapter CICS BMS Screen Painter in this User's Guide for information about using the painter.
To edit the BMS macro file directly, right-click the BMS file name and click Edit As Text. This displays the BMS macro source in the IDE editor and you can edit it in the same way as any other source file.
The CICS View of a project lets you define CICS resources, and manipulate CICS resource groups and the startup list. You display the CICS View by clicking the CICS tab in the Project View - see Figure 31-2.
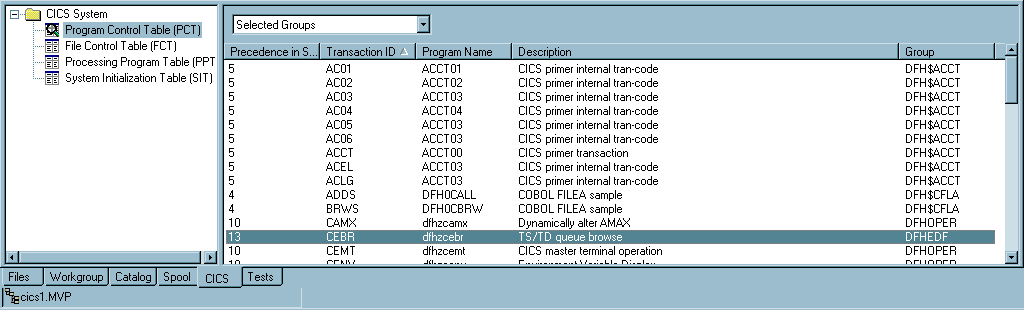
Figure 31-2: The CICS View
The CICS View comprises two panes: on the left is the CICS Tree View; and on the right is the CICS Details View. The CICS Tree View shows the resource definition tables for which you can view, create and change entries. The CICS Details View shows the entries that are in the resource definition table selected in the CICS Tree View.
The CICS Tree View shows the resource definition tables that can be viewed. Currently, only the Program Control Table, the File Control Table, Processing Program Table and System Initialization Table can be viewed and updated in the CICS Tree View. The remaining resource definition tables can be viewed and modified using the character interface to resource definition (click CICS > Resource Definition on the Tools menu). Right-click CICS System at the top of the tree view to display the popup menu shown in Figure 31-3.

Figure 31-3: The CICS Tree View Popup Menu
On this popup menu you can click:
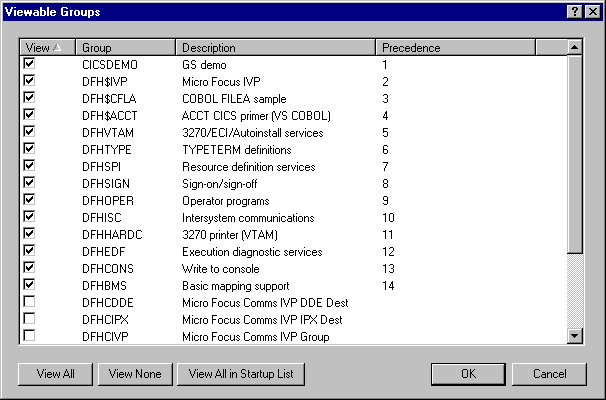
Figure 31-4: The Viewable Groups Dialog Box
On this dialog box you can select, with the check boxes to the left of the group names, which groups' resource definition table entries are to be displayed in the CICS Details View.
You also change the resource groups that are displayed in the details view by right-clicking a table name in the tree view and selecting the appropriate groups on the popup menu.
The CICS Details View is initially empty but when you select a resource definition table in the CICS Tree View, it shows the entries in that table. The entries shown depend on the groups you have made viewable for resource definition. Initially it may be that no groups are viewable, in which case a message dialog will lead you to the Viewable Groups dialog box, described above, so that you can select the groups you want to view.
You can see the details of an entry by double-clicking the entry name to see the tablename Properties dialog box. You use this dialog box to update the details of the table entry. See the chapter Developing CICS Applications in this User's Guide for more information about defining resources.
You can pin this dialog box to the IDE by clicking
![]() in the bottom left-hand
corner. You can then click table entry names in the details view; the
Properties dialog box remains displayed and is updated with the
information for each table entry you select.
in the bottom left-hand
corner. You can then click table entry names in the details view; the
Properties dialog box remains displayed and is updated with the
information for each table entry you select.
From the details view you can also create, copy and delete table entries by right-clicking the entry and selecting the appropriate item on the popup menu shown in Figure 31-5.
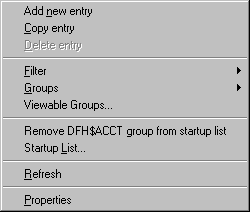
Figure 31-5: The CICS Details View Popup Menu
On this popup menu you can also click:
The CICS tools menu lets you control the functions of CICS Option. Click CICS on the Tools menu of the IDE to display the CICS tools menu shown in Figure 31-6.
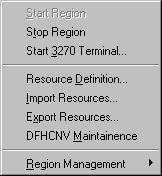
Figure 31-6: The CICS Tools Menu
On the CICS tools menu you can click:
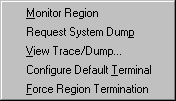
Figure 31-7: The CICS Region Management Menu
On the CICS region management menu you can click:
When you debug a CICS application, the Start debugging dialog box (displayed by clicking Start Debugging on the Debug menu) contains a CICS tab page. You specify different options on this page depending on whether you are debugging in a single-tasking or multi-tasking CICS environment. See the chapter Developing CICS Applications in this User's Guide for information about debugging CICS applications.
Copyright © 2001 Micro Focus International Limited. All rights reserved.
This document and the proprietary marks and names
used herein are protected by international law.