

| Metering Lines of Code | The Worksheet and Group Working | |
This chapter describes how to find the monetary points of interest in an application.
The analysis tools are for finding the points of interest in an application and adding them to the worksheet. Each analysis tool produces a set of potential points of interest (candidates) based on one attribute, such as the candidate's name, its type and size, its value, its usage and so on.
Figure 8-1 shows an example view of a set. The candidates in the set are listed in the left-hand pane. The right-hand pane shows a history of how the set reached its current state. You can also optionally display the source program or copybook, where it is known, or view relevant source code.
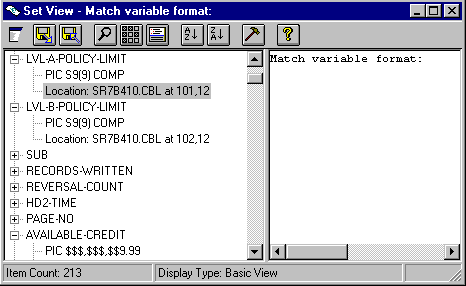
Figure 8-1: Example Set View
Once you have created a project for your application, loaded the source files into the project database and metered the source code, the process for identifying the monetary points of interest in your application is broadly:
Warning: Do not edit the original source code during the finding process. If you do, you will need to restart the project from the beginning, reparse the database and repopulate the worksheet.
There are lots of analysis tools but you're likely to use some more than others, simply because monetary data items share several attributes, such as being numeric and having at least a certain number of digits.
The list below outlines some of the tools you're likely to use most frequently:
You can search for data items with a specified PICTURE so that you can isolate potential currency definitions. For example, to locate data items used to process Deutsche Marks and Pfennigs, you might specify criteria for numeric data items between 4 and 10 characters long, with between 0 and 4 decimal places.
You can search for data items based on their names, either exactly or by using wildcards. For example, you can search for all data items with PRICE anywhere in the name by specifying *PRICE*, where * represents a match with any character and any number of them, and where the name is not case-specific.
You can find literals and constants that might be monetary, such as the constant 100 or the literal "p & p", which might be used in the following statement:
MOVE "P & P" TO P1-ORD-TRANS-LINE.After locating the statement, you could examine the surrounding context to see whether any computational activities were involved in processing postage and packing . With this tool, every occurrence of the literal or constant you specify is located, even if it occurs in a data item that is not used in a statement. Compare this with the action of Constants used with data items and statements below.
In the same way as when specifying data items by name, you can specify the exact or partial literals that are potentially currency-related, such as *pf*. However, you need to be careful about choosing literals. If you were to search for *pf*, you might extract the following:
MOVE "PF9-EXIT ORDER ENTRY" TO OE01-PF-KEY-TEXTO.and not the references to pfennigs that you wanted.
By using the Ignore embedded option you can locate only literals that are not embedded in other literals. So, for example, checking Ignore embedded in conjunction with a search for *DM* would ignore the statement:
MOVE "ADMISSIONS" TO WS-ENTRY-TYPE.You can search for constants that are actually used in the source - this is not the same as the action of the Literals tool. So, the effect of this tool is to find data items initialized to a constant value and are not subsequently modified, plus the statements that use them and, additionally, all other statements that use constants, irrespective of what the constant value might be. Therefore, the following items might be found by this tool:
03 LACODE-UNINVOICED-PROFIT-PERCENT PIC 9(8) VALUE 3000.MOVE LACODE-UNINVOICED-PROFIT-PERCENT TO WS-WK-PC.MOVE 00001922 TO LEDGER-REASON.IF LACODE-CALC-PROFIT > 999.99
Note that this tool only considers numeric constant values like those in the example above, not alphanumeric literals in quotes like "311299".
You can find data items that are obviously not monetary, because they are used, for example, as counters or exponents: the tool offers a set of options that you can look for. When you have located a set of items of this type, you can subtract them from an original set of all data items, for instance, in order to increase the likelihood of the residue being monetary, and so reduce the investigative effort.
You can search for monetary data items and screen fields used by presentation services such as BMS. Since BMS data items are generated from screen formats, there are several different items for each base item. This can lead to difficulties, since only the base items would need to be changed. You might need to identify these data items, extract them from a set of all data items and work on them separately.
This section lists common points of interest you are likely to want to investigate in your project:
Numeric constants can take several forms, including:
Constants used with data items and statements gives a set of data items and statements that include or use constants. You can use it to pick up all except those read in at the start of a program. However, this tool also picks up many values that are of no interest. You can refine the set in steps by using various tools, but at each step you need to provide progressively more application-specific criteria.
Use of data items requires little detailed knowledge, and allows you to remove from your set any data items that don't appear to be monetary, such as subscripts and program control devices.
Names of data items allows you to specify portions of names that you know preclude them from being currency items; for example, names containing the string 'date'.
Your knowledge of the application may allow you to use some of the other tools to refine the set further, based on attributes such as the data format or its context.
Alphanumeric constants that label currency include:
You can use Literals to find alphanumeric literals, restricting your search to specific substrings. Specifying what substrings to look for is a matter of judgment and several iterations of the tool might be required to ensure that spurious literals are excluded but all potential literals are considered.
Screen items that are declared in BMS maps but have no name can be considered as equivalent to COBOL literals. The worksheet and analysis tools do not provide help in finding these items. The only reliable method is a visual inspection of the screens using Screens on the Browser menu.
BMS screens that display monetary values are obvious candidates for change. Even if the size of the currency fields doesn't need changing, you may want to rearrange the positions of the items or add currency labels to improve clarity in the changeover environment. The worksheet and tools do not handle BMS items directly. However, as each named BMS field generates at least one corresponding data item in BMS copybooks, these generated data items can be used as proxies for the BMS items themselves.
BMS-related data items allows you to select, or filter, data items that are related to BMS fields. To select the input and output values, you might need to use Names of data items to choose the appropriate name suffixes. Use a suitable category to ensure that only the BMS fields and screens are changed during the fix process, not the data items themselves.
Depending on your mode of changeover (big-bang or graduated), when your application starts to use the euro, you need to have converted any current data held in files or databases, so you must identify all the files, records, fields, tables and columns that need converting:
Once you have a full list of data items in the worksheet, suitably categorized, you can use this list as input to your database conversion project.
Although most data items that hold currency values will be the correct size to hold the minimum currency unit, some will invariably be 'abbreviated' in one of the following ways:
Although an application might allow two decimal places for a currency, items such as delivery charge could still be expressed as an integer number of currency units. After conversion, it may be appropriate to express the amount as an integer number of euros, but if customers expect an exact conversion, then the converted euro amount will need expanding to include two decimal places.
If a credit limit is always expressed as hundreds of thousands of a currency unit, then the data item may be scaled, either explicitly using the COBOL PICTURE string P or implicitly with an integer field with each unit representing one hundred thousand currency units. There is no general way to discover these items. By knowing your application, you could deduce which items are likely candidates and be able to pick them out with Names of data items using suitable strings for the names.
If your application works with the Belgian Franc, Italian Lire or Spanish Peseta, it will typically handle the currency as an integer value throughout. To convert this for use with the euro, each data item that handles a currency must allow two decimal places. You might wish to restrict the maximum integer size of the items at the same time.
For applications that work with other currencies, it might be necessary to consider the size of currency fields. After conversion, the euro values may generally be similar in size to the pre-conversion currency values, but items that hold totals, sub-totals or are used in calculations may become too small and need expanding by a decimal place or two.
It isn't easy to find all the data items reliably. You will have to use several tools and make full use of your knowledge of your application.
Use Format of data items to produce an initial list of potential currency data items and eliminate obvious non-currency items with Use of data items. Using your knowledge of an application, you may be in a position to identify names with substrings that identify data items as being currency-related or not currency-related using Names of data items.
Each analysis tool searches the specified project components for items that match the criteria you define, and then presents the matching items as a set. For example, to find monetary-related text, you might specify DM, PF, Mark and Pfennig as criteria. There are two ways of doing this:
You can configure the tool to use your own settings instead of the supplied defaults, if you wish.
Before running the analysis tools, you decide how to use them:
 Options
in Analysis Tools, select the Scope tab and specify the
programs to search.
Options
in Analysis Tools.
Options
in Analysis Tools, select the Scope tab and specify the
programs to search.
Options
in Analysis Tools.
Although you can supply fresh tool settings each time you run a tool, this doesn't guarantee a consistent method of locating points of interest, especially if you are working on a group project. For this reason, you might use the various settings facilities, which are:
However, you can change to another country's default settings, by using the Country option on the Euro menu.
The tools settings you are currently using are shown at the bottom of the Analysis Tools window, such as Defaults/Belgium.The Configuration Wizard copies the settings that you want to base your own defaults on, and then allows you to make changes by selecting the tools whose criteria you want to modify. Then you can apply the settings to your project, which means that the tools settings shown at the bottom of the Analysis Tools screen becomes, for example, August/Belgium. Because your customized settings are saved separately, you can always return to the original defaults whenever you wish.
Note: Custom criteria other than those you specify using the Configuration Wizard only apply until you close the project. If you specified criteria for an analysis tool and you want to preserve them, run the Configuration Wizard and select that tool so that the settings are saved as a new group of settings.
If the tool settings and the analysis process you used to find a set of specific points of interest is extremely complicated, but you need to be able to repeat it or share the process, you can save it as a customized euro tool which you add to the analysis tools list. Then you can use it for other projects and in group projects. Using the same tool ensures consistency and saves effort when complicated selection processes are required. You create a customized tool by right clicking on the audit trail of a set and selecting Create Tool.
Facilities for sharing customized tools are currently limited. All your tools are stored in one file and there is currently no way to merge your tool file with anyone else's.
To work around this problem, one person needs to maintain the master tool file, which you can then distribute to other users. The file containing the customized tools is toolcomp.dat and is located in the project directory.
Each time you run a tool, a fresh set is produced. This means that you can always have a think and start again if you run a tool and the resulting set is not what you expected. Remember to delete any unwanted sets, though. It can be quite confusing when there are several sets in the project window.
You can create sets of data items and statements from a number of starting points. You can create a set from:
Options
in Analysis Tools, select the Scope tab and specify the
programs to search.
You can also expose a set to further refining by an analysis tool, by dragging the set onto the tool and specifying the required criteria. The contents of the resulting set depends on the tool.
You can manipulate sets in the following ways:
The history of the set is maintained in the right-hand pane, so that you can see how you arrived at the current set. The history states how you first generated the set, the analysis tools you subsequently used on the set, and the other sets or subsets you combined with this set. To see the criteria that you specified for an analysis tool, double click the name of the analysis tool in the right-hand pane.
You can combine a whole set with another set, using the following set operations:
| Set operation: |
Result: |
|---|---|
| Intersect | Removes from the target set any candidates that aren't also in the dragged set. The resulting target set contains only the candidates that are common to both sets. |
| Union | Adds the contents of one set to another or to the worksheet. |
| Subtract | Removes the contents of one set from another or from the worksheet. |
To combine a whole set with another set, pick up the whole set by
pointing to  in the Set View, and dragging it to the target set. If you hover over the
target set before dropping the dragged set onto the target set, a menu
pops up for specifying how to combine the sets.
in the Set View, and dragging it to the target set. If you hover over the
target set before dropping the dragged set onto the target set, a menu
pops up for specifying how to combine the sets.
Alternatively, instead of hovering and waiting for the menu to appear you can use a key in conjunction with dragging with the mouse, as follows:
| Cursor: |
Set operation: |
Mouse + key:
|
|---|---|---|
 |
Intersect | Drag |
 |
Union | Ctrl + drag |
 |
Subtract | Alt + drag |
You can combine a subset with another set using the same set operations as for combining a whole set: intersect, union or subtract.
To combine a subset, you select just the set entries you want and drag those to the target set. You can hover over the target set and choose the required set operation. Similarly, you can use a key combination with the mouse.
Note: Set operations on a subset destroy the integrity of the resulting set. The resulting set is no longer considered pure. It is no longer a product of manipulating complete sets using known criteria, and this step cannot be precisely recorded in the history of the set in the right hand pane of the Set view. This means that you cannot reproduce the set automatically, but you have to repeat the manual step if you want this set again.
Sets are transient and you don't need to keep them. As you work, you probably produce interim sets that you won't need again. If you need to, you can:
You're asked whether you want to save the set to disk at this point. You can choose a file to write to or specify a new name.
 and
and  .
.
There might be occasions when you want to go back to a previous set, or you might want to save a set between sessions. To enable this, you name the set.
To name a set, go to the Name tab of
Options
in the relevant Set View and specify a name. The set is saved to
disk with the name you specify and the suffix .set. It's stored in
the project directory.
When a set has a name, you can:
Options
in the relevant Set View, deleting its name and then closing the
Set View, declining saving it to disk.If you change a named set and then try to close it, you're automatically asked whether you want to save the set.
Alternatively, you can save it manually if you want to keep the changes:
We recommend keeping sets only temporarily, because once you have identified some genuine candidates, it is best to add them to the worksheet. Sets are temporary, whereas the worksheet is the permanent record of the points of interest. Sets are partial information, whereas the worksheet is a complete database on disk and is immediately updated whenever you make any changes. Only the group worksheet enables you to share information, and you can't share sets.
You can add a set or subset to the worksheet or remove one from it, in the same way as you combine other sets and subsets. You can also take selected worksheet entries and make them into a set or combine them with an existing set.
When you combine a set or subset with the worksheet:
from
the Set View to the worksheet. If you do this, you can't set categories
or write notes as you could with Worksheet channel.
 Add selected to worksheet to move selected items into the
worksheet through the Worksheet channel, assign categories and
write notes.
Add selected to worksheet to move selected items into the
worksheet through the Worksheet channel, assign categories and
write notes.
The result is by default a union of the set or subset and what was in the worksheet. You are told how many candidates are added or removed.
If you subtract a set or subset from the worksheet, any candidates in
the set or subset that match those in the worksheet are removed from the
worksheet. The candidates are not deleted but are moved to the removed
list, the same as if you had used  Remove from list.
If you add a set or subset to the worksheet, any candidates in the set or subset that are already in the worksheet's removed list, stay in the removed list. They don't get reinstated.
When you drag selected entries from the worksheet, you can:
You can also highlight the candidates in the set that are already in the
worksheet. To do this, use
Options in the Analysis Tools and check
Colorize items that exist in the worksheet on the Set Viewer
Options tab.
Copyright © 1998 Micro Focus Limited. All rights reserved.
This document and the proprietary marks and names
used herein are protected by international law.
| Metering Lines of Code | The Worksheet and Group Working | |