

| Finding Points of Interest | Reporting on the Worksheet | |
This chapter explains the worksheet and how you use it to manage your work.
The worksheet is the central point for keeping points of interest. The worksheet keeps track of what's of interest and why.
To show the worksheet, click Open Worksheet on the Euro menu. The worksheet lists the points of interest in the project together with a range of information on each one. Figure 9-1 shows an example worksheet.
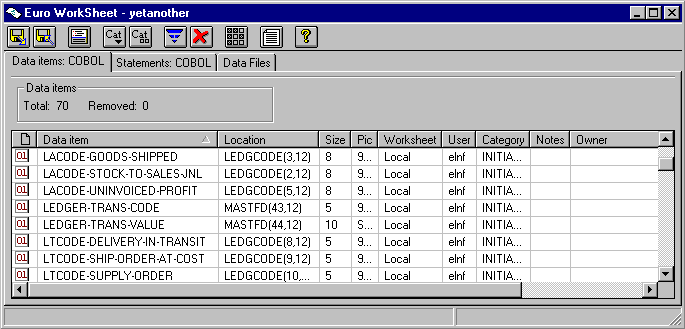
Figure 9-1: Worksheet
The worksheet can hold information on the following elements of a project:
You use the worksheet to manage your work, which involves:
Ultimately, the worksheet contains all the monetary points of interest, together with other relevant information in the form of categories and notes, plus an audit trail which gives a history of the analysis.
There are a number of techniques for moving around the worksheet and for finding worksheet entries quickly and easily:
| To achieve this:
|
Do this:
|
|---|---|
| Sort the entries in order | Click a column heading to sort the entries according that column's attribute. |
| Widen a column | Drag the divider between one column heading and the next. |
| Filter the worksheet, to show only the required entries | Click  Display Filters and specify the entries you want using the
wildcard * as necessary.
Display Filters and specify the entries you want using the
wildcard * as necessary. |
| Select a category for a worksheet entry | Select the entry and click  to display the category list. Select a category and click Add.
 |
| Display an index number for statements | On the Worksheet tab of Options, check Prefix index in statements. |
| Display the source code | Select a data item or statement and click
 View
Source Code. You can also press F9 to show the source view
in a separate window. View
Source Code. You can also press F9 to show the source view
in a separate window. |
| Show statements for the selected data items (multiple entries are allowed) | Select the data items and press F3 |
| Show data items for the selected statements (multiple entries are allowed) | Select the statements and press F3 |
| Select multiple entries | Click one entry, hold down Shift and click another
entry to select a whole range of entries. Click one entry, hold down Ctrl and click other entries to select the entries you click. |
| Show all columns in full | Press Ctrl + F2. |
| Change the visible category | Click on the Category of the required entry, click the down arrow, then click the category you want displayed from the drop-down list. |
Processing the worksheet entails allocating a category to each entry. You can use this method to indicate, for example, whether the entry definitely requires investigation because it's a point of interest, why the change is required or perhaps to document the type of work required for the euro changeover. You could even use it to record the types of error anticipated from the entry (reconversion, depreciation inconsistency and so on).
You can assign categories to a worksheet entry by selecting the
worksheet entry and clicking .
A worksheet entry can have as many categories as you wish. When you sort the worksheet by category and an entry has several categories, the entry is sorted on the visible category.
There is a default categories file, default.fct, which you can use. Alternatively, as administrator you can specify your own. If you decide to do this, it's worth spending a little time to develop a system of categorization and get it right, because it can save a great deal of investigative effort.
Note: Only the administrator can create new categories, amend or delete existing ones, although all users can allocate categories to worksheet entries. See category in the Help index for how to do this.
The EuroSmart defaults categories are:
| Category
|
Meaning
|
|---|---|
| A-Yes A-No A-Prob A-Poss |
Ultimately, every worksheet entry will have an A category, which signifies that the entry's analysis has been completed and shows whether it is a point of interest. |
| B-Constant B-Label B-BMS_Field B-BMS_Currcy B-BMS_Label B-Currency B-Abbrevn B-Size |
The B categories indicate the type of point of interest. |
| X-AutoConv X-Comment X-Skip X-Manual X-NoOp |
The X categories indicate the type of modification required. |
A worksheet is completely tied to an application. If the application source files are modified the worksheet gets out of step and you're warned about it. Do not edit the source files of an application after creating a worksheet for it.
The worksheet does, however, survive a reparse of the Revolve database, as long as the application source files are the same. This enables us to upgrade the base Revolve without forcing you to recreate your worksheet.
You can share a worksheet among a group of users, so that information gathered during the finding process can be made generally available.
Briefly, the group worksheet requires that:
The main areas of responsibility for the administrator are:
Your organization needs to decide who should take on these responsibilities. One or more people can take on responsibility for some or all of them. For some tasks, the administrator needs the authority to delegate work and dictate procedures, and for other tasks, the technical knowledge to handle conflicts in the group worksheet
To access the worksheet administration functions, check Enable
Administration on the Worksheet tab of
 Options.
As administrator, you are responsible for creating the project and the group worksheet and for initially populating the group worksheet with the candidate data items and statements from EuroSmart or the other integrated tools.
To create a worksheet click  Administration and then Create a new group worksheet.
Alternatively, you can save an existing worksheet as a group worksheet. A
group worksheet is the same as an ordinary one, except that only you, as
administrator can update it, and the users have just read-only access.
Administration and then Create a new group worksheet.
Alternatively, you can save an existing worksheet as a group worksheet. A
group worksheet is the same as an ordinary one, except that only you, as
administrator can update it, and the users have just read-only access.
To allocate worksheet entries to group members, click
Administration
and then Assign items to owner. You also need to copy the relevant
entries to the owners' local worksheets. Note that ownership is
informational only and is to help you in delegating the group's workload
and in resolving conflicts when updating the group worksheet with users'
changes. However, the concept of somebody being responsible for each point
of interest might be very useful.
We suggest splitting up the work by source file, although you can split it up in any way that suits you. Notice that the data items in working storage copyfiles are likely to be shared by more than one program, and so, to avoid conflicts, each of these common data items needs one owner.
When you have set up the project and the worksheets, you need to tell each user:
As a group member, when the administrator tells you where the project and worksheets are, you can proceed as follows:
 Load
from File. The name of your local worksheet is shown in the title
bar.
Load
from File. The name of your local worksheet is shown in the title
bar.
If the administrator has not created a local worksheet for you, you take a copy of the project locally and this creates a local worksheet for the project automatically. Alternatively, you can access the project across the network, but this can incur some performance degradation, depending on the speed of your network and the size of the project.
Options,
where you point to the group worksheet. Now the group and local worksheets are displayed together. There are some visual cues for differentiating the entries in the two worksheets:
We recommend that while you are working on a group project, you keep group working enabled in the Options, even if you don't want to view the group worksheet. This ensures that the administrator's log stays up to date with any changes you make to your local copy of a group item.
As a group member, you don't directly change information in the group worksheet, but you can copy entries from the group worksheet into your local worksheet and change those copies locally. To copy a group worksheet entry, right-click the entry in the worksheet and click Copy local.
Note: There is no locking process. In theory, you can copy any entries from the worksheet and update them in your local worksheet. However, in practice, you should copy only the entries assigned to you.
When you change your local worksheet, the changes are automatically
saved and the group administrator can take your worksheet and merge it
into the group worksheet without any action from you. However, your
organization might require some action. For example, you might need to
save the worksheet to a separate file, using  Save to File, or you might need to tell the administrator that you
have some changes to be merged.
Save to File, or you might need to tell the administrator that you
have some changes to be merged.
When your entries are merged into the group worksheet, those changes are deleted from your local worksheet. If any entries are not merged for some reason, such as they conflict with existing entries, those entries are left in the worksheet. This means that you should check your worksheet after is has been merged and investigate any entries that were not merged.
The administrator might update the group worksheet with others' changes while you are working. You can request notification on the Worksheet tab of Options. To update your view of the worksheet, right-click in the worksheet and click Refresh.
As administrator, you are responsible for merging users' local worksheets into the group worksheet. Depending on the procedures in your organization, you merge the local worksheets:
The activity log is created automatically when users make changes, while they are connected to the group worksheet. This log has the filename worksheet-name.cng, and is created in the same directory as the group project.
Before merging in users' changes, you must backup the group worksheet in case you decide to restore the previous version.
You use the Merge wizard to merge in the information from the users' local worksheets and to resolve any conflicts between the new entries and the existing ones. When you merge the worksheets:
As administrator, you should backup the group worksheet before making any changes. To do this manually copy the worksheet project-name.mdb to group-file.bak.
You might need to restore a previous version of the worksheet if, for example, the new worksheet has some incorrect entries or if there are many conflicts when merging. To restore a worksheet, copy the backup file group-file.bak to project-name.mdb.
Copyright © 1998 Micro Focus Limited. All rights reserved.
This document and the proprietary marks and names
used herein are protected by international law.
| Finding Points of Interest | Reporting on the Worksheet | |