12.4.3 Assigning an Authorization Policy to Protect a Resource
Use the following procedure to limit access to the page based on the sales role:
-
Click > then click > > > .
-
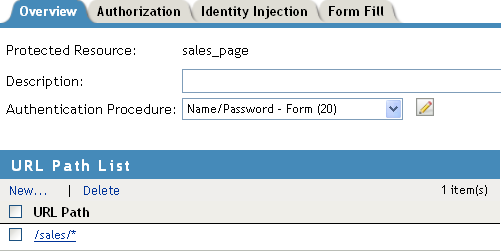
In the , click , specify sales_page for the name, then click .
-
For the , select .
-
In the , click /*, modify it to specify /sales/*, then click .
Your protected resource must look similar to the following:
-
Click > .
-
Click then fill in the following fields:
Name: Specify
Type: Select .
-
Click .
The page appears.
-
In , click > , then specify the following values:
Comparison: Select .
Mode: Select .
Value: Select
Return on Condition Error: Select
-
In the section, ensure that is selected.
Your rule must look similar to the following:
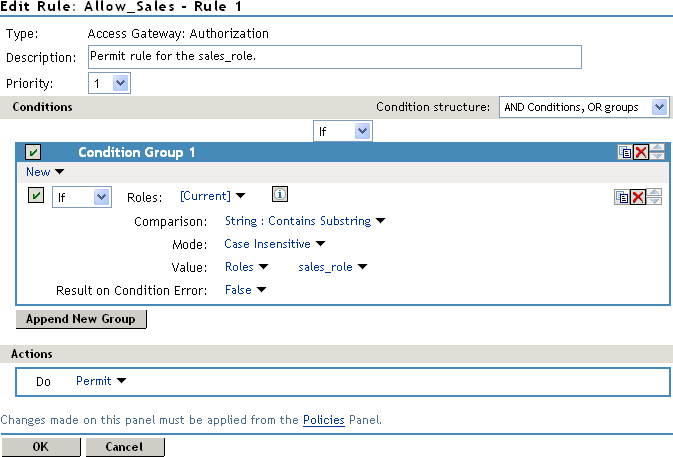
This rule allows everyone assigned to the sales_role to have access.
-
Click .
-
In the , select .
This second rule is a general deny rule for everyone who has not been assigned the sales_role.
-
Make sure the field is set to 10 and that the has no conditions.
-
In the section, click , select , then select .
-
Click , then in the text box, type the deny message: Sorry, you must work in sales today.
Your rule must look similar to the following.
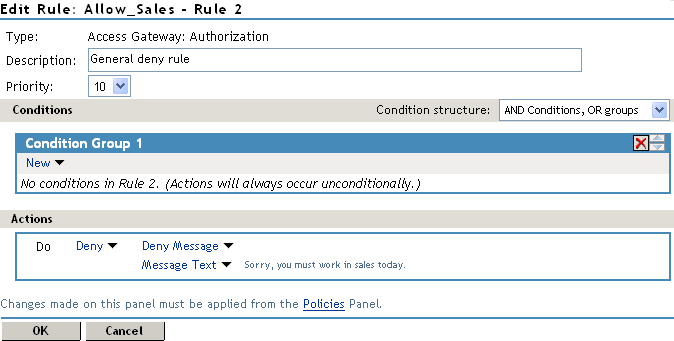
With no conditions in the condition group, this creates a general deny rule that matches everyone. The users who have been assigned the sales role match the first rule that is processed. Everyone else matches this general deny rule.
-
Click to close the rule editor, then click to close the .
-
In the Policy List window, click , then click .
-
In the , select the policy, then click .
-
Click .
-
Click the link, then click > .
-
Test the results:
-
Open a new browser, then enter the URL of the Digital Airlines website you created.
In this example, it is am3bc.provo.novell.com.
-
Log in as the admin user.
-
Add /sales to the URL.
You must receive the following response window with the message derived from Access Gateway you just configured:
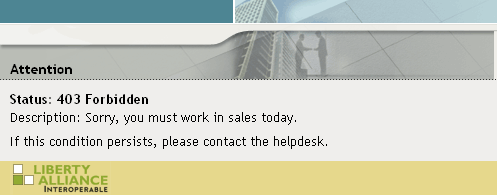
Now, only users with an assigned sales role can access the Sales page.
-
-
Test the results with a user who has the sales role:
-
Open a new browser, then enter the URL of the Digital Airlines website you created.
In this example, it is am3bc.provo.novell.com.
-
Log in as Tom.
-
Click or add /sales to the URL.
The page is displayed.
-
Close all sessions of the browser.
-
-
Continue with Configuring an Identity Injection Policy for Basic Authentication.