Creating a Role by Using a Group Membership Attribute
If you have created an LDAP group and assigned users to the group, you can use group membership to assign a role to the user. For example, create a first-level managers group and make all first-level managers members of this group. Create other groups to keep upper-level managers. You can create a Role policy that assigns the user a role if the user is a member of a specific group.
You can use the Role policy in an Authorization or Identity Injection policy to protect a web resource.
-
Click > .
-
Select the policy container, then click .
-
Specify a name for the Role policy, select for the type, then click .
-
In , click , then select .
-
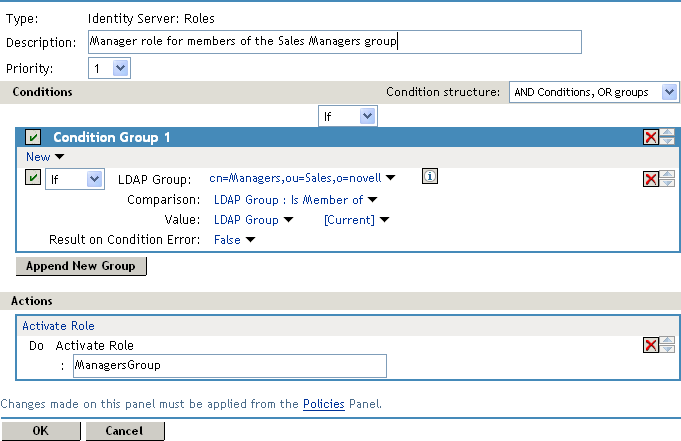
In , select the conditions the user must meet:
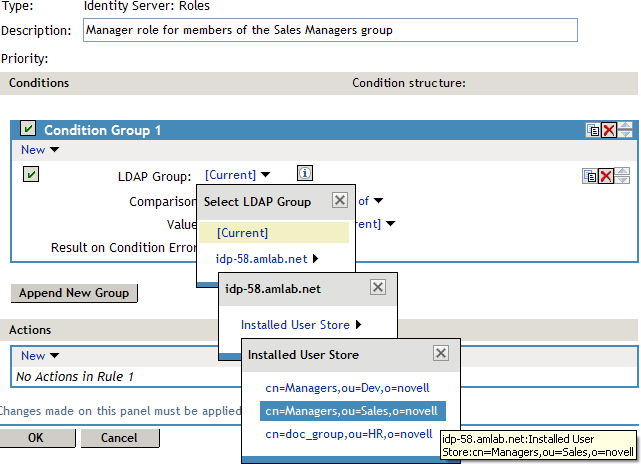
LDAP Group: Select Identity Server Configuration, the user store, then the Group.
The following figure illustrates this selection process:
Comparison: Select the attribute values comparison criteria. For LDAP Group, select .
Value: Select , then select .
The DN of the authenticated user is compared with the members of the LDAP Group. If the DN of the user matches one of the members, the user matches the condition.
Result on Condition Error: This sets up the results that are returned if an error occurs while evaluating the condition (for example, the LDAP server goes down). This rule is set up to grant the user the role of ManagersGroup if the condition evaluates to . If an error occurs, you do not want random users assigned the role of ManagersGroup. Therefore, for this rule, you need to select .
-
In the section, click .
-
In , specify ManagersGroup and click . The name you specify here is the role you want assigned to the users who match the condition.
Your rule must look similar to the following:
-
Click > > .
-
Click > > > > .
-
Select the check box next to the name of the role, then click .
-
Click and update Identity Server.
You can now use this role when creating Authorization and Identity Injection policies. For more information, see Authorization Policies and Identity Injection Policies.