Identify a directory that contains files that you want to place under version control and note its pathname (c:\myfiles\src\, for example). The directory you choose can have subdirectories. The data in these directories is not modified during initial data setup -- AccuRev makes a copy of it.
Alternative: In a Command Prompt window, enter acgui.
|
2.
|
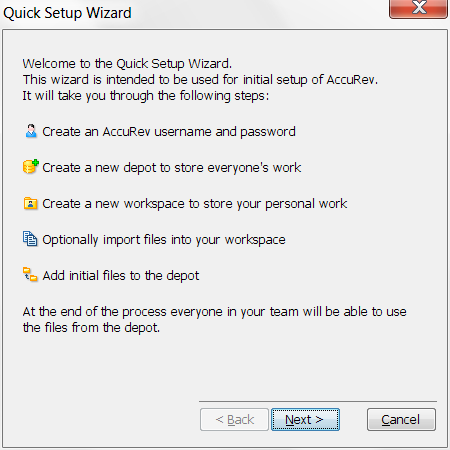
Review the quick setup process, then click the Next button to start the wizard.
|
Note: Names for all AccuRev entities (usernames, depot names, workspace names, and so on) are case-sensitive. Usernames john and JOHN are considered to be different, for example.
|
•
|
Select Yes when asked "Do you have files that you would like to import into AccuRev?"
|
|
•
|
Select Yes when asked "Do you want to create a workspace in a new location …?"
|
|
•
|
|
6.
|
Add the files in your workspace to the depot by clicking Promote in the Promote window.
|
|
1.
|
|
2.
|
|
4.
|
Click Ok.
|
|
5.
|
|
7.
|
Click Ok.
|
|
1.
|
|
2.
|
Give the depot a name (example: widget).
|
|
3.
|
Click Ok (and continue to the next operation).
|
|
1.
|
Click Yes (“Do you want to create a workspace for the depot?”).
|
|
2.
|
Click Next to select your newly created depot, and the stream that has the same name as the depot.
|
|
3.
|
Choose a physical location for the workspace (example: C:\ws\widget) and click Next to accept the default name for the workspace.
|
|
4.
|
Click Next to accept defaults for the new workspace.
|
|
5.
|
Click Finish.
|
Use operating system commands to copy the directory and files you identified in Before You Begin on page 1 into the workspace directory on your file system. For example:
xcopy /E /Y c:\myfiles\src\* c:\ws\widget)
xcopy /E /Y c:\myfiles\src\* c:\ws\widget)
If your newly created workspace is not already open in the AccuRev GUI, open it by clicking the Open Workspace button on the toolbar (Alternative: Select File > Open Workspace from the AccuRev main menu).
|
3.
|
Alternative: Right-click and choose Promote from the context menu.
Tip: Promote automatically performs a Keep operation on any files that require it.
|
4.
|
(optional) In the Promote dialog box, enter a comment string.
|
Tip: Comments that you enter during Promote and other operations become part of the history of those files.
|
5.
|
Click the Promote button.
|
The files you just added to your workspace are now available to other users with workspaces that share the same parent stream. They are no longer visible in Outgoing Changes mode because their status has changed from (external) to (backed). Click the Workspace Explorer button to change modes; the files you just promoted are displayed here.
Click the Update button ( ) to update your workspace with changes promoted by other users with workspaces that share the same parent stream.
