|
•
|
Tip: You can specify extensions for the files you wish to be treated as text files in Crucible. See Review Text File Extensions on page 49 for more information on this topic.
|
•
|
|
•
|
Crucible uses the text/plain attribute in the raw-mime.types file to identify the files in a code review that it can treat as text files. While Crucible recognizes many extensions commonly associated with text files (.txt and .cpp, for example), consider reviewing the raw-mime.types file to ensure that it includes any special files you plan on adding to code reviews. For example, you might want to include log files (.log) and configuration files (.cfg) in code reviews as text files. If so, you need to add these extensions to the text/plain attribute in the raw-mime.types file as described in the following procedure.
|
1.
|
Locate the raw-mime.types file in the directory where you installed Crucible.
|
|
2.
|
|
4.
|
Save the raw-mime.types file.
|
Note: AccuRev determines whether files without an extension are text or binary when you add them to a review or include them in a new review.
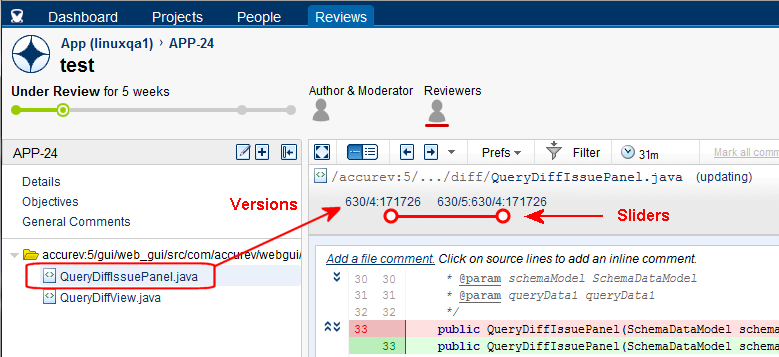
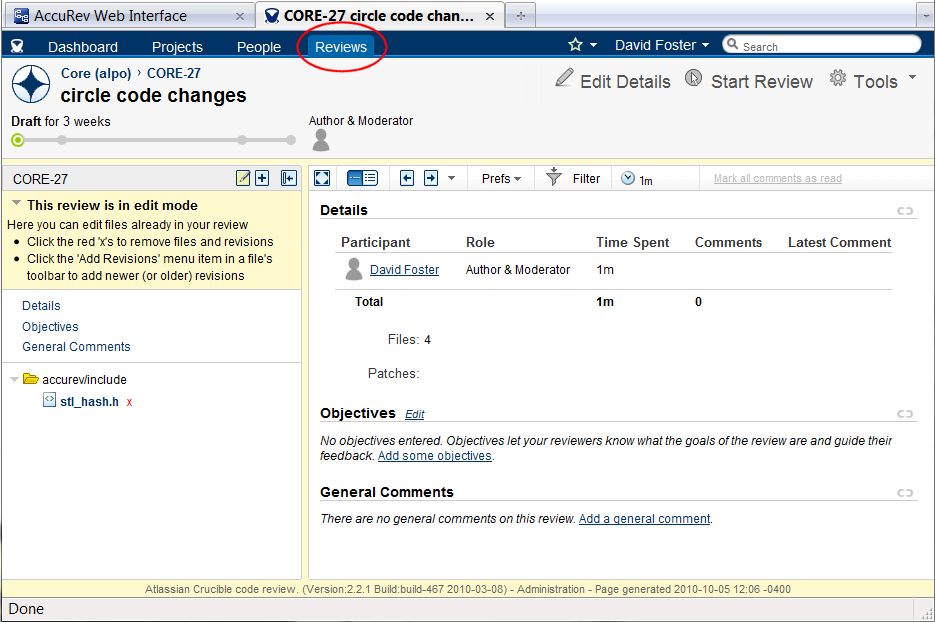
Tip: You can add the same element to an existing review multiple times, to create an iterative review. When you create an iterative review, each version you add is associated with its own entry, as shown in the following illustration:

See Adding AccuRev Elements to an Existing Crucible Review on page 55 for more information about working with existing Crucible reviews.
|
|
•
|
Backed Version: Compares your file with the version currently in the backing stream. For example, you might use this choice to see all the changes you have made to this file since you updated your workspace and starting working on the file. (And assuming no one else has promoted a new version to the backing stream in the meantime.) This might include the changes stored in several intermediate versions that you have created with keep.
|
|
•
|
Basis Version: Compares your file with the version that you started working with, before making your "recent" changes.
|
|
•
|
My Changes: Compares the workspace version with the common ancestor in the backing stream. This option is useful for files that have an (overlap) status because it identifies the changes in the workspace that did not come from the backing stream. The My Changes option is the equivalent of diffing against the last version that you merged with.
|
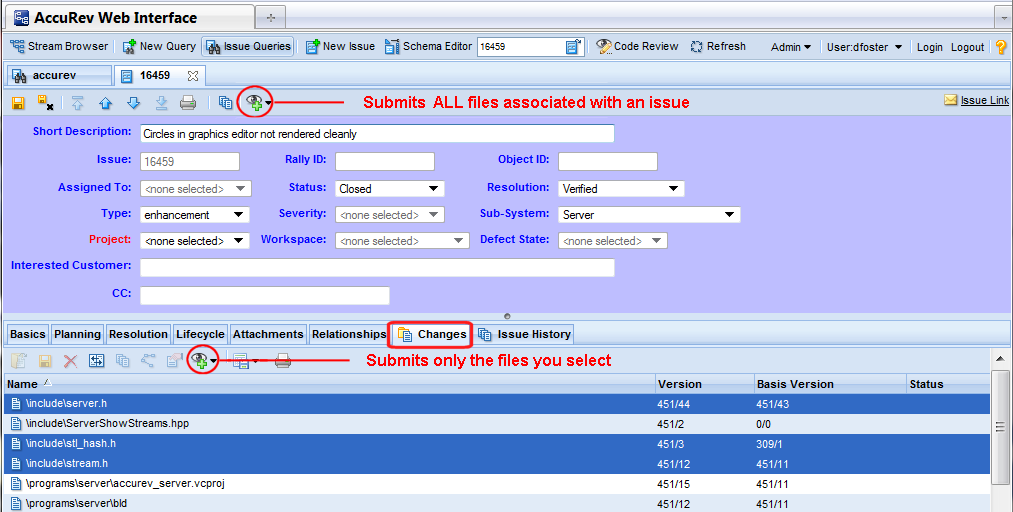
Notice the two Code Review buttons ( ) highlighted in this particular view -- one on the Issue Edit form toolbar, another on the Changes subtab toolbar. AccuRev responds differently depending on which button you click:
|
•
|
Clicking the Code Review button on the Issue Edit form toolbar submits to review all the elements associated with the current issue, regardless of whether or not you have selected any elements on the active subtab.
|
|
•
|
Clicking the Code Review button on the Changes subtab toolbar submits to review only those elements that you explicitly select (server.h, stl_hash.h, and stream.h in the illustration, for example). Note that you can use Ctrl+ click and Shift+ click to select multiple elements.
|
|
|||||
|
|||||
|
|||||
Note: Multiple elements, regardless of whether you select them explicitly or implicitly, are always placed in the same Crucible review.
|
2.
|
Select the elements for which you want to create a Crucible review. See Choosing Files for Review if you need help with this step.
|
|
3.
|
Note: If you are working in the File Browser, choose either Basis, Backed, or My Changes from the Create Review menu, as appropriate. See Use the File Browser to Choose the Diff Operation on page 51 for more information.
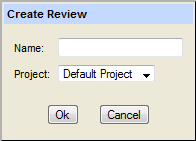
The Create Review dialog box appears:
|
4.
|
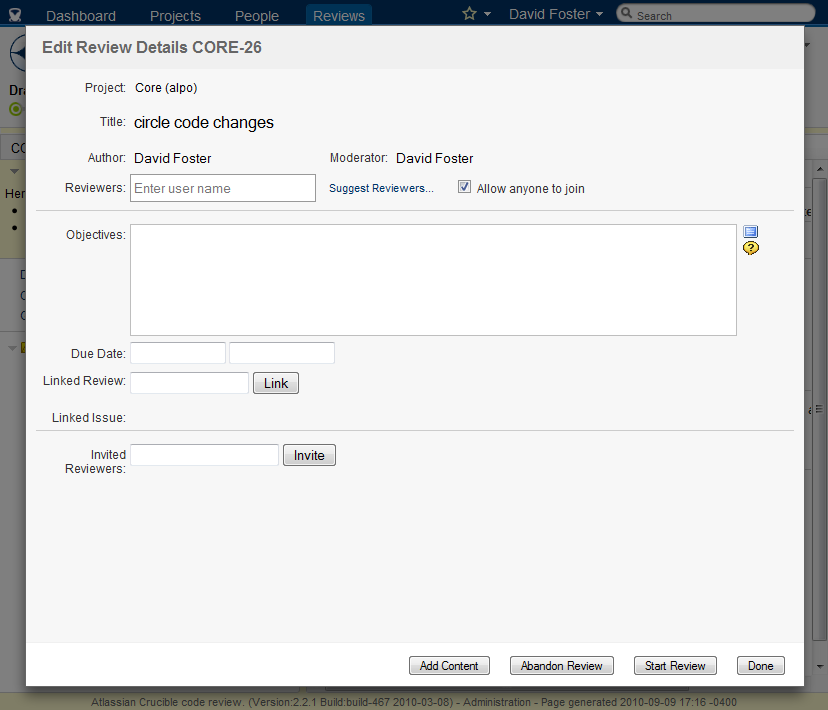
In the Name field, enter a name for the Crucible review.
|
|
5.
|
In the Project field, select the Crucible project in which you want to create the review from the drop-down list.
|
|
6.
|
Click Ok.
|
Note: Your Crucible administrator must create a Crucible user account using your AccuRev user identity. See your Crucible administrator if you have trouble logging in to Crucible.
|
8.
|
|
•
|
Start Review if you want to start the review immediately
|
|
•
|
Done if you want to start the review at another time
|
Tip: You can also use this procedure to add a different version of an element that has already been added to a review to create an iterative review of that element.
|
2.
|
Select the elements you want to add to the Crucible review. See Choosing Files for Review if you need help with this step.
|
|
3.
|
Note: If you working in the File Browser, choose either Basis, Backed, or My Changes from the Add to Review menu, as appropriate. See Use the File Browser to Choose the Diff Operation on page 51 for more information.
The Add to Review dialog box appears:
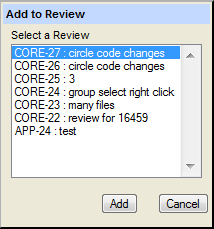
Note: The Add to Review dialog box does not list closed reviews.
|
5.
|
Click Add.
|
Note: Your Crucible administrator must create a Crucible user account using your AccuRev user identity. See your Crucible administrator if you have trouble logging in to Crucible.
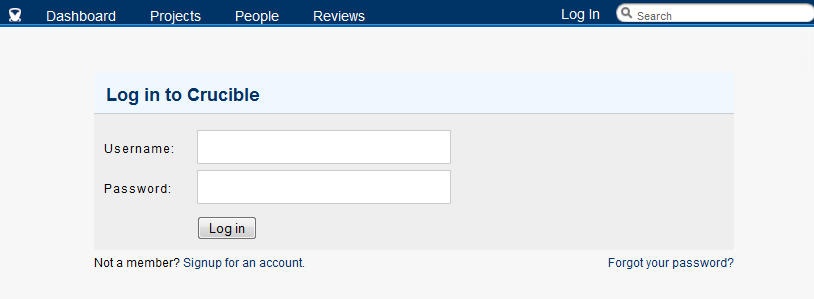
If your AccuRev system administrator has configured AccuRev as a Crucible plug-in, the Code Review button ( ) appears in the Web UI toolbar, as shown in the following illustration.

To start Crucible from within AccuRev, click the Code Review button (). Crucible opens in a new Web browser instance, displaying the login page.