This section describes how to manage EACLs in the AccuRev GUI. You can also manage EACLs using the CLI. (Changes that you make using one interface are reflected in the other.) See the section eacl in the AccuRev CLI User’s Guide for more information on using the CLI. See Element-Level Security (EACLs) of the AccuRev Administrator’s Guide for more detailed information on EACLs, permissions, and privileges.
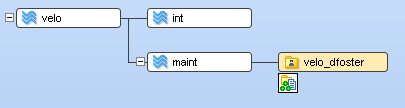
If you change the privilege for an element in the velo_dfoster workspace, that change is automatically reflected in all the other streams in the depot; the same is true for changes made to an element’s privileges in, say, the int stream. In other words, you do not have to promote an element or update a workspace to propagate changes to its privileges throughout the depot.
|
2.
|
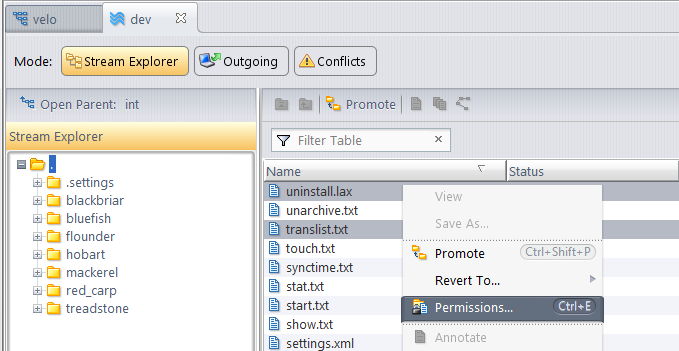
Right-click one of the selected files and choose Permissions... from the shortcut menu.
|
Alternatives: Use the Ctrl+E accelerator key, or choose Actions > Permissions... from the main menu.
Tip: You can select only one element at a time.
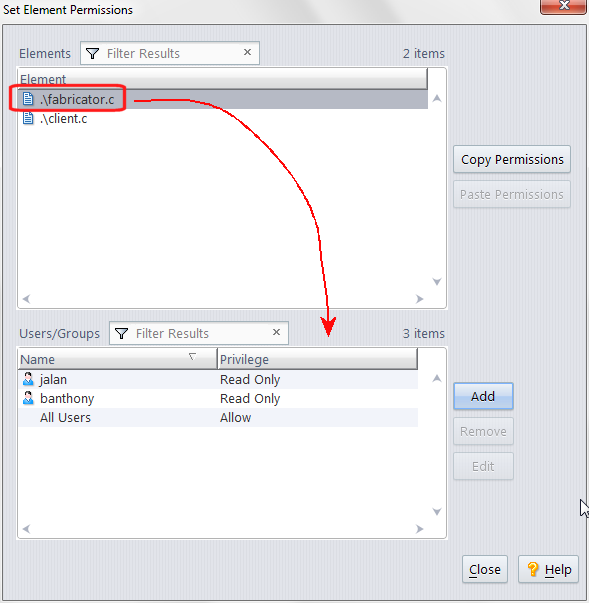
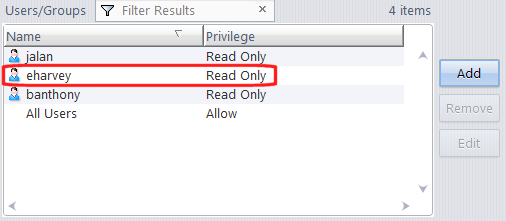
Note: The "All Users" name means just that -- all users and groups defined in the depot. Exceptions (like users banthony and jalan) are called out separately. In this example, all users have Allow privileges for forms.xml, except users banthony and jalan, who have Read Only access for that element.
|
4.
|
Click the Add button.
|
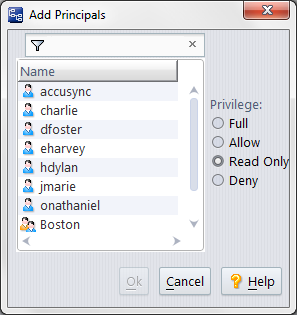
Note that the list does not include any principals for whom privileges have already been defined for the selected elements. In this example, users banthony and jalan do not appear because privileges have already been set for them for the selected element. (Use the Edit action to change existing privileges. See Editing Permissions for more information.)
Note: Changes that you make to permissions take effect as soon as you click the Ok button in the Add Principals dialog box.
|
6.
|
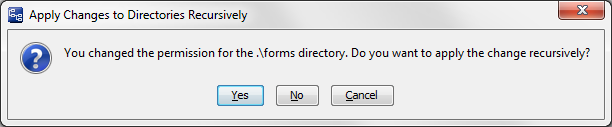
If you selected a directory in Step 1, AccuRev asks whether you want to apply the privilege recursively to all elements in that directory. See Setting Permissions on a Directory for more information on this topic.
The change you made appears in the Users/Groups list box. Here, for example, we see that the privilege for user eharvey has been changed from Allow to Read Only for the element selected in Step 3:
|
7.
|
If you selected more than one element in Step 1, return to Step 3 and repeat this procedure for the remaining elements.
|
Otherwise, click Close.
|
§
|
Yes to apply the permission to the selected directory, all child directories, and all elements within those directories.
|
|
§
|
No to apply the permission to the selected directory only.
|
|
§
|
Cancel or click the X button on the dialog box to cancel the operation without making any changes.
|
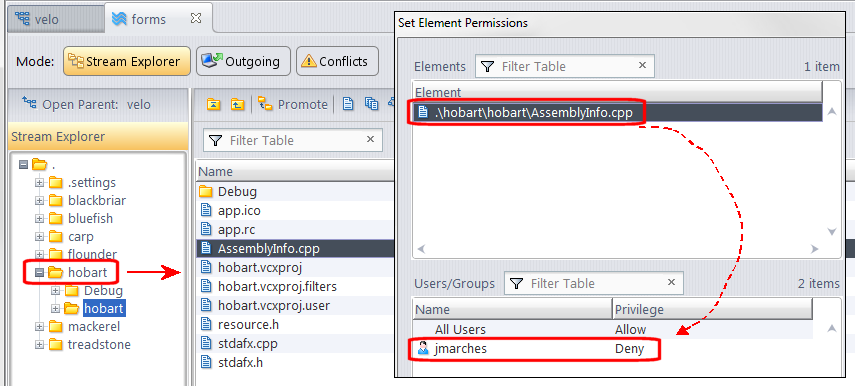
Consider the following example. Here, the Deny permission was set recursively on the /hobart directory for user jmarches. You can see that the Deny permission was set for elements within the
/hobart/hobart directory, as with the AssemblyInfo.cpp file:
/hobart/hobart directory, as with the AssemblyInfo.cpp file:
|
1.
|
Display the Set Element Permissions dialog box. See Setting Permissions for an Element if you need help with this step.
|
|
4.
|
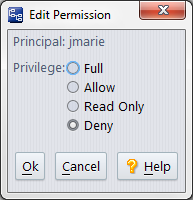
Click the Edit button.
|
Note: When you paste, any existing permissions associated with the target element are overwritten.
|
1.
|
Display the Set Element Permissions dialog box. See Setting Permissions for an Element if you need help with this step.
|
|
3.
|
Click the Copy Permissions button to copy that element’s permissions.
|
|
4.
|
|
5.
|
Click the Paste Permissions button to paste the copied permissions to the selected element.
|
Note: When you remove a privilege that you explicitly set for a user or group, that privilege reverts to the value set for any group to which that user or group belongs. Note, however, that the default behavior for an element whose ACL does have any permissions defined for a user is to deny access to that user.
|
1.
|
Display the Set Element Permissions dialog box. See Setting Permissions for an Element if you need help with this step.
|
|
4.
|
Click the Remove button.
|