A. The Schema Editor (Administrators Only) : Layout Tab

Layout Tab
 
An Issue form consists of field-labels and corresponding edit-widgets, arranged in rows and columns. The field-labels come from the Labels column of the Schema Fields table (Schema subtab). The edit-widget for a field depends on its data type and, in some cases, on the additional Field Value information.
Contents of the Layout Subtab
The Layout subtab provides a drag-and-drop canvas on which you design the Issue form's rows and columns. On this canvas, each field-label/edit-widget pair is represented by a yellow box.
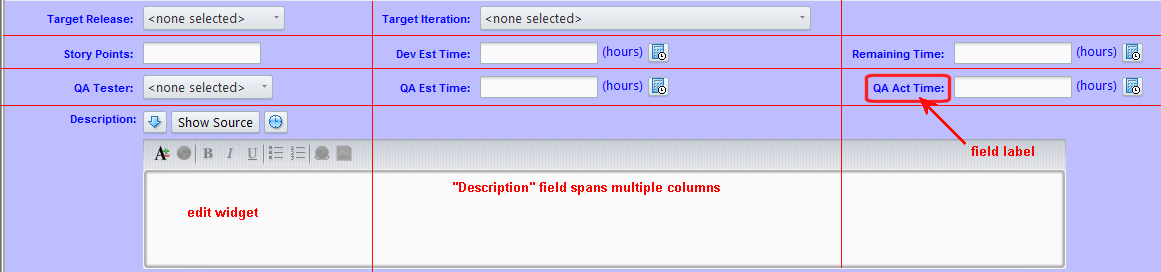
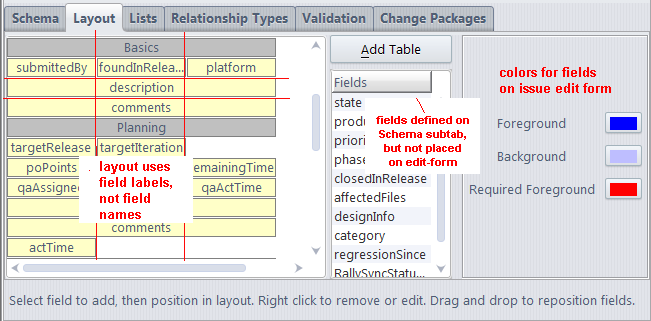
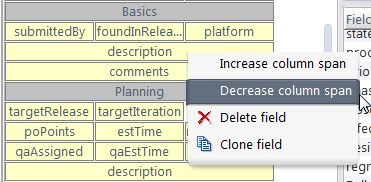
As the screen-shot annotations indicate, the yellow box contains a field-name (e.g. actTime), not a field-label (Actual Time). On the Issue form, the field-label and the corresponding edit-widget will appear, side by side, at this position. You can also expand a yellow box to make it span two or more columns.
You can organize the fields into multiple "tables", each of which defines a separate tabbed page in the Issue form. One of the tables can define a header section, which always appears on the Issue form, no matter which tabbed page is currently visible.
The layout for a multiple-page Issue form looks like this:
Form Layout Operations
This section lists the edit-form design operations available on the Layout subtab.
Adding a field to the Issue form
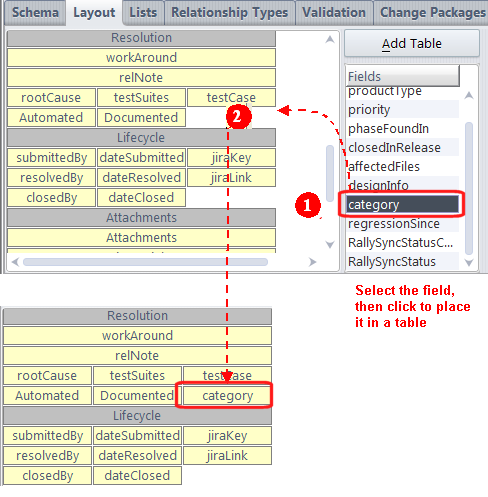
The Fields list-box offers all fields that do not currently appear in the Issue form. Click to select a field in this list-box. Then, click at the empty location on the canvas where you want to place the field.
Arranging fields into rows and columns
Drag-and-drop the yellow boxes to the desired location on the canvas. Drop a box on top of another one to push it rightward or downward.
Changing column-spanning
Right-click a yellow box, and select one of the spanning operations from the context menu.
Creating a new page in the Issue form
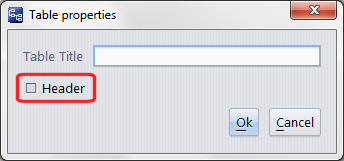
Click the Add Table button above the Fields list-box. Fill in the Table Title field in the dialog box that appears, then click OK . This title will appear on the page's tab in the Issue form.
A gray box with the specified title appears at the bottom of the layout. Fields that you place below this box will appear on the new page of the Issue form.
Creating a header table for the Issue form
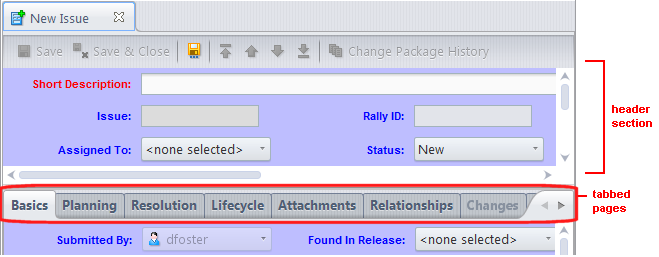
When creating a new page for the Issue form (see above), check the Header checkbox if you want it to be the header table.
An Issue form can have at most one header table. If another table is currently selected as the header table, it is automatically deselected. Its fields always appear at the top of the Issue form, even if it is not the topmost table on the Layout tab.
You can also redefine an existing page to be a header table: right-click the gray box and select Properties. All fields in the header table will appear at the top of the database's Issue form, above every tabbed page.
Renaming a page
Right-click on the gray box, select Properties , and change the entry in the Table Title box.
Arranging fields into multiple pages
Drag-and-drop the yellow boxes (fields) and the gray boxes (pages). Fields that you place below a gray box will appear on the corresponding page of the Issue form.
Removing a field or page
Right-click the yellow box (field) or gray box (page), and select Delete from the context menu. Deleting a page doesn't delete the fields currently on the page -- it just deletes the gray box, effectively merging the fields into the page above. Note: You cannot delete the first gray box; an Issue form must have at least one page.
Setting the Issue form's colors
Click one of the colored buttons at the right side of the Layout subtab. Then select a color from the Pick a color window. You can set these colors:
Foreground: the color of the Issue form's field-labels.
Required Foreground: the field-label color for fields where a value must be specified. Required fields are defined on the Validations subtab.
Background: the color of the Issue form's background.

Micro Focus