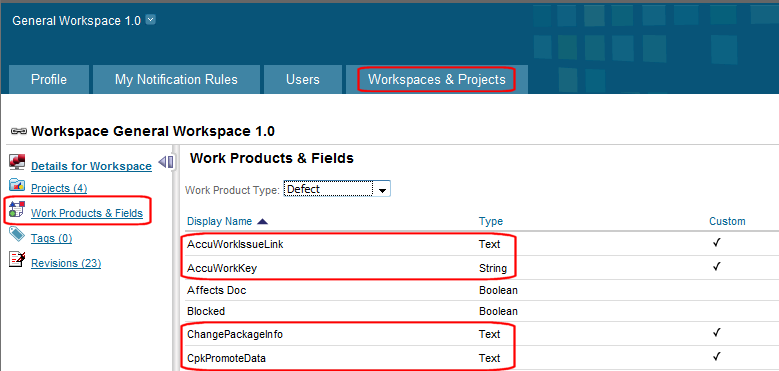
Specific procedures vary from one ITS to another, but they typically involve adding a custom field to the ITS schema and then making that field read-only or hidden in views that allow users to modify other fields (like Description or Comment, for example). Custom fields added to your ITS schema must use the field name and type shown here:
Tip: The Label column has been left empty. Consider using this column to record the name you plan to use for the field’s label when displaying issue record data in your ITS.
All ITSs: Refresh the AccuSync™ Configuration
If you update your ITS schema or forms after you have created an AccuSync Configuration, you must refresh the AccuSync Configuration. You do this by clicking the Reload Configuration Cache button ( ) on the AccuSync Management Console main page. See Making Changes to AccuSync™ Configurations for more information.
The fields described in the preceding table are required for AccuSync to successfully synchronize AccuWork issues with ClearQuest requests and tasks. See Appendix E: IBM Rational ClearQuest Configuration Reference to learn about the fields that are synchronized by the default ClearQuest configuration (Owner, Description, and so on).
In addition to the required and default configuration fields, AccuSync allows you to create and synchronize up to 30 additional fields, called custom fields. You follow the same basic process for adding custom fields that you use for adding required fields, with these exceptions:
|
•
|
Custom fields have required names. Due to limitations in the ClearQuest API, custom fields must adhere to a strict naming convention in order to be recognized by the synchronization engine. You can name these fields however you like in the AccuWork schema, but in ClearQuest they must be created as “customField1”, “customField2”, “customField3” and so on, and cannot exceed “customField30”. Note that these names are case-sensitive.
|
|
•
|
Custom fields must be added to the AccuWork schema. Once you create a custom field in ClearQuest, you need to add the corresponding field to the AccuWork schema and the issue form as described in Modifying an Existing AccuWork™ Schema. For example, if you add “customField1” to ClearQuest to store a customer name, you might add an “Interested Customer” field to the AccuWork schema to allow this value to be synchronized.
|
|
•
|
Custom fields must be added to AccuSync field mappings. The custom fields you create in ClearQuest must be added to an AccySync field mapping, to associate the custom field with a corresponding field in AccuWork. See Editing Field Mappings for more information.
|
|
2.
|
Click the Administration tab in the top navigation bar, then choose Issue Fields > Screens from the left navigation bar.
|
|
a.
|
Locate the Default Screen and click Copy in the Operations column.
|
|
b.
|
On the Copy Screen page, enter a name for the new screen. (Edit Issue Screen, for example.) You can enter an optional description.
|
|
c.
|
Click Copy to create the new screen.
|

|
4.
|
Locate the new Edit Issue Screen and click Configure in the Operations column.
|
|
5.
|
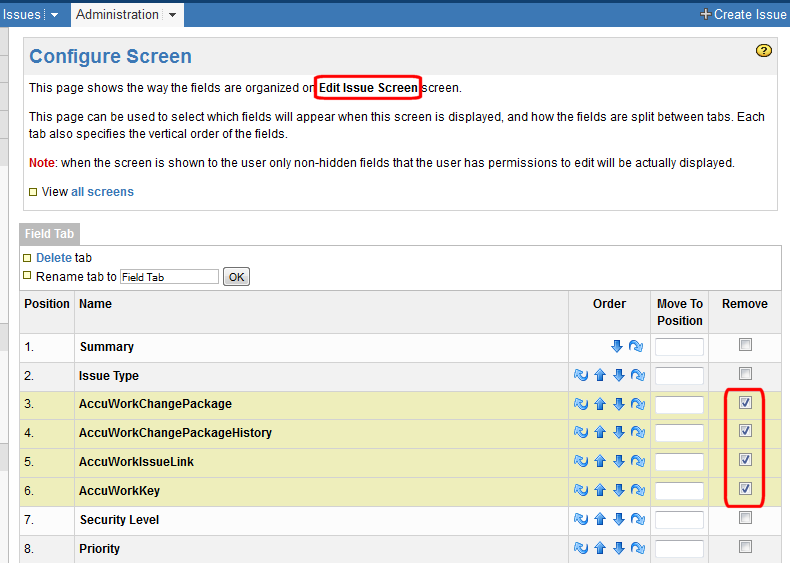
Locate the AccuWork fields, select the Remove check box for those fields, and click the Remove button at the bottom of the form.
|
|
1.
|
Click the Administration tab in the top navigation bar, then choose Issue Fields > Screen Schemes from the left navigation bar.
|
|
2.
|
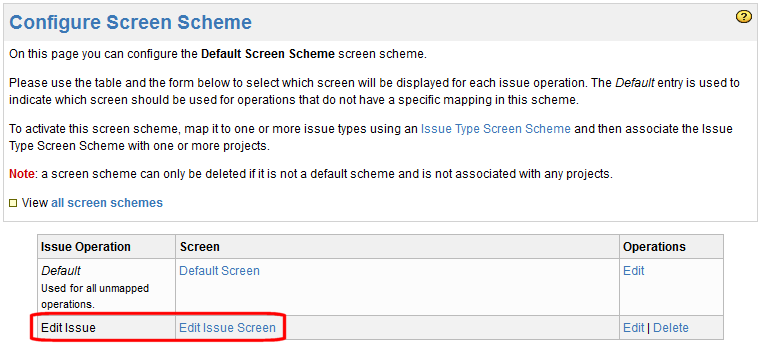
Locate the Default Screen Scheme and click Configure in the Operations column.
|
|
•
|
|
4.
|
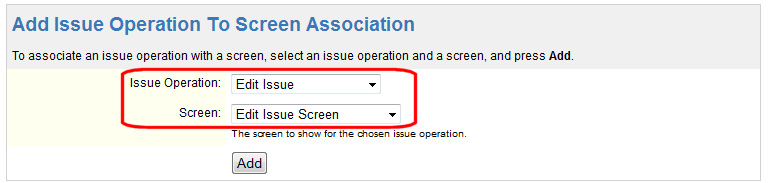
Click Add.
|
|
2.
|
|
3.
|
Choose Project Entities from the navigation bar.
|
|
4.
|
Expand the Defect folder and then select the User Fields folder.
|
|
5.
|
Click the New Field button.
|
