In this chapter, you learn about the generation process and view
generated output.
Goal
In this section, you learn about the APS Generator and APS Precompiler
and the tasks they perform. You also generate the application.
When you generate an application, the APS Generator and APS Precompiler
translate your APS specifications into a complete, structured COBOL
application. APS then automatically passes the source to your COBOL compiler
and link edit program to produce a load module.
When you generate an application, APS automatically processes your
application as follows:
- Ensures that each component of your application exists.
- Generates APS screen symbols for each screen, for use by the APS
Precompiler.
- Generates the screen source, native to your DC environment, such as
BMS or MFS mapsets.
- Arranges all APS program specifications into proper COBOL program
organization.
- Includes all the externally-defined components -- such as APS macros,
user-defined Customization Facility macros, COBOL copylibs, and APS data
structures -- at the program locations you specify in the Application Painter,
Specification Editor, and Program Painter.
- Processes all APS database and data communications calls and
user-defined macros, translating all source into COBOL source.
- Writes a temporary error message file and sorts it into the COBOL
compiler error message file. The combined error message file presents messages
sorted by program line number, with both types of messages appearing where
appropriate.
The generation process produces a separate output file for each screen
and COBOL program selected. The screen source is generated first, followed by
each program in the order in which they appear on Application Painter. APS
stores your generated and precompiled COBOL program source and screen in your
user Project and Group.
Procedure
Start
this procedure where the last one ended -- in the Application Painter.
- To tailor screen generation to your target environment, do the
following:
- Transfer to the Screen Painter by typing s in the
selection field to the left of the APSU screen name. Press Enter.
- Type pm on the Command line and press Enter. The Screen
Generation Parameters screen displays.
- Because the screen name is not the same as the program name, you
must specify the program name. Type apsupd in the Associated Pgm
field.
- Press PF3 repeatedly until you return to the Application Painter.
- Optional. Before generating, you might want to verify that your
generation options DC and DB targets are set to ISPF and VSAM respectively. To
do so, type OPT 1 in the Command field and press Enter to access
the APS Generator Options panel.
- To generate the application, type gen in the Command
field and press Enter, as shown in Figure 11-1.
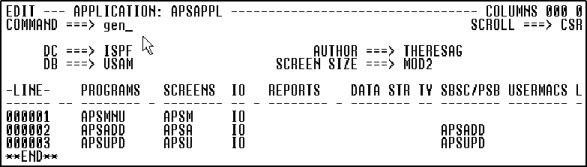
Figure 11-1: Generate the Application
Checkpoint
You have generated the application and should review the system
messages.
Help
The generators first process the screens serially, followed by each
program.
You can tailor how APS generates your application. Options are available
for controlling both the Generator and Precompiler, as well as target-specific
options such as SQL Bind and IDMS options.
Hints
To observe the generation process, go to your system area, just as you
would for any job you submit.
Goal
In this section, you review the system message files in the generated
output for errors, and then delete the output to save disk space.
You can view the system messages for the generated screens online. These
output files contain the equivalent of MVS JCL messages as well as the specific
APS runtime messages.
To save space, you should delete the generated output files. APS will
flag each output file as deleted so that these jobs no longer appear in the
jobqueue.
Procedure
- To view the output files, type tso sdsf in the Command
field and press Enter.
- Type s to the left of each output file and press Enter. The
first output file displays.
- Press PF7 and PF8 to scroll throughout the first output file.
- Press PF3 to view the next selected output file.
- Continue reviewing your output using PF7, PF8, and PF3 until you
return to the output jobqueue screen.
- To save space, type d to the left of each job name and press
Enter. The files will be deleted.
- Press F3 twice to return to APS Main Menu.
Checkpoint
You are now ready to execute, or run, the entire application.
Copyright © 2002 Micro Focus International Limited. All rights reserved.
This document and the proprietary marks and names
used herein are protected by international law.