Configuring the Kubernetes Cluster
After you install the CDF Installer, complete the following steps to configure the cluster.
- Use your remote desktop to access the jump host.
- Browse to the cluster using your private DNS address at port 3000.
- Log in using admin (user ID) and the password you specified during the CDF installation.
- On the Security Risk & Governance - Container Installer page:
- Select the CDF base product metadata .
- Click Next.

- On the End User License Agreement page:
- Review the End User License Agreement.
- To accept the agreement, select the I agree… check box.
- (Optional) To have information passed to Micro Focus, select the I authorize... check box.
- Click Next.

- On the Capabilities page:
- Select the capabilities and products you want to install.
- To show additional information associated with the product, click the > (greater than) arrow.
- Click Next.
For example, to install Transformation Hub as a standalone install, select the Transformation Hub check box.
Other products might require Transformation Hub or other capabilities as prerequisites. You can view any such requirements in the pull-down text associated with the capability.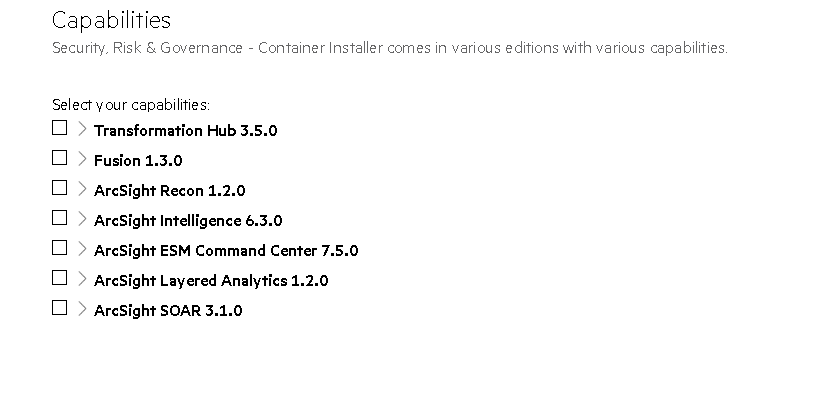
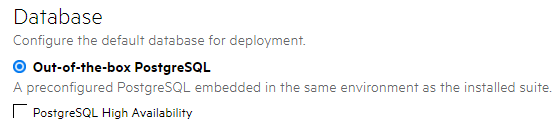
- On the Database page:
- Ensure the PostgreSQL High Availability box is unselected. This database is not used by capabilities in SODP.
- To continue, click Next.
- On the Deployment Size page:
- Based on your planned implementation, select a size for your deployment. (You can configure additional nodes, each running on their own host systems, in subsequent steps.)
- Click Next.
The installation will be halted if your environment does not meet the minimal hardware requirements for the deployment.Size Minimum Worker Nodes Cores Memory Disk Small Cluster 1 Worker Node 4 Cores 16 GB 50 GB Medium Cluster 1 Worker Node 8 Cores 32 GB 100 GB Large Cluster 3 Worker Nodes 16 Cores 65 GB 256 GB 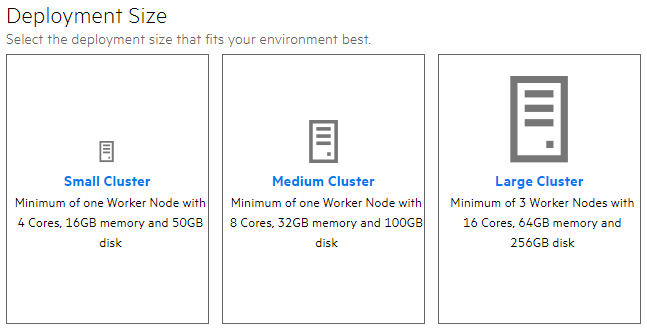
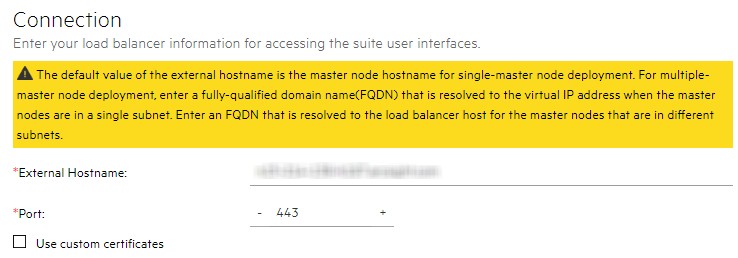
- On the Connection page:
- In External Hostname, the deployment populates an external hostname automatically from either:
The Virtual IP (VIP) specified earlier during the install of CDF (
--ha-virtual-ip parameter)- The master node hostname if the
--ha-virtual-ipparameter was not specified during CDF installation
- Confirm the port is correct.
- To continue, click Next.
- In External Hostname, the deployment populates an external hostname automatically from either:
- On the File Storage page, for each NFS volume to configure:
- In the File System Type drop-down, ensure Managed NFS is selected.
- In File Server, specify the IP address or FQDN for the NFS server.
- From the Exported Path drop-down, select the appropriate volume. (If using NetApp, specify the path manually instead; for example,
/nfs/arcsight-volume, /nfs/db-backup-vol, /nfs/db-single-vol, /nfs/itom-logging-vol itom-vol.) - Click Validate. All volumes must validate successfully to continue with the installation. The following volumes must be available on your NFS server.
- Click Next.
CDF NFS Volume Claim
Your NFS volume
itom-vol<NFS_ROOT_FOLDER>/itom_voldb-single-vol<NFS_ROOT_FOLDER>/db-single-voldb-backup-vol<NFS_ROOT_FOLDER>/db-backup-volitom-logging-vol<NFS_ROOT_FOLDER>/itom-logging-volarcsight-volume<NFS_ROOT_FOLDER>/arcsight-volume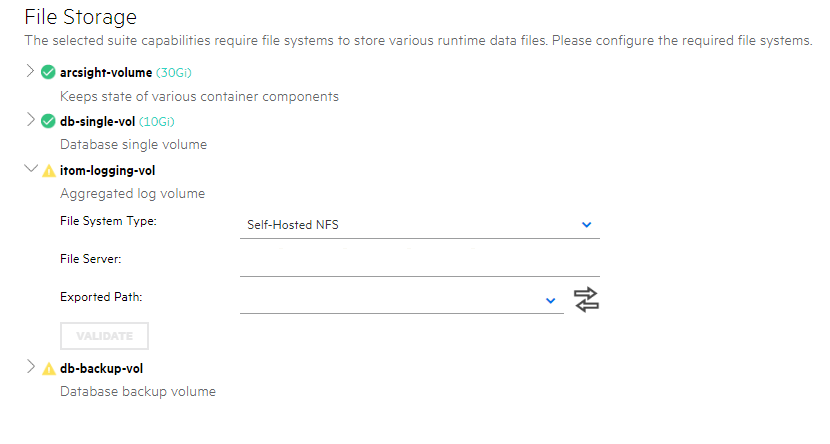
After you click Next, the infrastructure implementation is deployed. Please ensure that your infrastructure choices are adequate to your needs. An incorrect or insufficient configuration might require a reinstall of all capabilities.
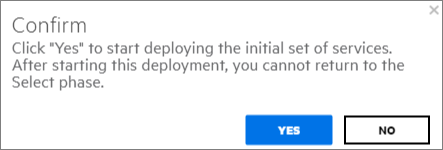
- On the Confirm dialog, to start deploying the nodes, click Yes.
- To configure the products and components of the deployment, click Next.
For example:
https://installer.private.arcsight.com:3000
The system prompts you to upload the following ArcSight installer metadata.tar file:
arcsight-installer-metadata-<version>.xx.tar
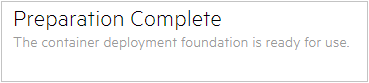
After all nodes have been configured, and all services have been started on all nodes, the Preparation Complete page displays. You are now ready to configure product-specific installation attributes.