You can add charts to your reports. The query object option selected by default is Use Parent's but you can also uncheck it and choose a new query from the drop-down menu. You can also apply changes while viewing the chart simultaneously on the left pane of the report.
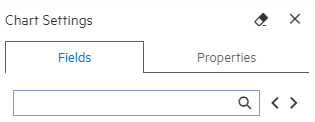
To edit the chart on the Classic Report, click the Query Editor link. To edit the query in a Smart Report, click the + icon located at the bottom of the report. Values are divided in fields (Y-Axes and X-Axis) and properties (General, Chart, Miscellaneous, Sort and Split Order) tabs.
To create a chart, specify values for the following:
|
Setting |
Description |
|---|---|
|
Title (Only for Classic Reports) |
Title of the chart. |
|
Chart Type |
Select a chart type from the drop-down list. To select a chart type from Smart Reports, click the general > chart type under the properties tab. |
|
Link |
Choose to link the chart to either report fields or a matrix. To add a link from Smart Reports, click general > link under the properties tab. |
|
Available Fields |
Available Fields are drawn from the report query. Using the > button, assign these fields to Value Fields (Y-axes on the chart) or Group Fields. To select the fields from Smart Reports, go to the fields tab. Then, simply drag and drop the fields where needed. |
|
Settings |
To display the legends, point labels, and description from Smart Reports, go to the chart section under the properties tab. |
|
Sort Order |
Select a sort order for the chart. To sort the order from Smart Reports, click the sort order section under the properties tab. |
| Split Order |
Determine how to split the chart. To split the chart from Smart Reports, click the split order section under the properties tab. |
| Description | Add a description of the chart. For more details, see Annotating Report Charts. |
You can set value and sort fields for a chart.
To Set Value Fields (Y-Axis):
To Set Group Fields (X-Axis):
Select the method to group (for Numeric or date type).
You can specify groups in numeric fields. For example, to have groups of 10, specify 10 in Groups box.
You can specify groups in date fields. From the box select from Day, Week (Sunday to Saturday), Month, Quarter (Jan-Mar, Apr - Jun, Jul - Sep, Oct - Dec), Year.
Tip: To remove fields from Value fields (Y-Axis) or Group Fields (X-Axis), drag them out of the respective box or use the ![]() arrow (Remove field) on selected fields.
arrow (Remove field) on selected fields.
In Classic Reports: To display one chart per field, go the field line and click split. To remove all settings and contents of the current chart, click Clear Chart. To specify the screen percentage space, use the Max Height value. To establish the maximum number of characters for view in the chart label, use Max Characteres value.
In Smart Reports, select the display field and group drop-down as well as the pivot or split boxes as needed.
To save a chart as an image: