C: SharePoint administration tasks
Identifying the app catalog in use
-
-
Go to SharePoint Central Administration, and click on the Apps link in the navigation pane.
-
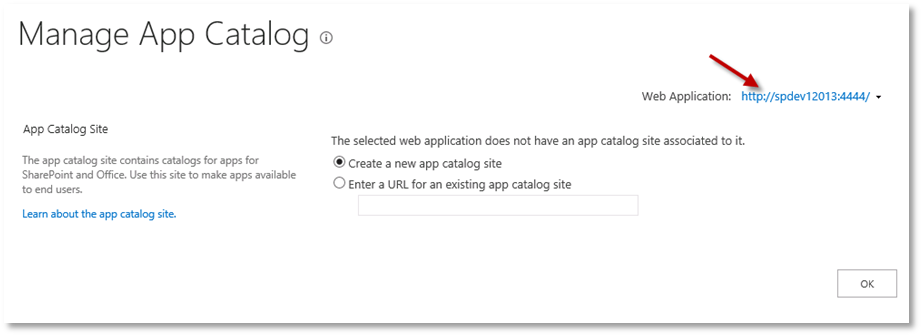
Click on the Manage App Catalog option under App Management section.
-
Ensure you have the correct web application selected, and note the Site URL, this is your app catalog.
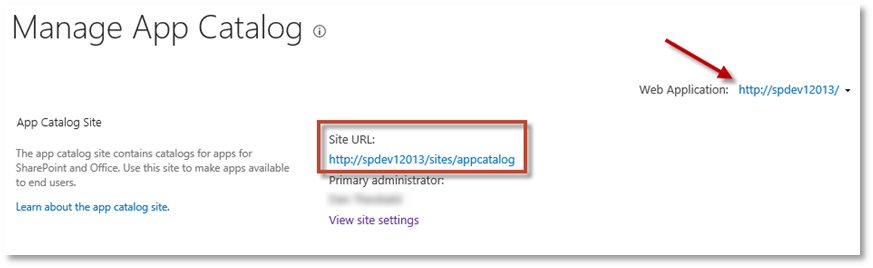
If you select the correct web application but do not see a site URL, then you do not have an app catalog configured for this web application. See section Creating an app - On premise.
-
-
-
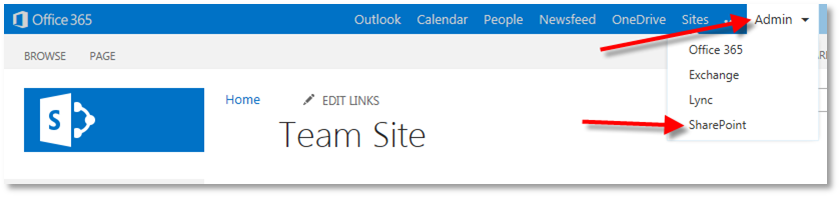
Login to your Office 365/SharePoint Online portal, as a tenant administrator, and click on the Admin > SharePoint menu item.
-
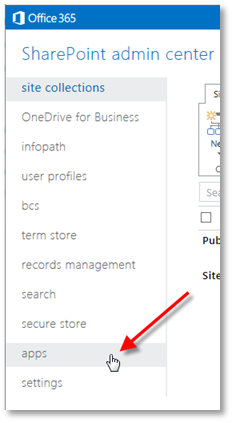
From the left-hand navigation pane, click on Apps.
-
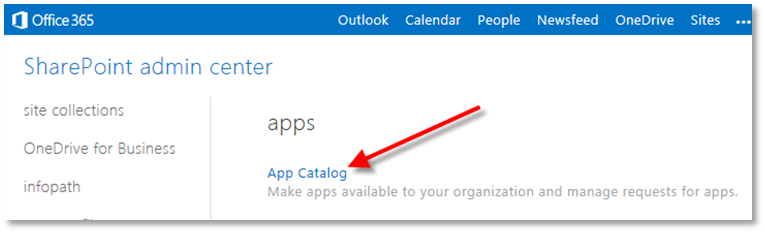
Click on the App Catalog link.
-
Creating an app catalog
-
If you do not already have a corporate app catalog within your SharePoint content web application, then you need to create one. Understanding apps, and the general app architecture, is outside the scope of this document, but here are some basic steps to create an app catalog suitable for testing/proof-of-concept work.
-
Go to SharePoint Central Administration, and click on the Apps link in the navigation pane.
-
Click on the Manage App Catalog option.
-
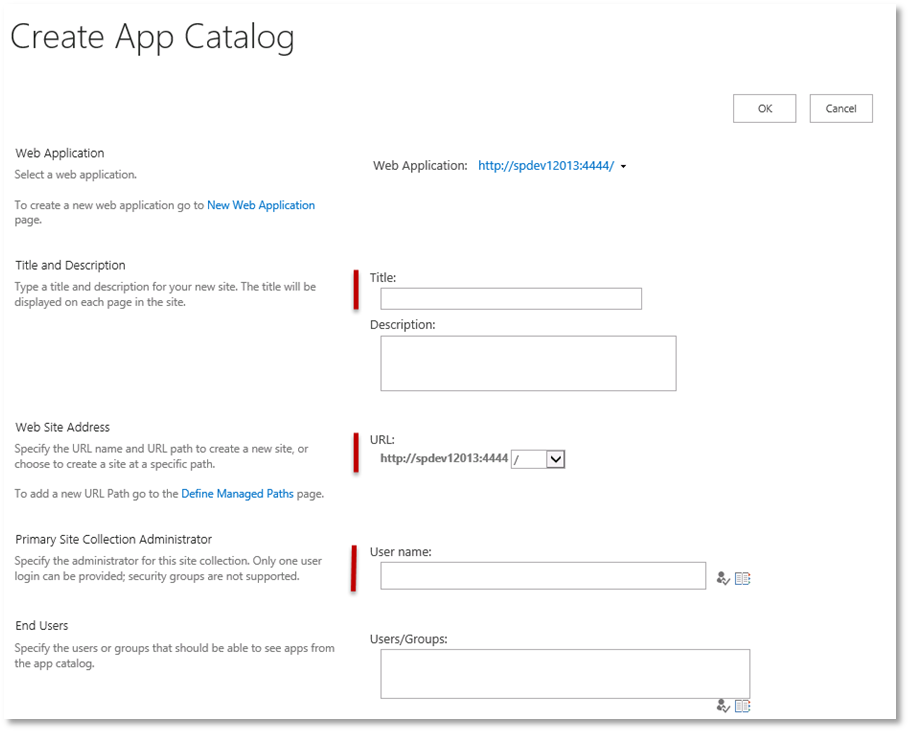
On this page, select your content web application, choose the Create a new app catalog site option, and click OK.
The app catalog lives in its own Site Collection. At a minimum, provide the values for Title, URL, Site Collection Administrator and click OK.
-
-
-
Login as a tenant administrator, go to the Admin menu at the top right, and click SharePoint:
-
In the SharePoint admin center, you can see a list of site collections. On the left-hand menu, click on apps.
-
Click App Catalog
Leave the default selection and click OK to create a new App Catalog.
The app catalog is provisioned within its own site collection. Fill in details for the app catalog (See examples below).
-
Click OK to provision the app catalog. This will take you back to the Admin Center.
-
Configuring App URLs – On Premise only
After creating an App Catalog, you have to configure App URLs, which will be used by all Apps that you add to the corporate catalog.
-
Go to SharePoint Central Administration, and click on the Apps link in the navigation pane.
-
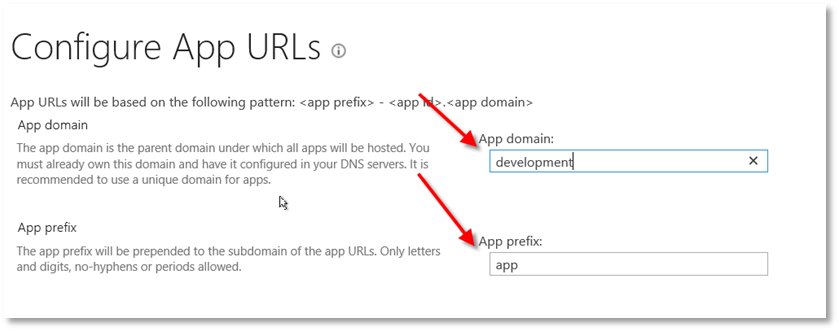
Click on the App Management > Configure App URLs link.
-
Enter your domain name and enter a prefix you would like to see to indicate app URLs. For example ‘app’. Then click OK.
For troubleshooting app catalog issues, see Troubleshooting App Catalog .
Working with the term store
-
-
On Premise
You can access term store using one of the following methods:
-
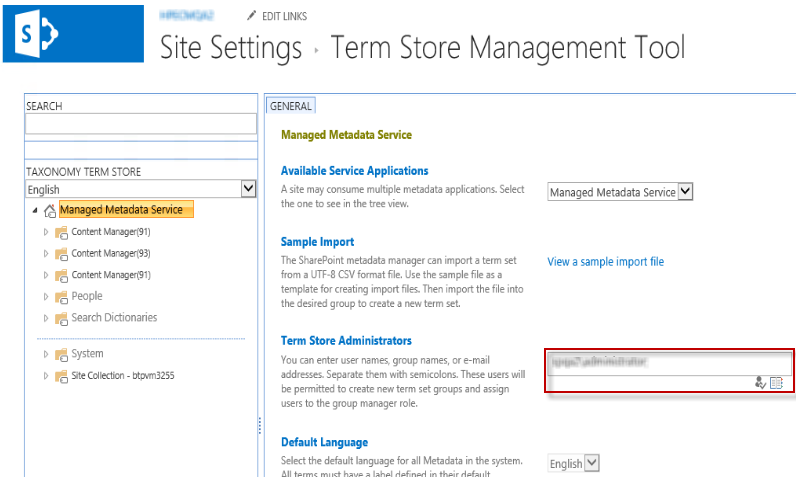
Go to Site Settings on any site, then under the Site Administration section, click Term store management link.
The Term Store Management Tool page is displayed.
OR
-
From the Central Administrator, go to Application Management > Service Applications > Manage service applications > Managed Metadata Service.
The Term Store Management Tool page is displayed.
-
-
SharePoint Online
-
Login as a tenant administrator, click Admin at the top right and click on SharePoint:
-
In the SharePoint admin center, you can see a list of site collections. On the left-hand menu, click on term store.
-
-
-
Adding a term store administrator
This process is the same, whether on premise, or on SharePoint Online.
Make sure you have the root of the term store selected in the left-hand pane.
Enter the appropriate account into the Term Store Administrators field, check the account using the tick icon, then click Save to apply.
-
NOTE: This process is same for both SharePoint Online and on premise.
-
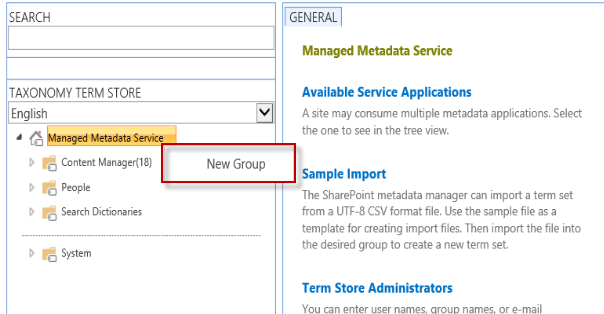
In the left-hand navigation pane, click Managed Metadata Service root drop-down menu and choose New Group.
-
Type the group name in and press return. The name that you give to your group is very important. It must be in the format:
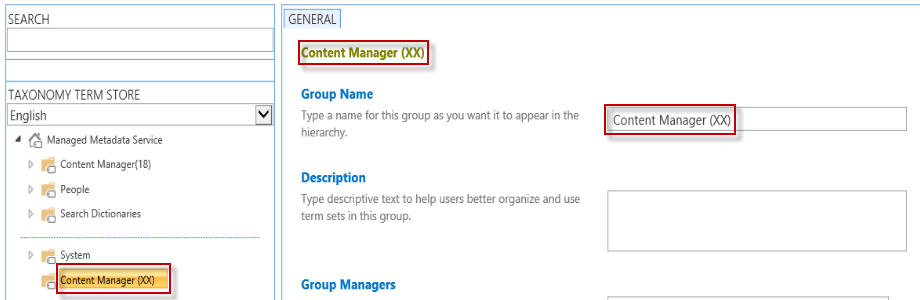
Content Manager(database ID)Replace the term “database ID” with the 2 character identifier of your Content Manager dataset. For example, if your dataset ID was “45” then the name of your group would be:
Content Manager(45)NOTE: There is no space between “Manager” and the opening bracket.
In the example below I have created a Content Manager group with a database ID of ‘XX’. Once the group has been created, the management page for the group is displayed.
NOTE: Editing (adding/deleting/changing) the termsets/terms in Content Manager Term Store group is not allowed.
NOTE: If you are using custom fields created using external termstore, the following are the constraints:
-
when you modify the values in Content Manager, make sure to use semicolon (;) as the delimiter. Anything other than semicolon (;) is not supported.
You will find an entry with an invalid value in the logs.
-
when you modify the values in Content Manager and you enter a value which is not present in the termset, the values are not reflected in the Sharepoint.
A failure message stating that the value is not available in the termset is logged.
-
-
-
Granting permissions to a term store group
-
In the left-hand navigation pane, select the appropriate Content Manager group, with the correct database ID. In this example I’m working with a term store group with a database ID of ‘XX’.
-
Add user(s) to the Contributors section, click on the validate icon (Person with a tick) or use the people picker to select the user(s), and then click Save.
NOTE: For on premise, add the job service user or the logged on user who generally runs configuration tool as Contributor for the term set group.
For Online, add i:0i.t|00000003-0000-0ff1-ce00-000000000000|app@sharepoint as contributor for the term set group.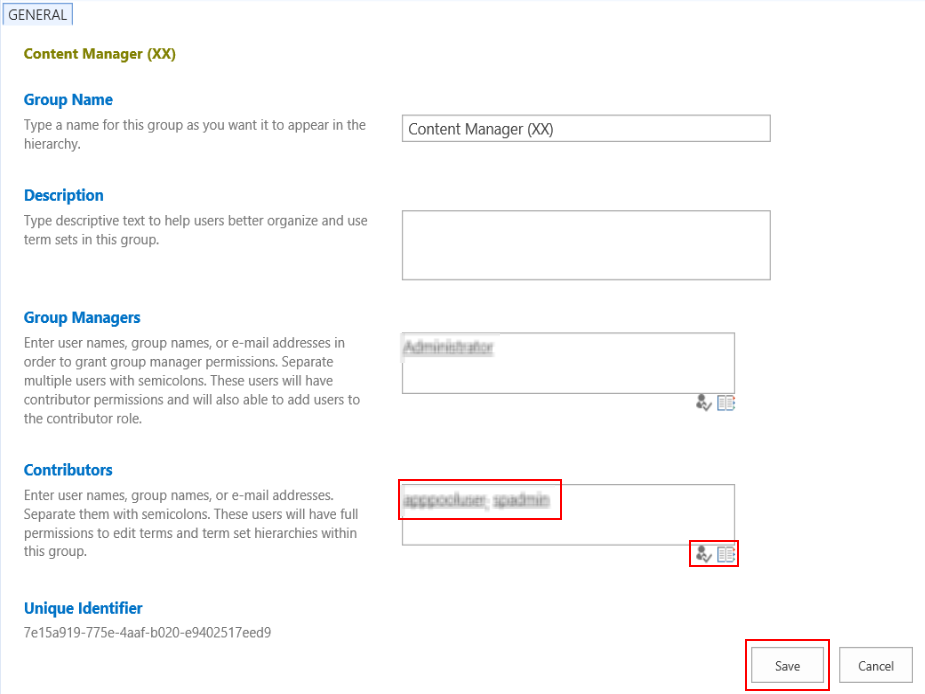
-
Verify that user (s) is saved into the Contributors section. Sometimes, the first attempt to save the value doesn’t work, and you need to repeat it a second time.
-
Accessing service applications
To access SharePoint Service Applications, perform the following steps:
-
Open SharePoint Central Administration.
-
From the Application Management section, click on the Manage service applications link.
The service application list will show all service applications on the farm, and importantly, whether or not they are ‘Started’. Click on the required service application link to manage it. Note, that if there are two links, the topmost link goes to the actual service, the bottom link is normally for configuring the associated proxy. In the example below, clicking this link will go to the Managed Metadata Service.
Creating a Subscription Settings Service Application
The following suggested PowerShell script will create a service called SettingsServiceApp. You do not have to use this script to create the application. This is provided to fast track the creation for you. Make sure you are logged in as a farm administrator, and that you run PowerShell as administrator, or else the script will not run correctly.
NOTE: If you don’t use Powershell ISE to run this script, you will need to run it line by line.
Remove-PSSnapin Microsoft.SharePoint.PowerShell -erroraction SilentlyContinue

Add-PSSnapin Microsoft.SharePoint.PowerShell -erroraction SilentlyContinue

$accountName = Read-Host "Enter your timer service account in "domain\username" format"

$account = Get-SPManagedAccount $accountName

# Gets the name of the Farm administrators account and sets it to the variable $account for later use.


$appPoolSubSvc = New-SPServiceApplicationPool -Name SettingsServiceAppPool -Account $account

# Creates an application pool for the Subscription Settings service application.

# Uses the Farm administrators account as the security account for the application pool.

# Stores the application pool as a variable for later use.


$appSubSvc = New-SPSubscriptionSettingsServiceApplication –ApplicationPool $appPoolSubSvc –Name SettingsServiceApp –DatabaseName SP_2013_Subscriptions_Service_App

# Creates the Subscription Settings service application, using the variable to associate it with the application pool that was created earlier.

# Stores the new service application as a variable for later use.


$proxySubSvc = New-SPSubscriptionSettingsServiceApplicationProxy –ServiceApplication $appSubSvc

# Creates a proxy for the Subscription Settings service application.
Once the script has been run on the SharePoint application server, perform an IISreset in an elevated cmd prompt. Confirm that the service application has been created. See Accessing service applications.
Starting a service
-
Go to SharePoint Central Administration, and from the System Settings section click on the Manage services on server link.
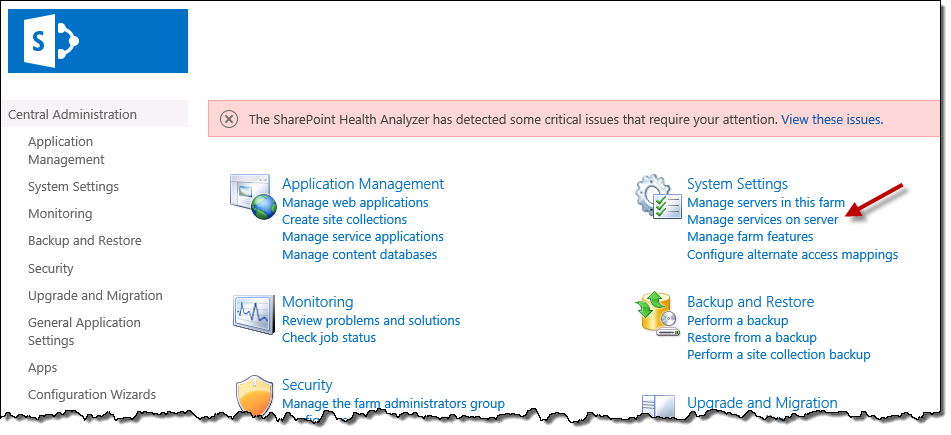
The Services on Server page, will show all services in the farm, and show which services are running on the server selected at the top of the page. Note that in multi-server farms, services may be spread across different servers. Make sure you check each server in the farm. To start a service, select the required SharePoint Server in the drop-down, locate the required service to be started and click on the Start link in the Action column. In the example below clicking Start will start the Document Conversions Launcher Service on the SPDEV12013 server.
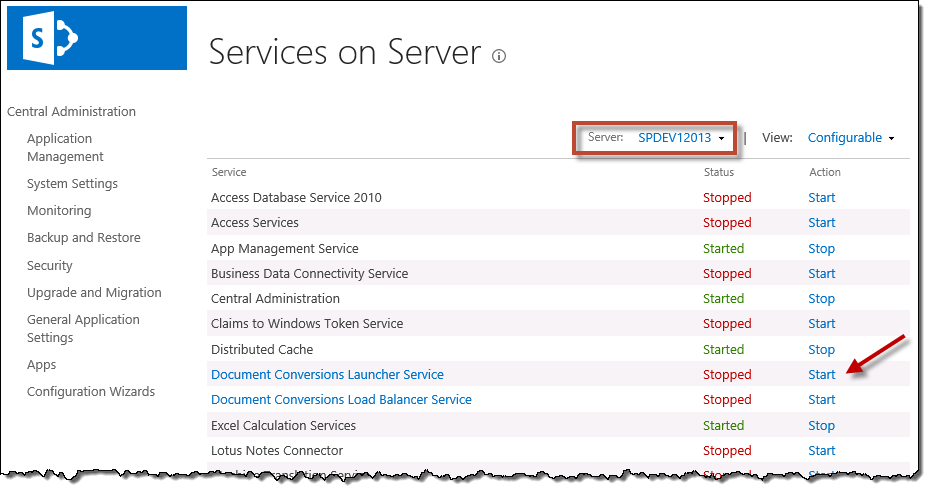
If the required service fails to start, troubleshooting the issue is outside the scope of this document. Please consult SharePoint documentation regarding how to rectify the issue.
Accessing a user profile
-
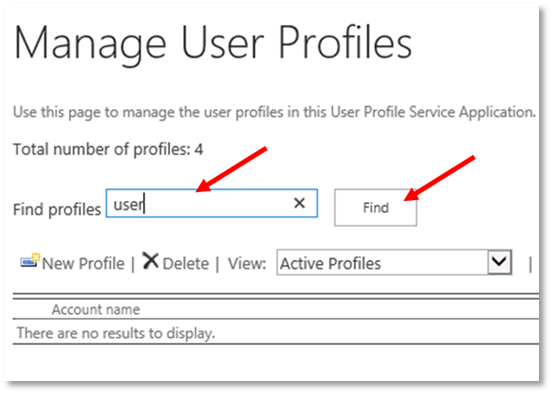
From Central Admin, navigate to Application Management > Manage Service Applications > User Profile Service Application > Manage User Profile.
-
Search for the user whose profile is to be viewed.
-
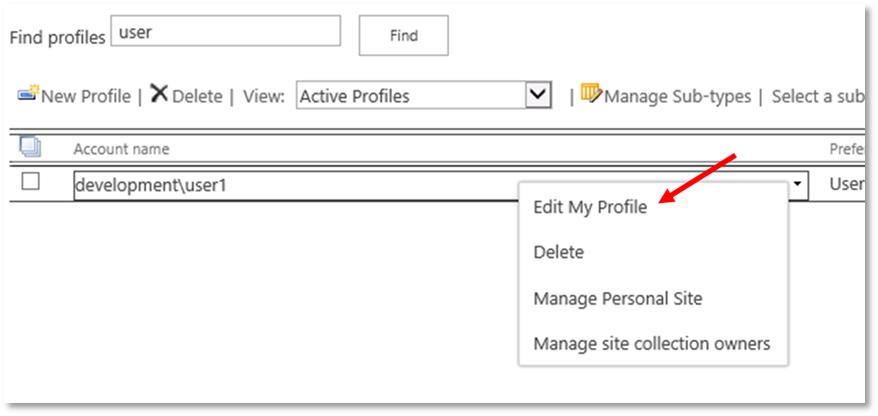
Use the Edit My Profile menu option to view the profile of the user.
-
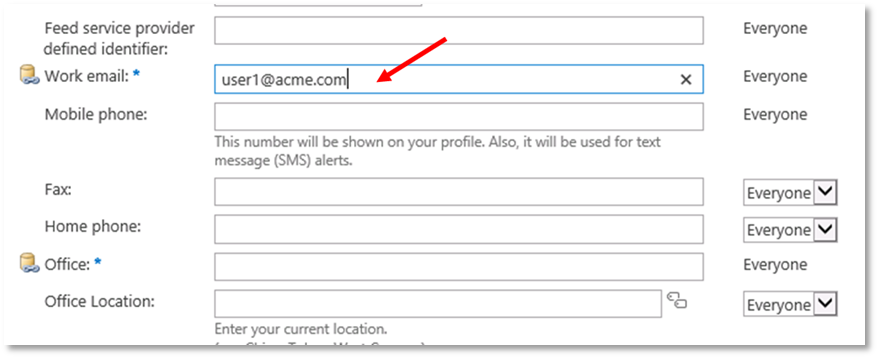
Modify properties as needed. For example, to set the email address of the user, enter it in the Work email field.
Enabling Performance mode for SharePoint Online
When the Content Manager SharePoint integration is deployed in a SharePoint Online environment, the performance deteriorates when you use the bulk add/update/delete document functionality. To reduce processing times, fundamental changes are made to the way remote events are processed.
The following are the factors considered to improve performance:
-
Reduce SharePoint Server calls from SharePoint Integration.
-
Caching the document information temporarily from SharePoint and CM Servers from the first event (first selected document in bulk update) processed and use the same information for subsequent events.
To enable the performance mode feature, edit the web.config file and add the key <add key="EnablePerformanceMode" value="true" />.
To enable, perform the following:
-
Stop the Content Manager SharePoint Service.
-
Open web.config file from
[Program Files]\Micro Focus\Content Manager\Content Manager SharePoint Integrationfolder. -
Add the following key under app settings node:
<appSettings>
<add key="EnablePerformanceMode" value="true"/>
</appSettings>
-
Save and close the web.config file.
-
Reset the IIS.
-
Restart the Content Manager SharePoint Service.
Known limitations
The following are the known limitations when you enable the performance mode:
NOTE: The following limitations are applicable only in bulk add/update/delete document use cases.
-
In existing behavior, updates for documents will be prevented if there is a pending finalize or archive job on the site, list or list item level for that document. However, with the performance mode enabled, this feature will not work. Documents can be updated even if there is a pending finalize or archive job at site, list or list item level.
-
If you upload a duplicate document that has already been managed, you need to re-manage the document in order to re-sync the security profile, if any.