Configure the Fileshare Server
In this walkthrough, it is assumed that your Fileshare server runs on the same machine as your enterprise server. You will create a directory to use as the Fileshare directory, and within this, create a subdirectory to contain the user files created and accessed by applications.
- Start an application command prompt.
- Create a directory called fsdir, and then within it create a subdirectory datasets.
-
Change into the directory that you just created, and enter:
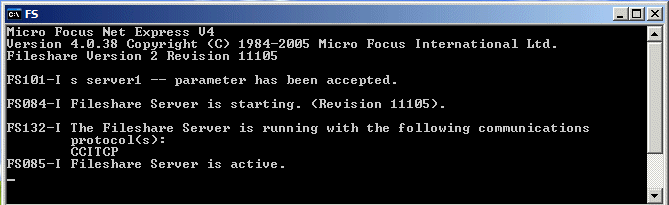
start fs /s server1
Note: To add tracing to the Fileshare server, append /tr f, or press F2.Tracing is written to the console window and also to a file called fsscreen.lst in your Fileshare directory. You should normally delete fsscreen.lst before starting a Fileshare server, otherwise your new trace output will be concatenated to whatever is currently in the file, which can be confusing when trying to track down problems.
This starts a Fileshare server named server1.
The Fileshare console window appears, as shown below.
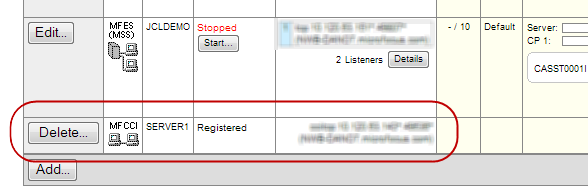
If you have the ES Admin home page visible at this point, you may notice that an entry appears for server1. This is because Fileshare is implemented using Micro Focus' Common Communications Interface (CCI), and a Fileshare server is an example of a CCI server. ES Admin shows CCI servers as well as enterprise servers. The current status is shown as Registered.