To View and Administer HSF Data for a JES Region
The Historical Statistics Facility (HSF) needs to be enabled for an Enterprise Server for .NET JES region before being able to view and administer the HSF data using the Enterprise Server for .NET Administration UI.
To view and administer HSF data:
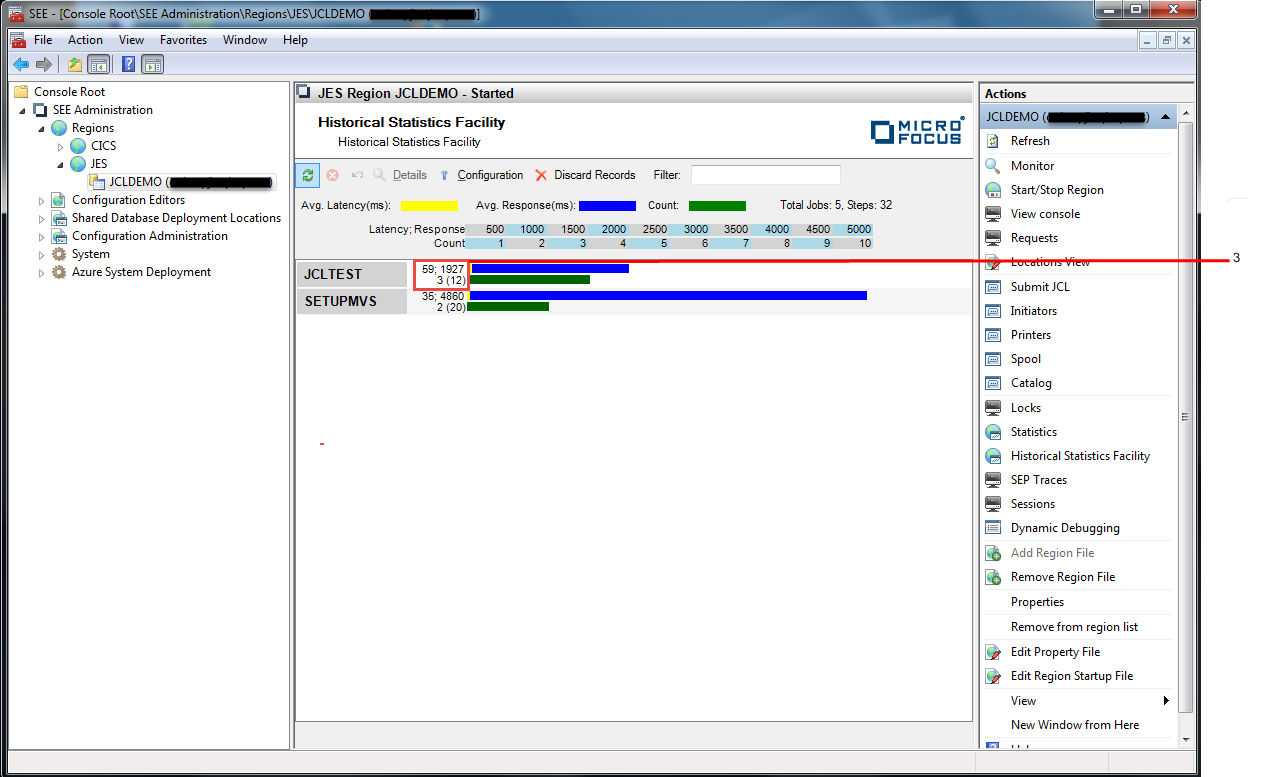
- Select a JES region from within the Enterprise Server for .NET Administration UI, and click Historical Statistics Facility in the Action pane. See 1 in the diagram below. The Historical Statistics Facility view is displayed in the Results pane, but no HSF data is initially shown. This provides you with the opportunity to configure/ restrict the number and/ or range of HSF jobs that you want statistics to be displayed for. By default, the most recent 1000 jobs will be used.
-
Click
Refresh to display the HSF data. See
2 in the diagram below.

-
The HSF data is displayed as an alphabetical list of all the jobs that have executed for the configured number and/ or range
of records. For each job, the average latency, average execution time and the number of times executed is displayed. See
3 in the diagram below.
-
Double-clicking a job name will display details for each individual invocation of it. See the diagram below.
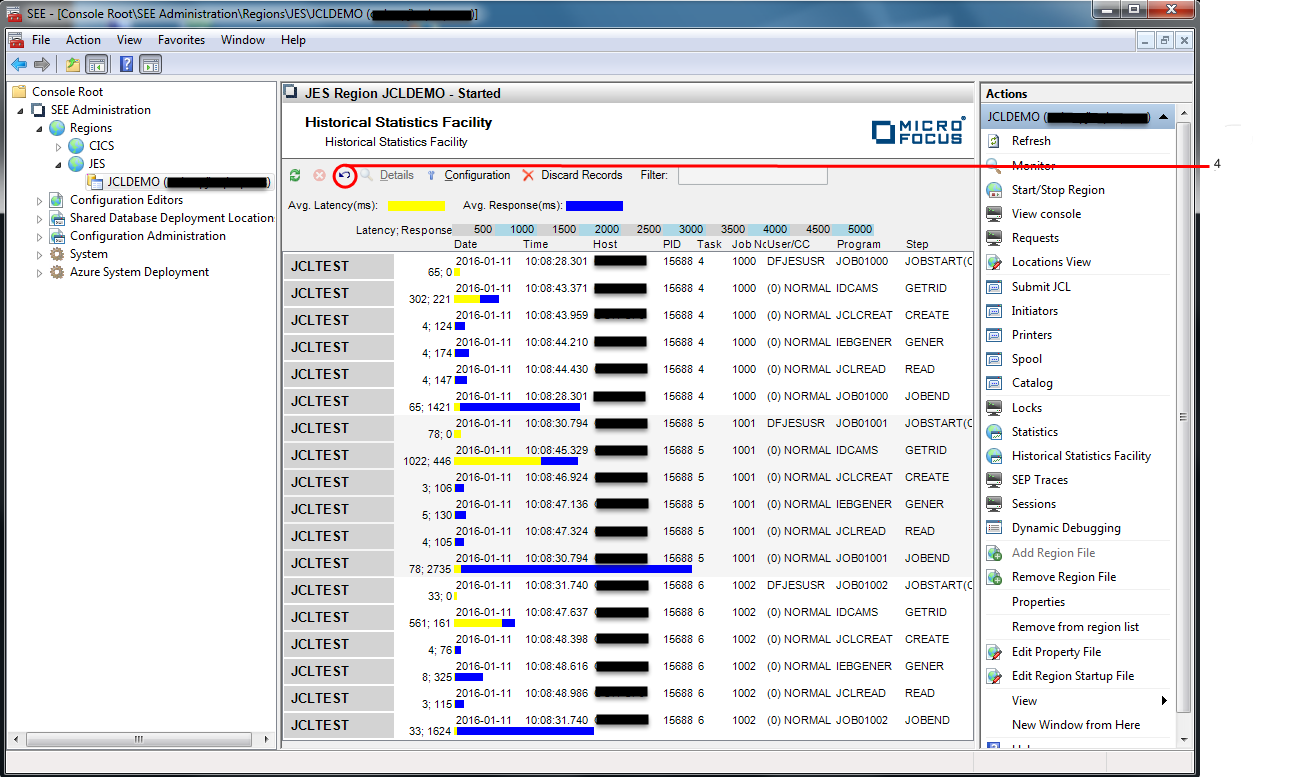
Click Return to return to the previous view showing the alphabetical list of job names. See 4 in the diagram above.
-
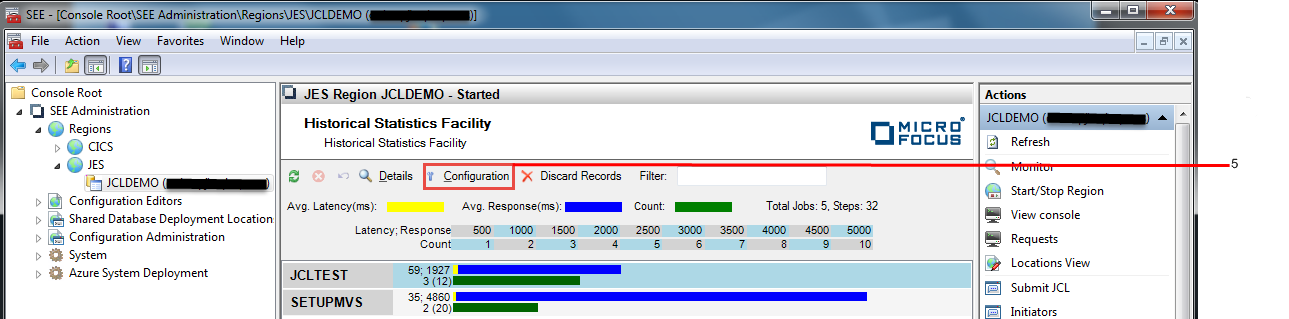
To configure/ restrict the number and/ or range of HSF data that you want statistics to be displayed for, click
Configuration. See
5 in the diagram below.
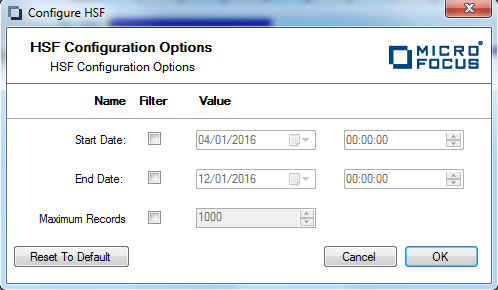
The Configure HSF dialog is displayed:
 In this dialog you can:
- Specify the range of HSF data that you want statistics displayed for, by checking the Start Date and/ or End Date filters and selecting the required dates and times.
- Specify the maximum number of jobs that you want statistics displayed for, by checking the
Maximum Records filter and entering the number of jobs you want to see.
Note: If Maximum Records is not specified, all jobs will be included.
Note: You will need to refresh the Historical Statistics Facility view for the configured options to take effect. -
To delete HSF data from the region database, click
Discard Records. See
6 in the diagram below.

The Discard HSF Records dialog is displayed:
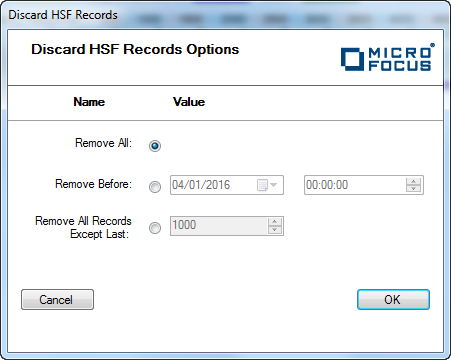 In this dialog you can:
- Specify that all HSF data is deleted by checking Remove All.
- Specify the date and time before which all HSF data is deleted, by checking Remove Before and entering the date and time.
- Specify the most recent number of jobs in the HSF data to remain, by checking Remove All Records Except and entering the number of jobs.
Note: Deleting a large number of records can take a very long time to complete. You might prefer to use the seehsf command-line tool to do this rather than blocking the UI while the delete operation is performed.