Run MFDEMO
With the IMSDEMO enterprise server region started in Enterprise Server (see the Start IMSDEMO section in the previous topic), you can now run the MFDEMO application from the Rumba TN3270 mainframe display, and add data to the IMS database.
The installation of Enterprise Developer includes the Micro Focus Rumba emulator. The Rumba TN3270 Mainframe Display is embedded within Enterprise Developer. As part of this tutorial, you use the embedded Rumba display to run the application.
Configure the TN3270 settings in Enterprise Developer
Here, you check your Enterprise Developer options and ensure that the embedded Rumba display is selected:
- In the IDE, click Window > Preferences.
- Expand Micro Focus > Enterprise Server, and click TN3270.
- Ensure that Enable display, Rumba (Embedded) and Connect automatically are all selected.
- Click Apply and Close.
Start the Rumba Mainframe Display View
- In Server Explorer, right-click
IMSDEMO; then select
Show TN3270 Display.
This opens the Rumba Mainframe Display view and connects Rumba to the IMSDEMO enterprise server using a TN3270 connection. You can see the login page of the IMSDEMO application.
Note: If the Rumba Mainframe Display view does not connect automatically, click (Connect).
Start the MFDEMO Application
- On the IMS sign-on screen, type SYSAD into both the USERID and PASSWORD fields using the Tab key to move from one to the other; then press Enter.
- Press Ctrl+Shift+Z to clear the Rumba Mainframe Display screen.
- Enter
MFDEMO
with a trailing space.
Rumba shows the MFDEMO initial menu screen, DEMO91.
Add Data
In the sections that follow, each set of instructions includes a screen shot showing the terminal emulator with required fields in green and red.
- Create a TESTDEPT table
-
- In the
FUNCTION CODE field, type
A to select the <A>DD function.
This action advances your cursor to the TABLE-ID field.
- In the
TABLE-ID field, type
TESTDEPT.
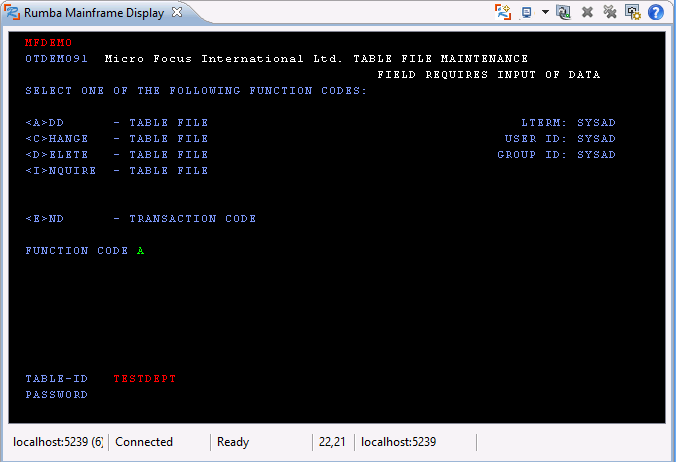
- Press
Enter.
This action advances you to the DEMO92 input screen.
- In the
FUNCTION CODE field, type
A to select the <A>DD function.
- Input records
-
- Complete the following fields as indicated:
DESCRIPTION A TABLE OF TEST DEPARTMENTS NUMBER OF CHARACTERS IN ELEMENT KEY 20 NUMBER OF CHARACTERS IN ELEMENT 50 PASSWORD PROTECT N - Tab to the first entry field under
ELEMENT KEY; then add the following records:
ELEMENT KEY ELEMENT VALUE/DESCRIPTION 123 DEPARTMENT 123 234 DEPARTMENT 234 - Tab to the
RETURN field; then type
X.
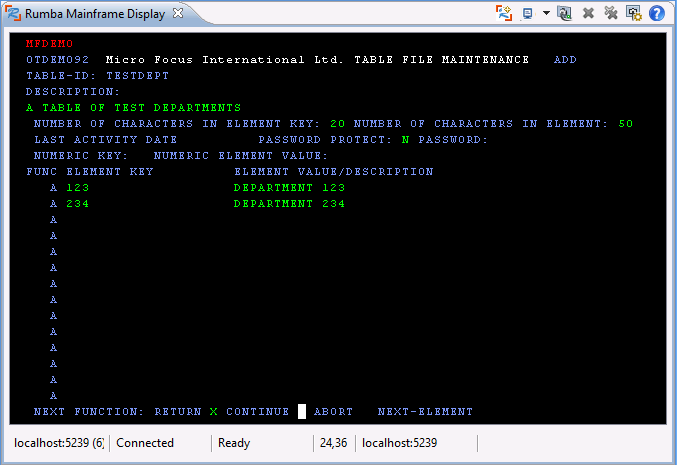
- Press Enter to return to the main menu.
- Complete the following fields as indicated:
- Add an additional record
-
- In the
FUNCTION CODE field, type
C to select the <C>HANGE function.
This action advances your cursor to the TABLE-ID field.
- In the
TABLE-ID field, type
TESTDEPT.
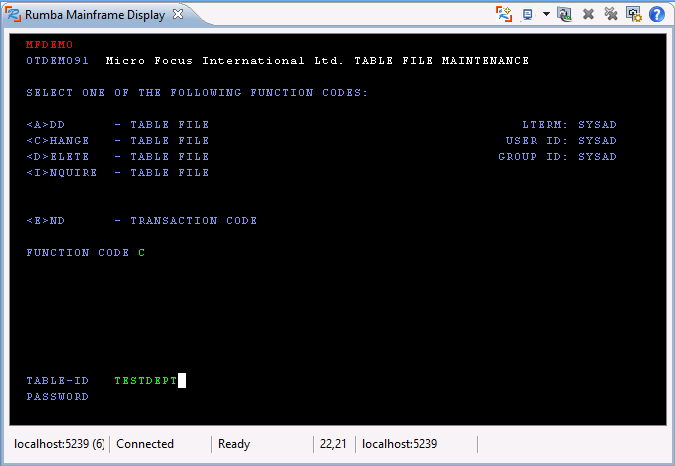
- Press
Enter.
This action advances you to the DEMO92 input screen.
- Tab to the first field in the third row under
FUNC; then add the following record:
FUNC ELEMENT KEY ELEMENT VALUE/DESCRIPTION A 345 DEPARTMENT 345 - Tab to the
RETURN field; then type
X.
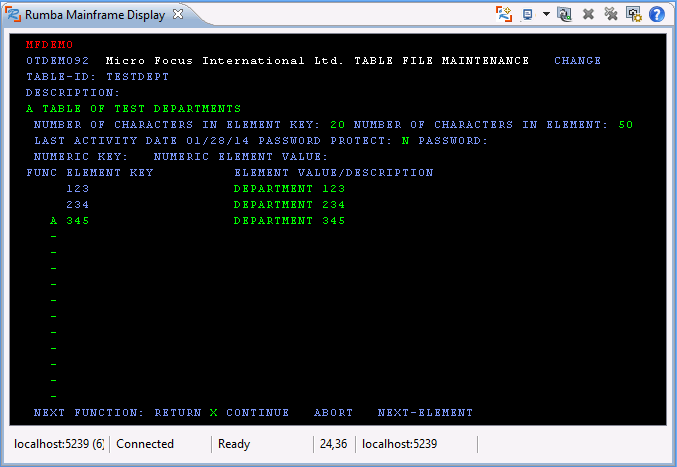
- Press Enter to return to the main menu.
- In the
FUNCTION CODE field, type
C to select the <C>HANGE function.
- Add the TESTERS table and records
-
- Using the same methods as you did to create the TESTDEPT table and add records, add the TESTERS table using these values:
DESCRIPTION A TABLE OF TESTERS NUMBER OF CHARACTERS IN ELEMENT KEY 20 NUMBER OF CHARACTERS IN ELEMENT 50 PASSWORD PROTECT N - Then add the following records:
ELEMENT KEY ELEMENT VALUE/DESCRIPTION JOHN SMITH IMS DC TEST TECHNICIAN JANE JONES IMS DB TEST TECHNICIAN 
- Press Enter to return to the main menu.
- Using the same methods as you did to create the TESTDEPT table and add records, add the TESTERS table using these values:
- Exit MFDEMO
-
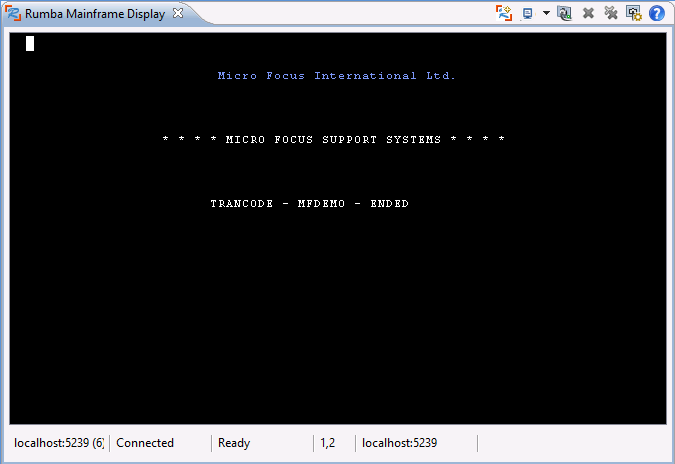
- On the main menu, type
E into the
FUNCTION CODE field; then press
Enter.
This action takes you to the TRANCODE - MFDEMO - ENDED screen.
- Disconnect from the TN3270 display. To do this in Rumba, click
Disconnect on the toolbar
 .
.
- On the main menu, type
E into the
FUNCTION CODE field; then press
Enter.