Deploying Artifacts to a File Storage Drive
There are various ways to deploy artifacts (programs, mapsets, etc.) to an Azure drive running under an Enterprise Server for .NET Azure instance.
Microsoft AZCopy
Use the AZCopy tool provided by Microsoft. This is a high-speed copy utility that can be used to deploy files to an Azure File Storage instance. The tool and usage descriptions are available from http://azure.microsoft.com/en-gb/documentation/articles/storage-use-azcopy/.
FTP
Install an FTP server onto the monitor roles and use it to upload and download files.
- Micro Focus does not recommend a particular FTP server, but the server software must be a standalone executable. That is, it must not require installation using MSI or other installer technology.
- The example below will use a commercial FTP server called Xlight.
- Purchase Xlight from http://www.xlightftpd.com/.
- Install Xlight onto your local machine and run it.
- Configure a user ID and password for the server.
- Associate the user account with a drive and path, e.g. v:\.
- Save and exit.
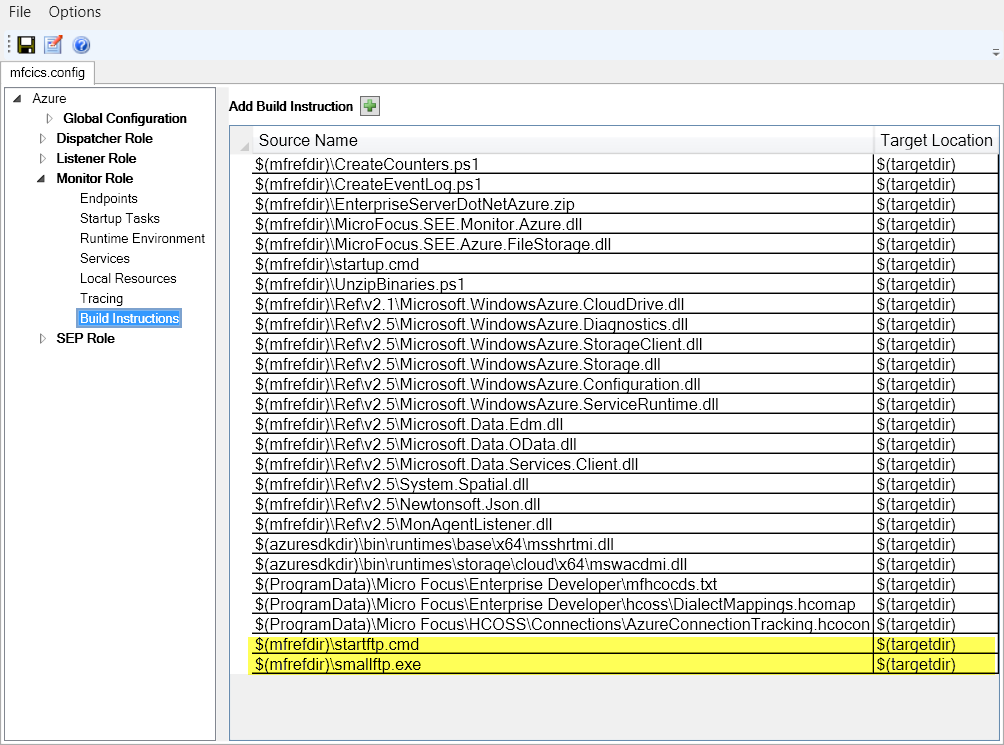
- Create a self-extracting archive of the Xlight server and configuration using a tool such as 7-Zip or WinZip. For this example, we will put those files in a directory named smallftp and call the archive smallftp.exe.
- Copy the smallftp.exe file to the reference directory for your Azure deployment. This is the directory containing files such as EnterpriseServerDotNetAzure.zip which are deployed to Azure as part of various roles.
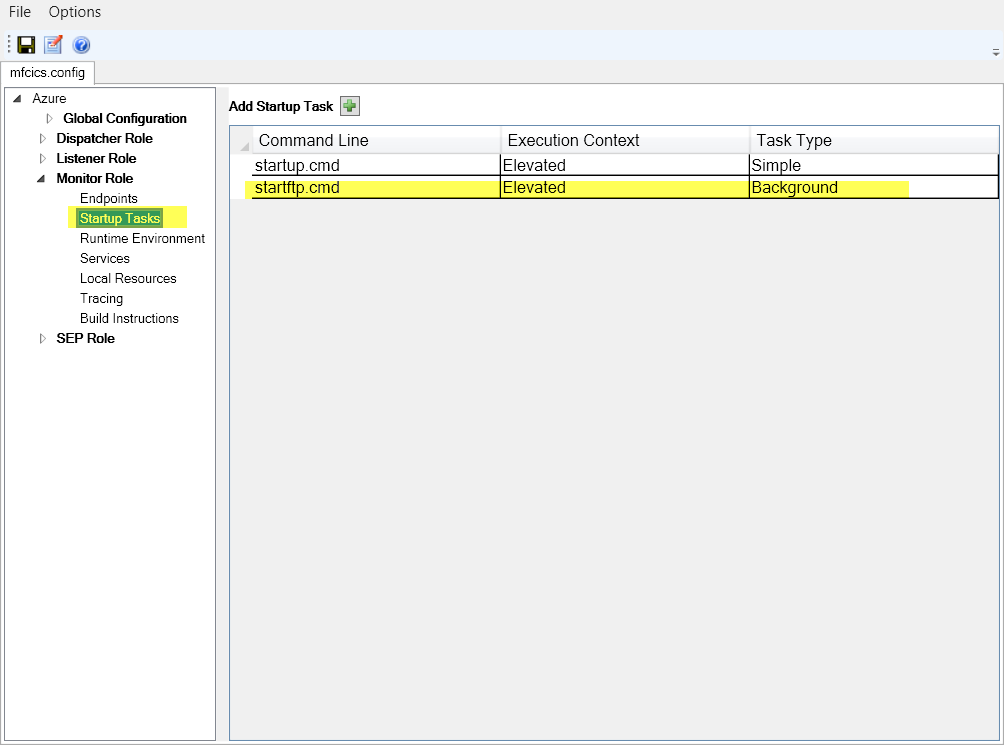
- Create a new command file called startftp.cmd with the following contents:
:file_check
REM seemap.cmd is created when the share is made available by the role startup processing.
IF EXIST seemap.cmd (GOTO file_exists) ELSE (timeout 5 >NUL)
GOTO file_check

:file_exists
REM Map the drive
call seemap v:
d:
REM Extract the archive
e:smallftp -o"d:\" -y
REM Change to the FTP directory and start the server.
cd smallftp
start xlight -startall
- Configure the monitor role in the deployment project to package the two new files startftp.cmd and smallftp.exe.
- Configure the monitor startup commands to run startftp.cmd as a background task.
Deploy the system to Azure. When the monitor roles are running, you should be able to connect an FTP client to your FTP server using hostname.cloudapp.net on port 21. Port 21 is exposed as part of the default deployment on the monitor role for this purpose.
You can also use the seedeploy tool to copy files to and from the cloud drive. For File Storage operations, seedeploy requires an FTP server. See seedeploy.