Validating the Installation
After installation and customization, confirm the connection to the z/OS environment, via the z/Server and Mainframe Access
(MFA) software, is correctly configured. Also, check file mappings for certain types of file, to ensure they are executed
correctly on the mainframe.
- Click .
- Open the workspace that was created during the Getting Started... tutorial.
- If the Team Developer perspective is not already displayed, click .
-
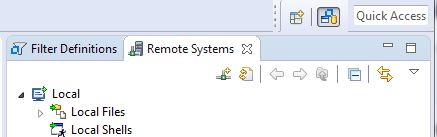
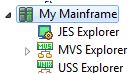
Click the
Remote Systems tab.
-
Create a remote system (mainframe) connection:
-
On the
Remote Systems tab, click
 , or right-click the
Remote Systems pane. If a connection to your mainframe has not been pre-configured and is therefore not listed, choose
and create the connection manually using the following steps.
, or right-click the
Remote Systems pane. If a connection to your mainframe has not been pre-configured and is therefore not listed, choose
and create the connection manually using the following steps.
- Select Micro Focus z/Server, then click Next.
-
Enter the details of the mainframe that has z/Server and MFA server installed.
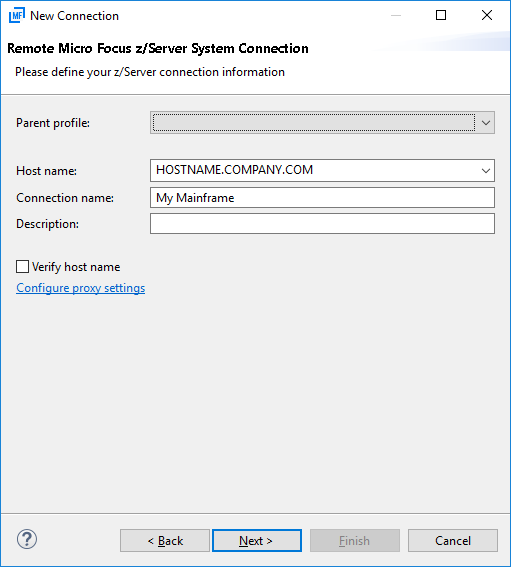
-
Click
Next, enter the MFA port number for the installation on the mainframe, and edit the host codepages, as required.
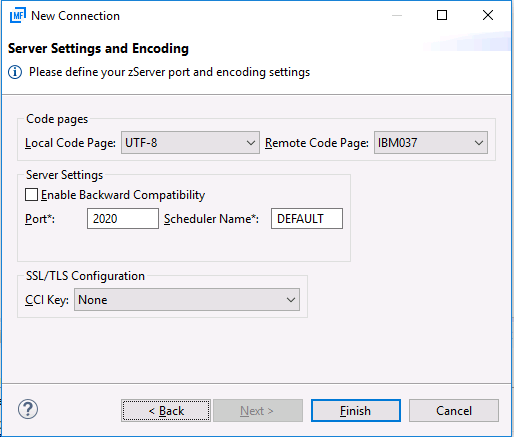
Note: Your systems administrator will have configured the port during the mainframe installation of the software. - Click Finish.
-
On the
Remote Systems tab, click
-
In the bottom pane, click the
File Mappings tab.
Note: If the File Mappings view is not displayed, click .
-
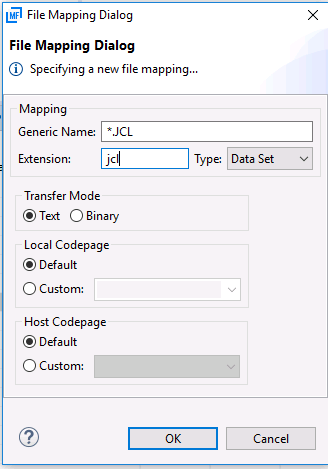
If the following file mappings have not been pre-configured, right-click and choose
Add Mapping, then create the following file mappings:
- Generic Name: *.JCL, Extension: jcl
- Generic Name: *.COBOL, Extension: cbl
- Generic Name: *.COPYLIB, Extension: cpy
- Generic Name: *.ASM, Extension: asm
- Generic Name: *.MACLIB, Extension: mac
- Generic Name: *.BMS, Extension: bms
- Generic Name: *.PLI, Extension: pli
- Generic Name: *.INCLUDE, Extension: inc
- Generic Name: *, Extension: txt
The generic file mapping name "*" must be the last one in the file mappings list. The .pli and .inc extensions are not necessary, if you haven't installed the PL/I sample.
-
Right-click on the connection in the
Remote Systems view and click
Connect.
You are prompted to log on to the mainframe.
Tip: The first time you connect, check the box to remember your userid for future logons.
-
Log on with your normal mainframe user ID and password.
The MVS, JES and USS Explorer entries are displayed in green to indicate you have logged on successfully.
- If the system has not been added to the Application Explorer view, right-click the Application Explorer view and choose Add System(s).
- In the Add System(s) dialog box, select the connection that you just defined, then click OK. The Application Explorer view displays the available applications, one of which is the MVS Projects Sample Application.
- Right-click MVS Projects Sample Application and select Load Application.
-
Expand the application entry, right-click
MVS Projects and select
Create Data Set Filter.
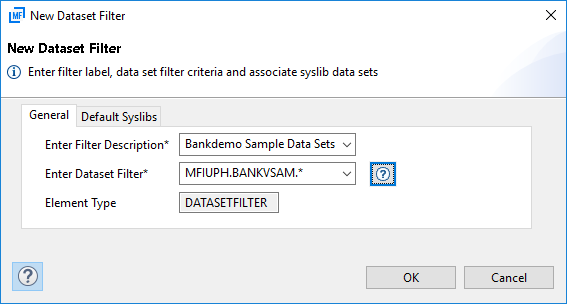
-
In the Filter dialog window, enter the filter description
Bankdemo Sample Data Sets and the filter criterion
userid.BANKVSAM.*, then click
OK and expand this defined filter in the tree view.
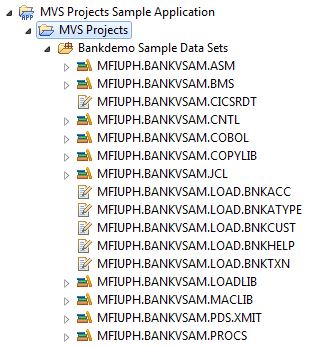
 The tutorial's data sets are displayed.
- If you have installed and want to use the PL/I Staff Sample application, create an additional filter with the filter criterion userid.STAFF.*.
The installation and verification of the BankDemo tutorial is complete. You are ready to run the application.