Sample - CICS BankDemo
The BankDemo application is a more advanced application than the ACCT example. It has more programs and maps, and more interestingly, can be configured to use HCOSS to access the samples database.
This walkthrough covers the steps required to build and deploy the BankDemo application into a database-hosted deployment using a local machine architecture. It will use HCOSS to access the applications database.
If you do not want to use HCOSS to access the database, ignore the HCOSS configuration steps.
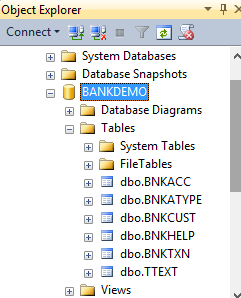
- Create the BANKDEMO database.
- Open the SQL Server Management Studio.
- Connect to the database where you would like to host the region and BANKDEMO database.
They do not have to be on the same machine, but this tutorial assumes that all databases reside on the local machine.
- Open the %PUBLIC%\Documents\Micro Focus\Enterprise Developer\samples\Mainframe\CICS\DotNet\BankDemo\SQL\BankDemoCreateAll.SQL file.
- Execute the SQL. This will create the required tables and pre-load them with the BankDemo data.
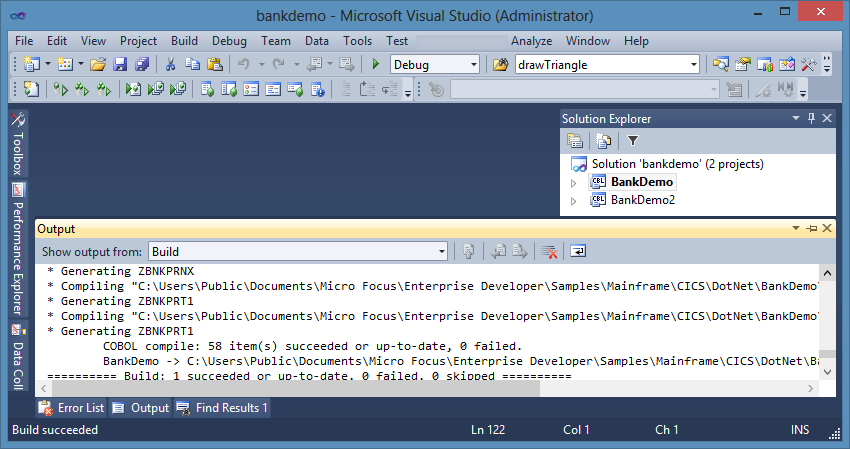
- Build the application in Enterprise Developer for Visual Studio.
- Open Enterprise Developer for Visual Studio.
- Open bankdemo.sln.
- Select the relevant project to build:
- If using HCOSS, make BankDemo the startup project.
- Open the project properties
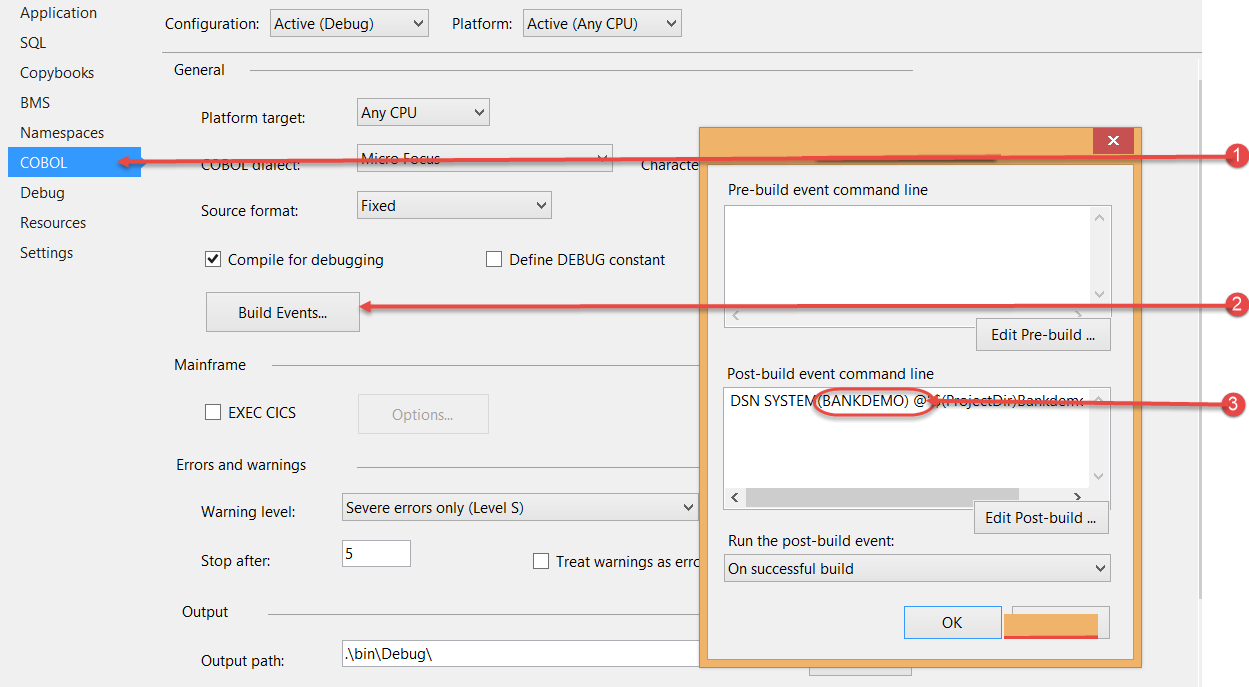
- Select the COBOL properties (1)
- Click build events button (2)
- Enter the DSN name configured in the HCOSS tool below, e.g. BANKDEMO (3).
- Open the project properties
- If not using HCOSS, make BankDemo2 the startup project.
- If using HCOSS, make BankDemo the startup project.
- For HCOSS, configure the database connection.
- Open the HCO for SQL Server Tools.
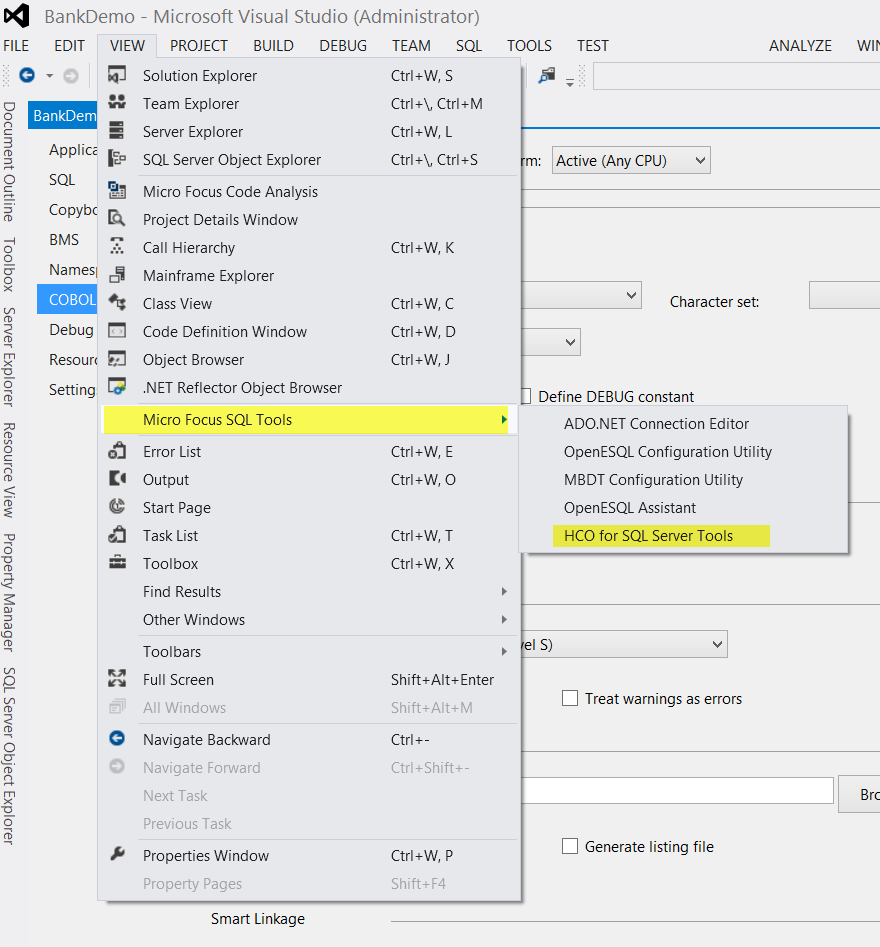
- Select the
Manage Connections activity from the list on the left and select
New SQL Server Connection in the connection list dialog.
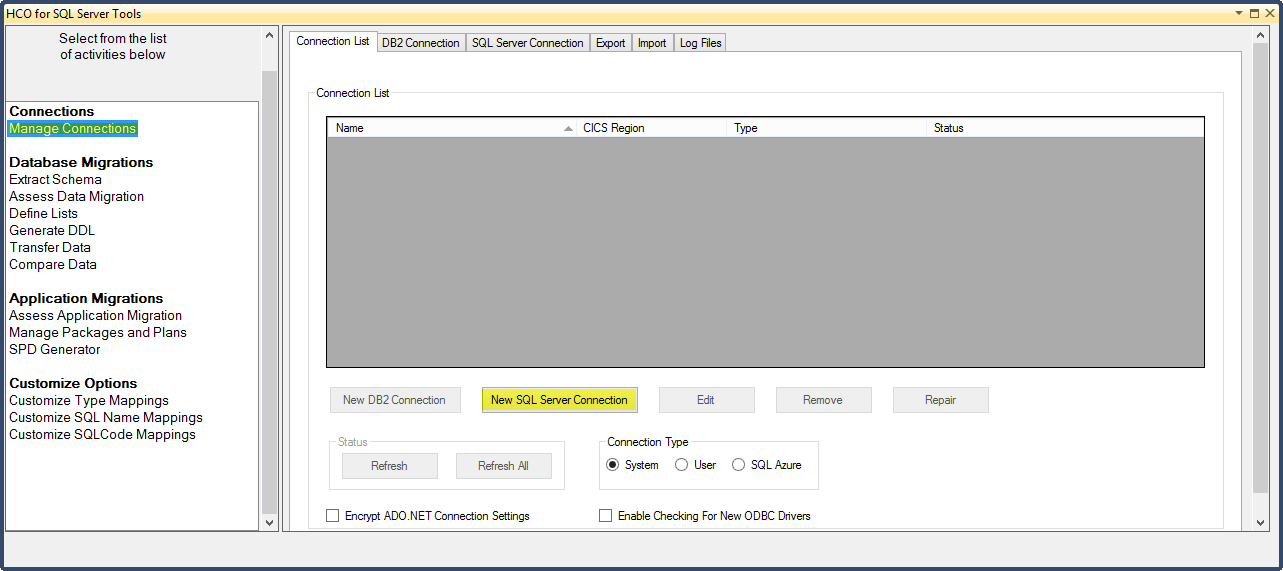
- Configure the connection data.
- Enter BANKDEMO into the Data Source Name.
- Either use Integrated Windows Authentication, or Use the SQL Server Login, depending on how you wish to authenticate in the database.
- Enter the name of the relevant SQL server instance ( e.g. (local) or machinename\databasename ....).
- Check Use a database other than the default database.
- Select BANKDEMO from the database dropdown list.
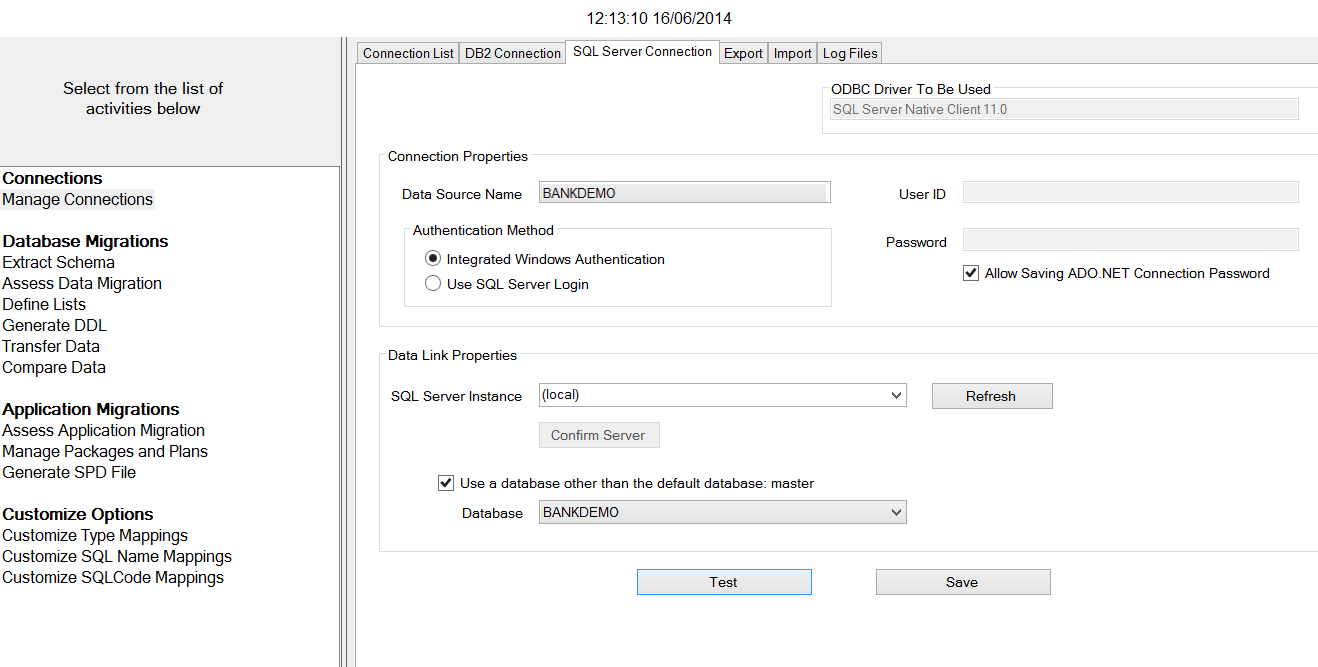
- Click Save.
- Open the HCO for SQL Server Tools.
- Build the project.
The project should build with no errors or warnings. For the HCOSS version, the post-build event will perform the bind to the configured database
- (Optional)This step is presented to show how to manually perform the bind step. The bind is normally done by the post-build
event during the project build for the HCOSS project.
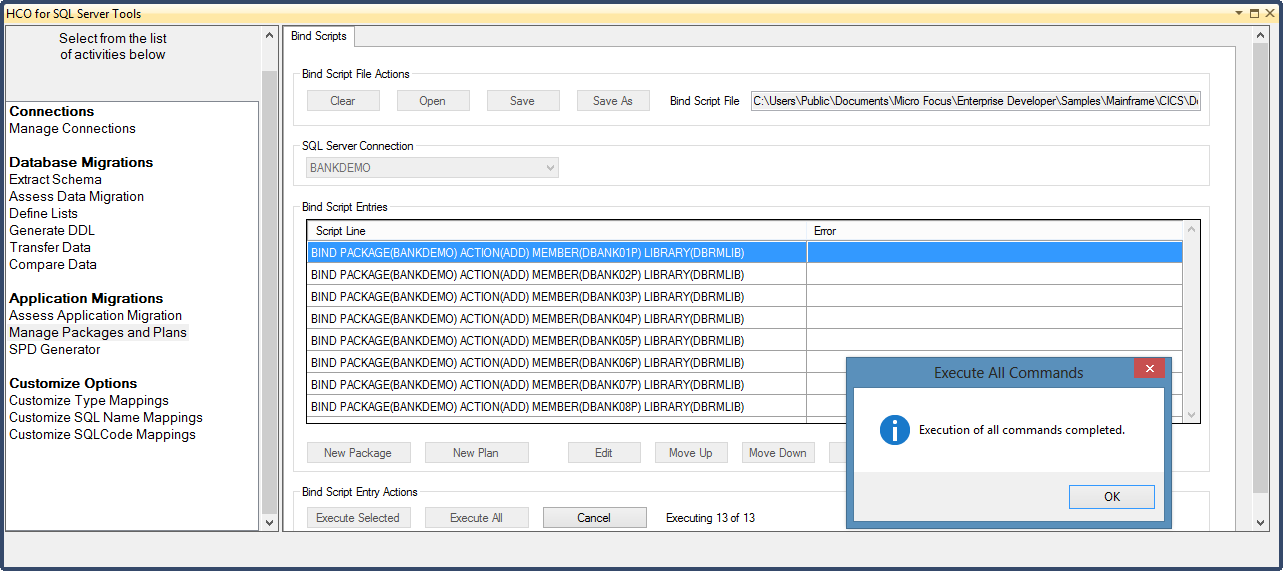
Select the Manage Packages and Plans activity from the Activities list in the left pane.
- Make sure that the bind scripts tab is selected.
- In the Bind Script File Actions, click Open and open %PUBLIC%\Documents\Micro Focus\Enterprise Developer\samples\Mainframe\CICS\DotNet\BankDemo\BankDemo.hcodsn.
- Select BANKDEMO from the SQL Server Connection dropdown.
- Click
Execute All.
This will bind the binaries generated when you built the project to the BANKDEMO database.
- Deploy the BANKDEMO application into the cross-region database.
- Open an Enterprise developer command prompt as Administrator.
- Navigate to the %PUBLIC%\Documents\Micro Focus\Enterprise Developer\samples\Mainframe\CICS\DotNet\BankDemo directory.
- Deploy the bankdemo application into the cross-region database.
- At the command prompt, execute
bankdemodbdeploy with the parameter to the database to deploy to, e.g.
bankdemodbdeploy localhost/sqlexpress or
machinename/databasename. or (local) or (local)/sqlexpress. Please note the use of the forward slash (/) when specifying the database name if required.
It is well worth looking at this batch file to understand how files are uploaded to the database. This knowledge is invaluable to deployment when developing your own deployment scripts.
- At the command prompt, execute
bankdemodbdeploy with the parameter to the database to deploy to, e.g.
bankdemodbdeploy localhost/sqlexpress or
machinename/databasename. or (local) or (local)/sqlexpress. Please note the use of the forward slash (/) when specifying the database name if required.
- Configure an XA resource definition for the bankdemo database as described in
Configuring XA resources
- An XA resource definition is used to tell the region how to connect to the database.
- Ensure that the application plan field in the XA resource definition is set correctly (BANKDEMO in this case).
- You do not need to set the application plan in the region definition, as the XA resource definition takes precedence.
- Create the BANKDEMO region.
These steps are not detailed, as most of the process has been previously described in other tutorials.
- Open the
Enterprise Server for .NET Administration UI.
- Create a new CICS Region called BANKDEMO, hosted in the (local) database.
- Select the region definition file from the cross-region database. It was deployed in the previous step.
- It is called region_bankdemo_db.config
- Edit the region definition or PCT entry and set the XA resource name to the name of the XA resource you created above.
- Create a listener endpoint for the BANKDEMO region on a suitable port.
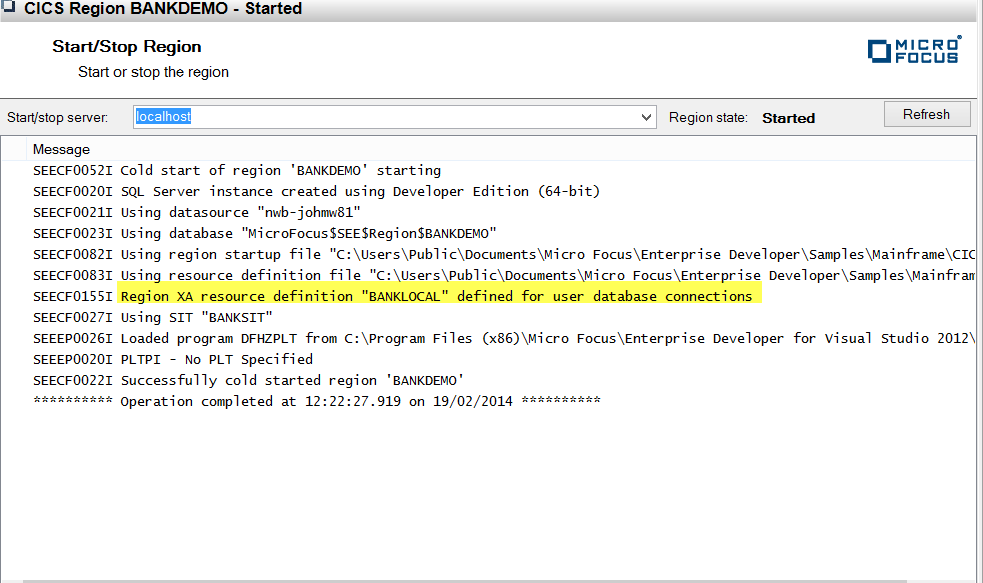
- Start the region.
- Check to see that the system picks up the XA resource definition .
- Start the listener.
- Open the
Enterprise Server for .NET Administration UI.
- Run Bankdemo.
- Connect a TN3270 terminal to the listener port you configured to be associated with BANKDEMO.
You should be presented with a blank screen, with a flashing cursor.
- Type 'bank' and click
Enter.
You will be presented with the initial login screen.
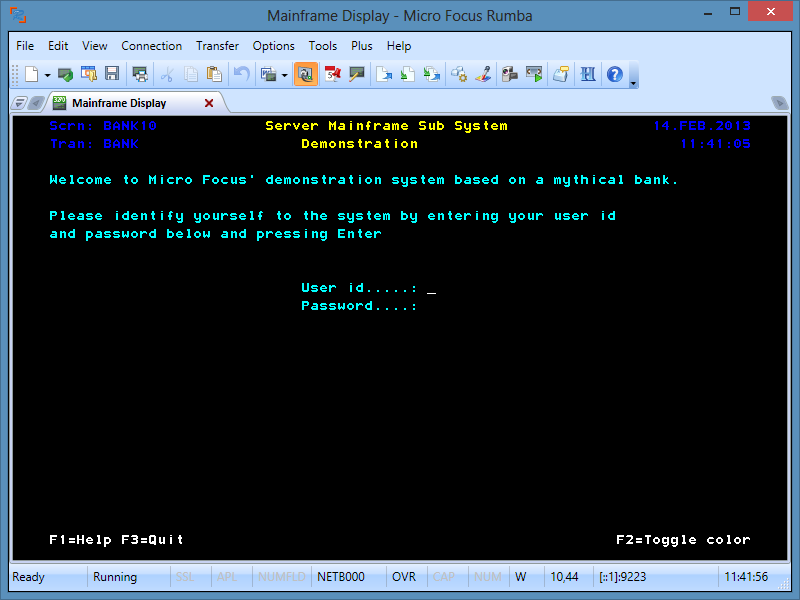
- Enter an account, in the format B000xx, e.g. B0001 and anything in the password field.
You will be presented with the first screen (BANK20) in the demonstration application.
- Tab to a field, enter a character and click
Enter.
Look at the console view in the administration tool, and notice that the transactions are being loaded from the database as opposed to disk.
- Connect a TN3270 terminal to the listener port you configured to be associated with BANKDEMO.