To Configure a CICS Region's Program Location and Search Order
- Open the startup file of the CICS region you are configuring with the Region Startup File editor. See To Edit a CICS Region Configuration.
- In the Results pane expand the Region node and select the Application Program Paths node. See 1 in the diagram below.
-
To add a file system program folder location, right-click on the Application Program Paths node and choose
from the context menu. See
2 in the diagram below.

The Add Program Path dialog is displayed.
Enter the name of the folder containing the user programs to be used by the region in the Folder entry field. Alternatively, use the Browse button to select a folder from a standard file dialog. Note that the folder specified should be on a network drive to ensure that it is available to any machine in a scaled-out system. Click on OK. See 3 in the diagram below.
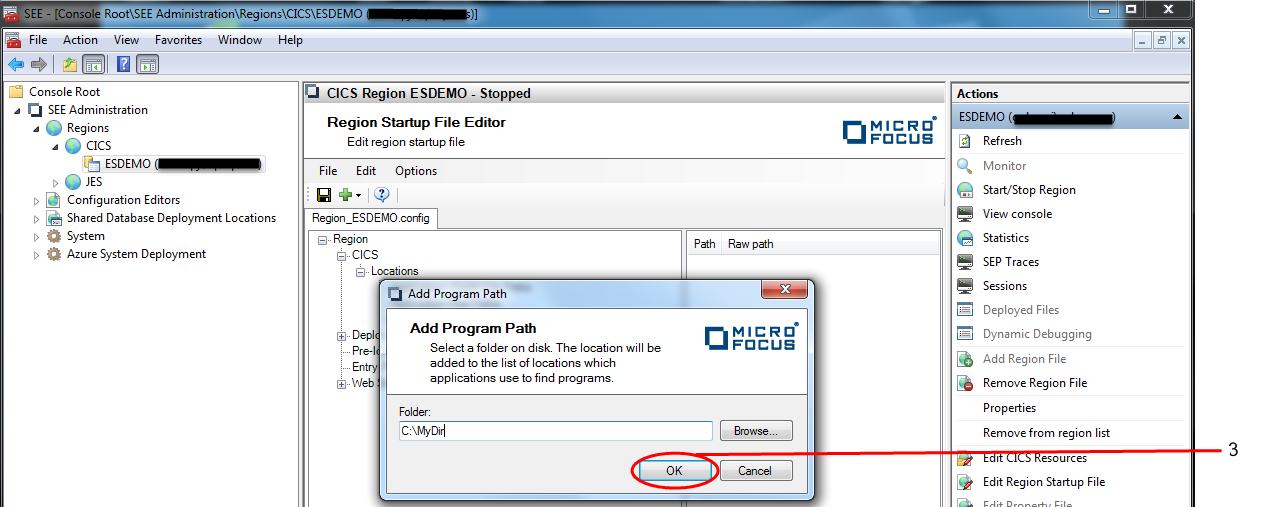
The dialog is dismissed and the folder specified appears in the program folder list.
-
To add the region database as a program location, right-click on the
Application Program Paths node and choose
from the context menu. See
4 in the diagram below.
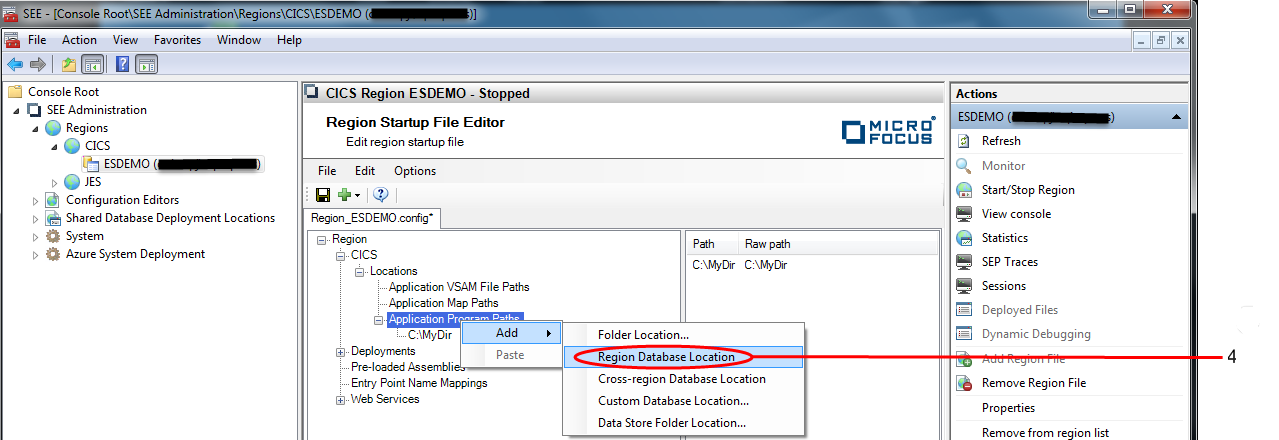 The region database appears in the program folders list. Note that the region database can only be added once to the program
folders list, so will not be available as a location for a subsequent
Add operation.
The region database appears in the program folders list. Note that the region database can only be added once to the program
folders list, so will not be available as a location for a subsequent
Add operation.
-
To add the cross-region database as a program location, right-click on the
Application Program Paths node and choose
from the context menu. See
5 in the diagram below.
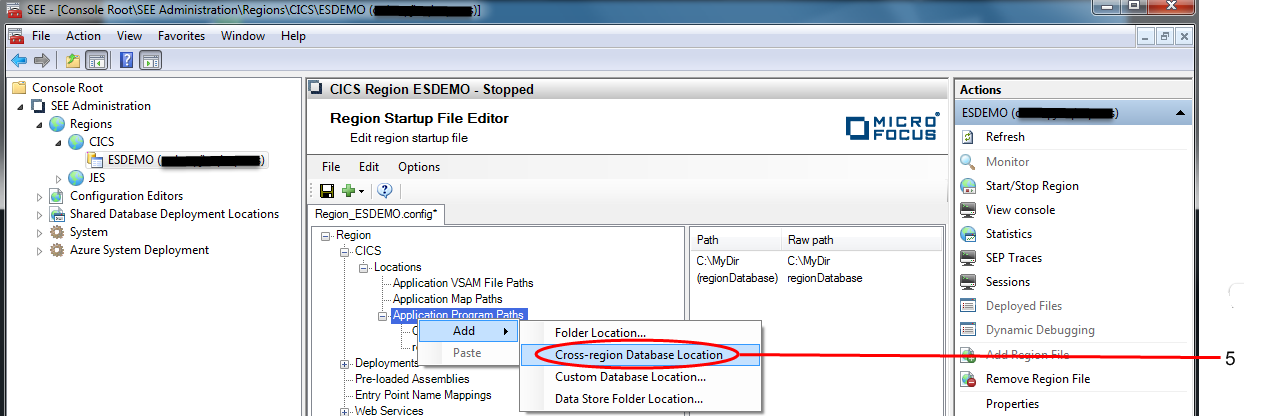 The cross-region database appears in the program folders list. Note that the cross-region database can only be added once
to the program folders list, so will not be available as a location for a subsequent
Add operation.
The cross-region database appears in the program folders list. Note that the cross-region database can only be added once
to the program folders list, so will not be available as a location for a subsequent
Add operation.
-
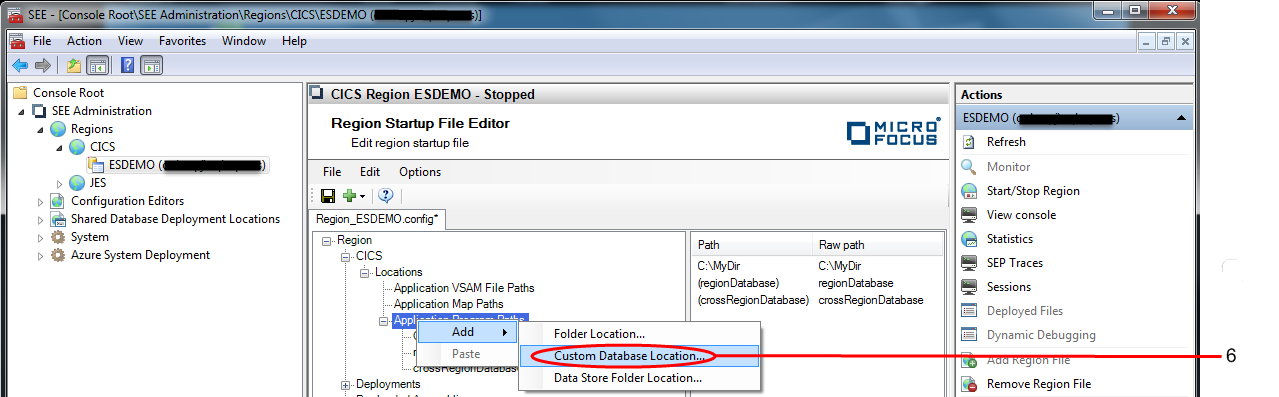
To add a custom database (i.e. a user specified database) as a program location, right-click on the
Application Program Paths node and choose
from the context menu. See
6 in the diagram below.
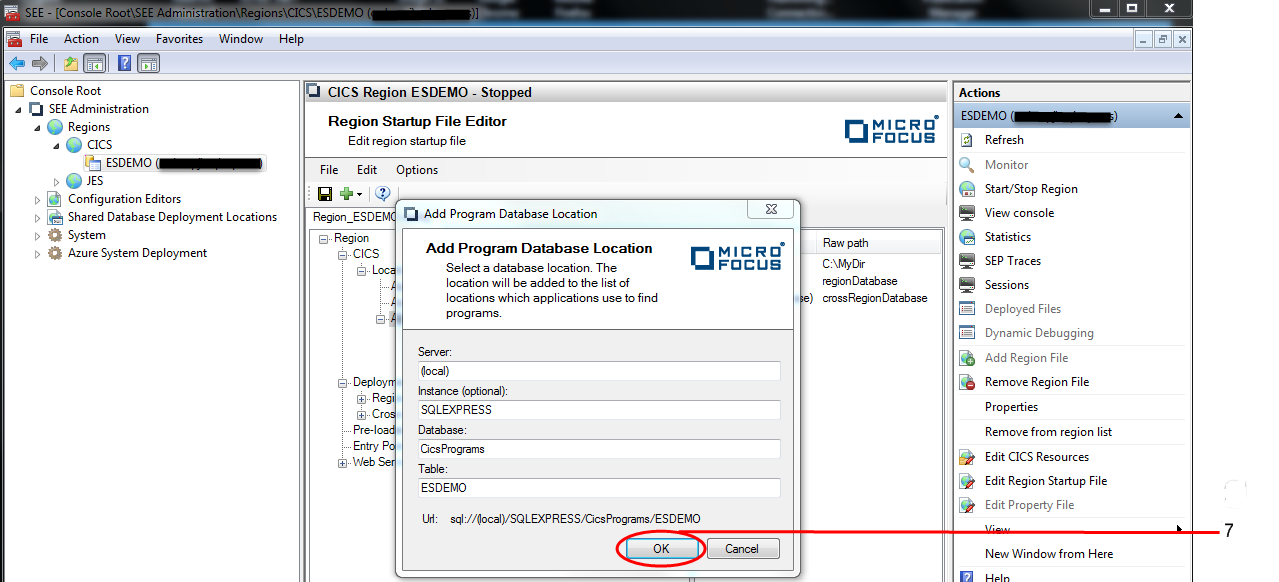
The Add Program Database Location dialog is displayed.
Enter the name of the machine hosting the database in the Server entry field, the name of the database server instance in the Instance entry field, the name of the database in the Database entry field and the name of the table where the programs will reside in the Table entry field. Click on OK. See 7 in the diagram below.
The dialog is dismissed and the custom database location specified appears in the program folder list.
-
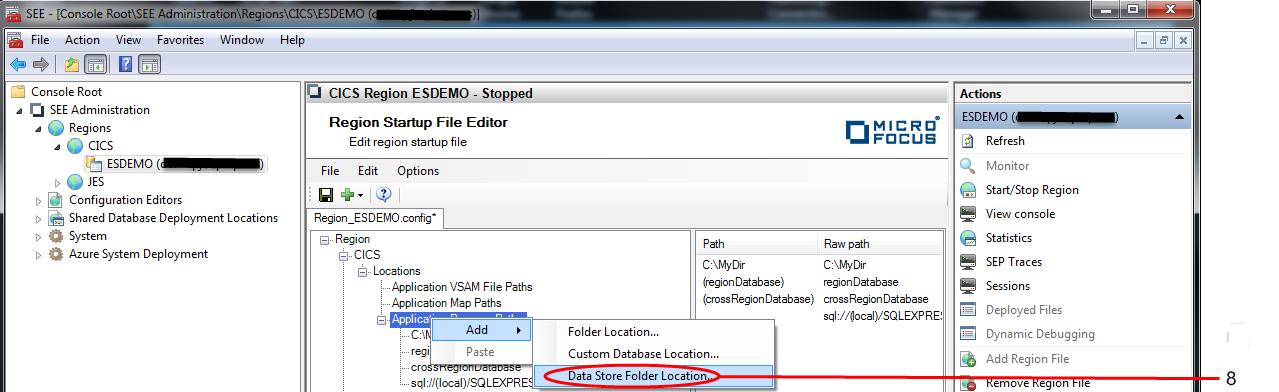
To add a data store database folder as a program location, right-click on the
Application Program Paths node and choose
from the context menu. See
8 in the diagram below.
The Data Store Browse dialog is displayed.
Enter the name of the database server instance in the Server instance entry field, the name of the data store in the Data store name entry field and the name of the data store folder where the programs will reside in the Folder entry field. Click on OK. See 9 in the diagram below.

The dialog is dismissed and the custom database location specified appears in the program folder list.
-
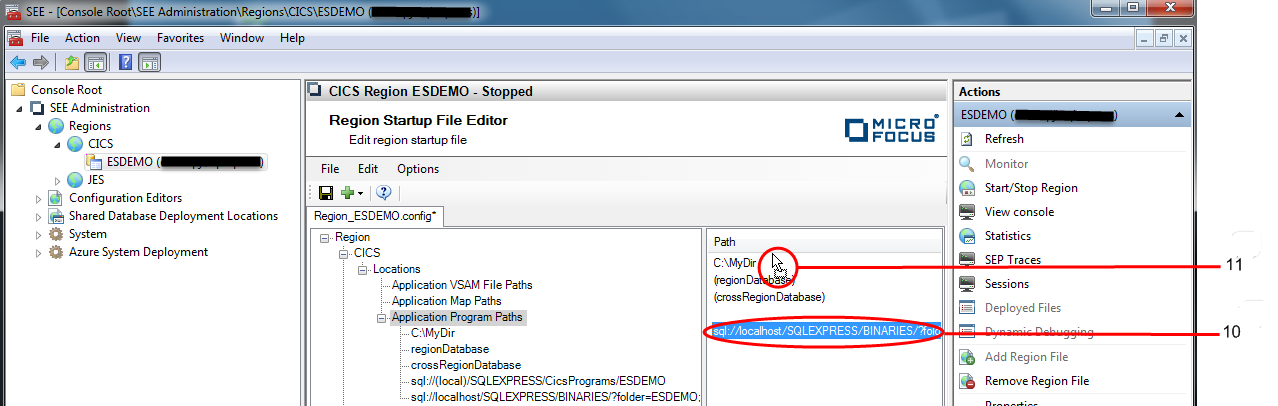
The order in which the program locations are listed indicates the order in which they will be searched at run time (i.e. the
location at the top of the list will be searched first, the second in the list searched second and so on). To change the search
order, select a location in the list, see
10 in the diagram below, and drag and drop it to the required position in the list. See
11 in the diagram below.
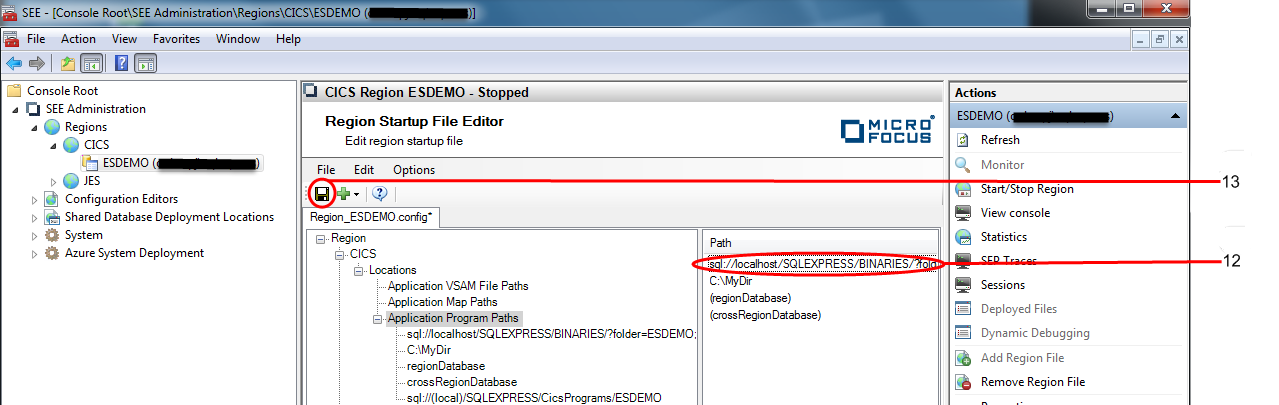
The selected item in the previous diagram is moved to the top of the list and will now be the first location to be searched at run time. See 12 in the diagram below.
-
Choose
, or click the
Save icon in the toolbar to save the file. See
13 in the diagram below.