ESF-Administering ESF Configuration
To configure security configuration, open the Enterprise Server for .NET Administration UI.
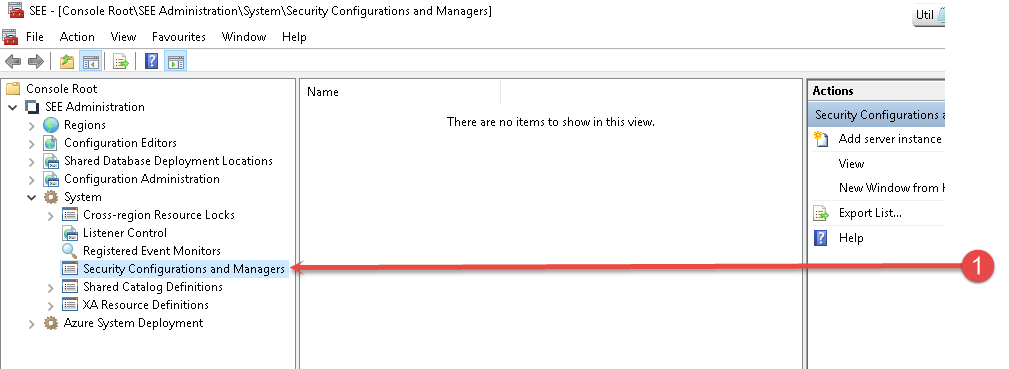
Select the System > Security Configurations and Managers node in the system, as in 1 above. Right-click and add the server instance if one is not already defined.
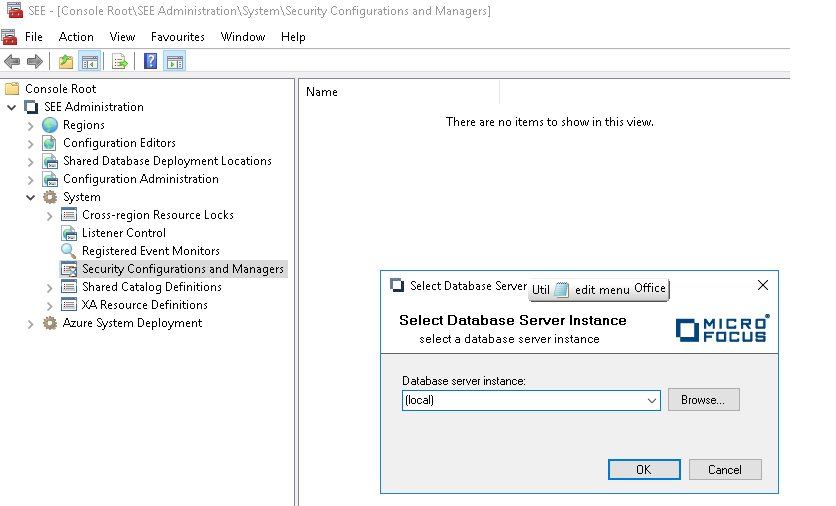
Click OK.
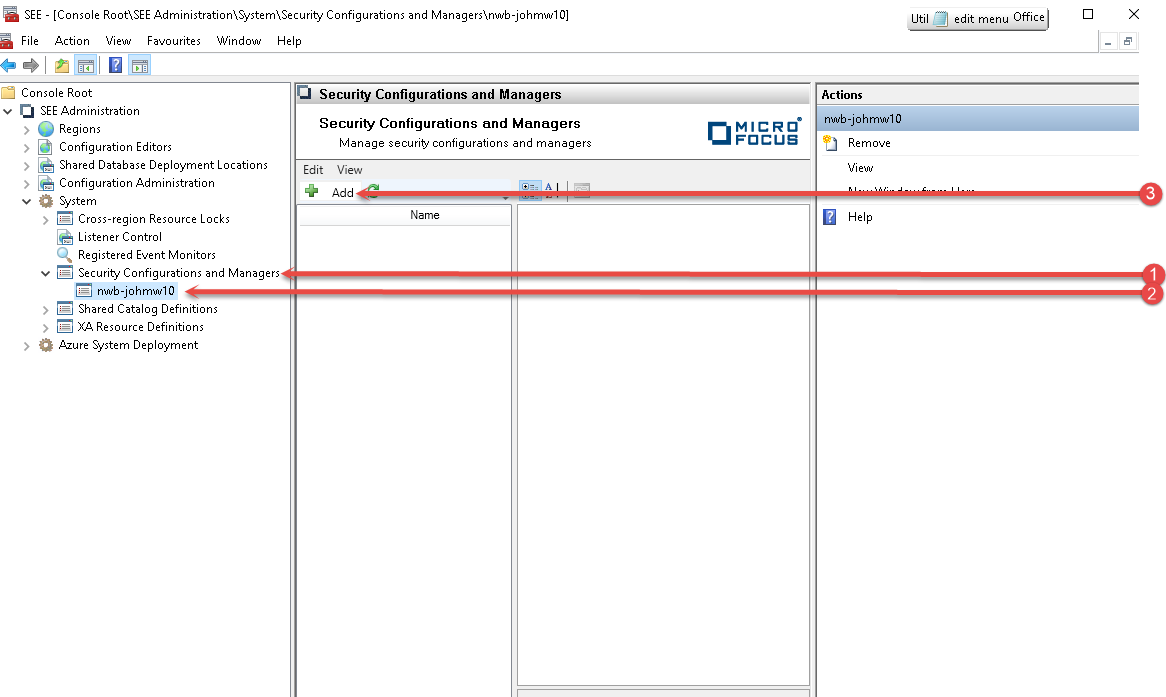
Expand the Security and Configuration Managers node (1).
Select the server instance you want to configure (2).
Click Add (3).
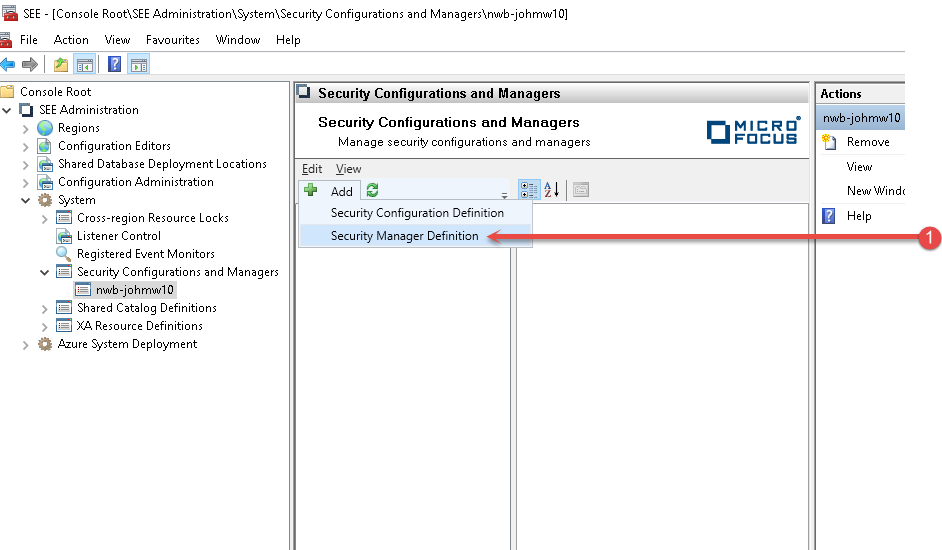
Click the Security Manager Definition menu item (1).
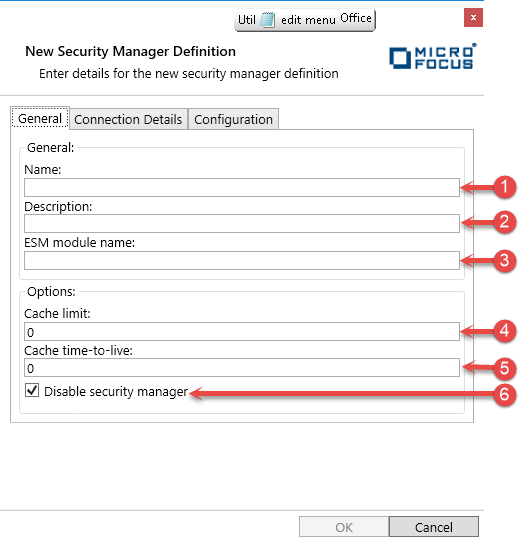
Enter the appropriate fields as above.
- Name
The name of this Security Manager Definition.
- Description
A description of this Security Manager Definition.
- ESM Module Name
The name of the External Security module that will be loaded.
- Cache Limit
If the module has a configurable cache for holding responses from the security manager, enter its maximum size in kilobytes here.
- Cache Time to Live
If the module has a configurable cache for holding responses from the security manager, enter the maximum time in seconds that an entry in the cache can be used to satisfy requests before the details must be re-queried from the security manager.
- Disable security manager.
- Check this box to disable this security manager.
For the Connection Details tab.
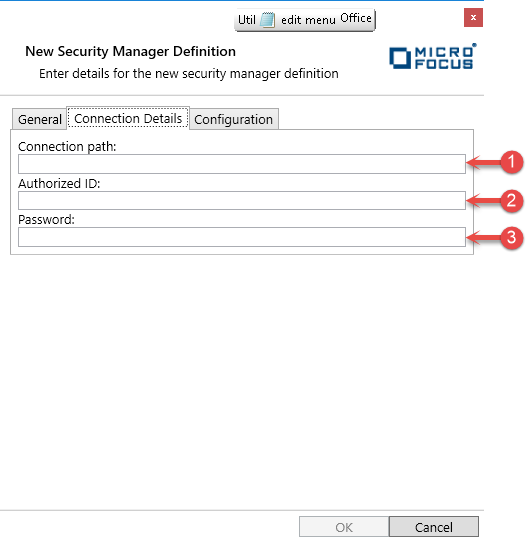
- Connection Path
If the module requires a connection string that tells it how to connect to the external security manager, specify it here.
The information supplied in the string and its format depend on the module that you are using. For details, please see the documentation supplied with the module.
- Authorized ID
If the module requires an ID to connect to the external security manager, specify it here.
As with the connection path, the content and format of these fields depend on the module that you are using. For details, see the documentation supplied with the module.
- Password
If the module requires a password to connect to the external security manager, specify it here.
As with the connection path, the content and format of these fields depend on the module that you are using. For details, see the documentation supplied with the module.
For the Configuration Tab
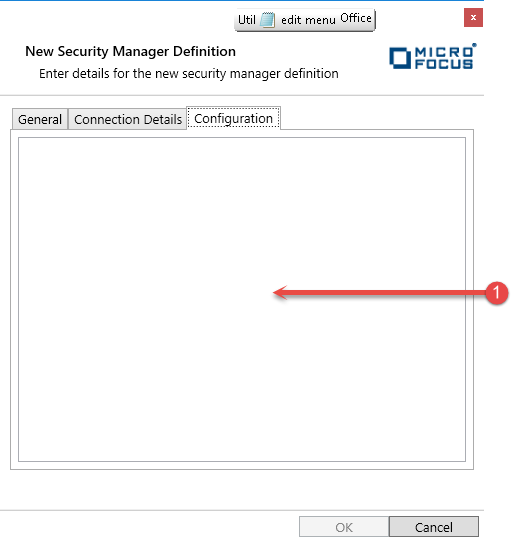
- This is a free-format text box where you can enter further configuration parameters that may be required for an ESM module.
Create a New Security Configuration Definition.
Click Add again, and select Security Configuration Definition.
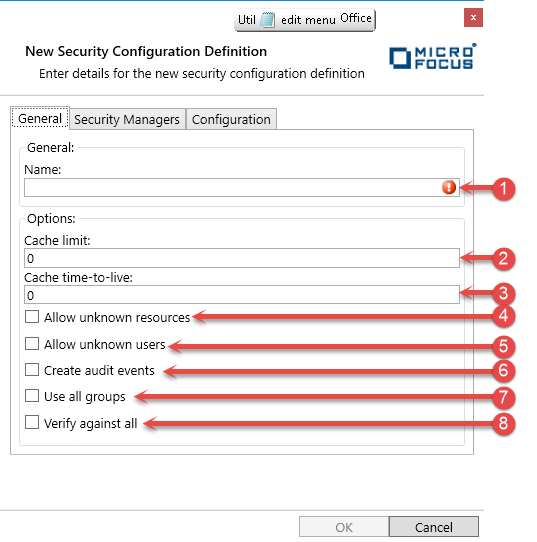
- Name
The name used to identify this Security Configuration.
- Cache Limit
Enter the maximum size in kilobytes that the Directory Server or enterprise server's security facility can use for caching the results of security queries.
- Cache Time to Live
Enter the maximum time in seconds that an entry in the cache can be used to satisfy requests before the details must be re-queried from the security manager.
- Allow unknown resources
Check this if you want the security facility to permit access to any unknown resource; that is, any resource for which all entries on the priority list return Unknown.
You might use this in circumstances where you only want to restrict access to some resources.
- Allow unknown users
Check this if you want to allow unknown users to log in.
- Create audit events
Check this to enable the enterprise server or Directory Server to generate security audit events. These events can be captured and logged by the Audit Facility.
- Use all groups
Check this if a user requesting authorization is to have the permissions of every group to which he belongs.
Uncheck this if the user is to have only the permissions of the group specified in the initial security API call that requested verification (authentication) of the user's credentials. Where no group is specified in the verify call, a default group is used.
- Verify against all
Set this if you want each security query to be checked by all entries on the Security Manager Priority List.
If this is not set, the entries will be queried in the order that they appear on the Priority List until one gives a response of Allow, Deny, or Fail (equivalent to Deny). This response will then be used to decide what action should be taken.
If this field is set, all entries on the list will be queried, and if any returns a Deny or Fail, the access request will be denied. If there are no Deny or Fail responses and at least one of the entries on the list gives Allow as its response, the request will be allowed.
If a security manager does not have a rule for the resource or user specified in the request, it gives a response of Unknown. Whatever the setting of the Verify against all Security Managers field, if all of the entries on the priority list respond with Unknown, the request will be denied unless you have checked Allow unknown resources or Allow unknown users.
For the Security Managers tab
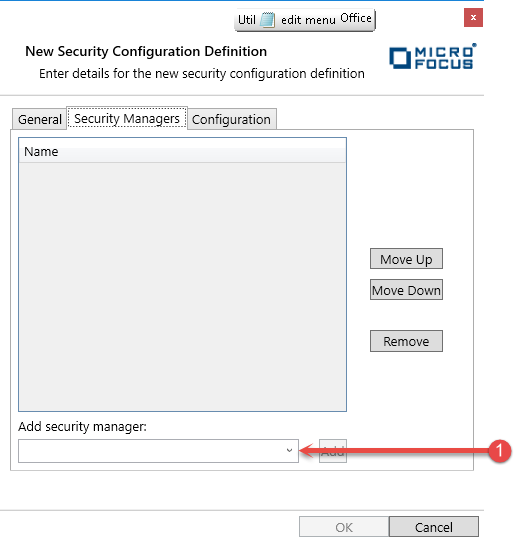
- Select the Security manager required to participate in this configuration.
Once added, the order in which the security manages are called is configured by moving them up and down using the appropriate buttons.
For the Configuration tab
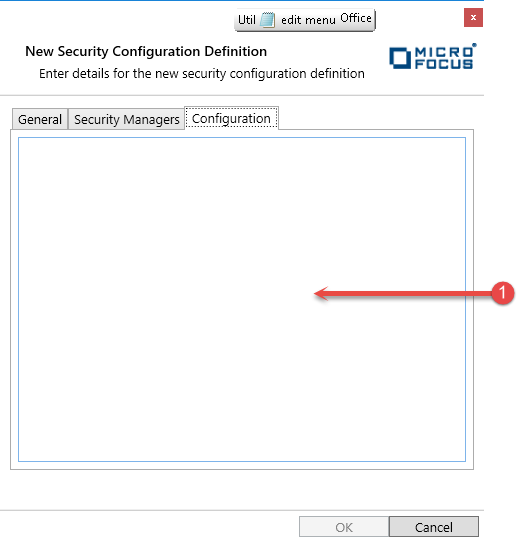
- This is a free-format text box where you can enter further configuration parameters that may be required for this configuration.