Finish Preparing Your Document
- Click Edit Main Document to continue preparing your document. Notice that new mail merge buttons have been added to the toolbar.
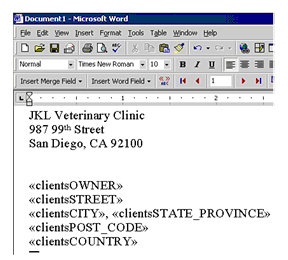
- Place the cursor in your document where you want to insert the data and click Insert Merge Field to see a drop-down list of table columns. These are the columns that you selected in Microsoft Query.
-
Click the merge field you wish to insert.
The control characters for this field are placed in your document.
-
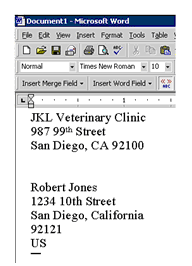
To display the data that corresponds to each field code, click the
<<ABC>> button on the Mail Merge toolbar.
Use the control buttons on the Mail Merge toolbar to move to the next, previous, first, or last record in the table.
- Finish your document as you normally would. Whenever you want to insert a data field, click Insert Merge Field once again and click the appropriate field.
For more instructions on using Word's mail merge feature, see your Microsoft documentation.