Creating a Security Notification Policy
- In the Admin Client, click the Target Driven tab.
- Click Policies.
- Select New > Security Notification Policy.
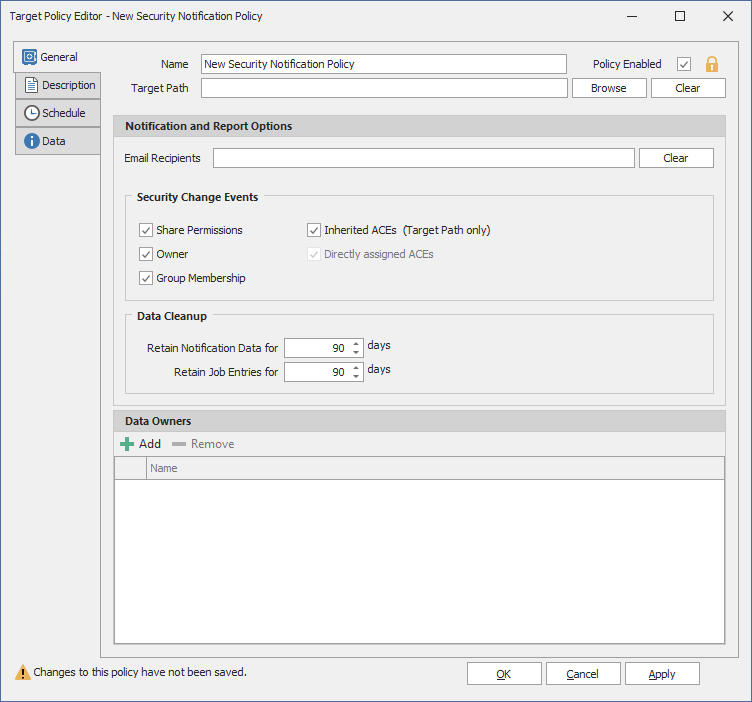
- In the Name field, give the Security Notification policy a descriptive name.
For example, HQ Finance Notification Policy - Leave the Policy Enabled check box selected.
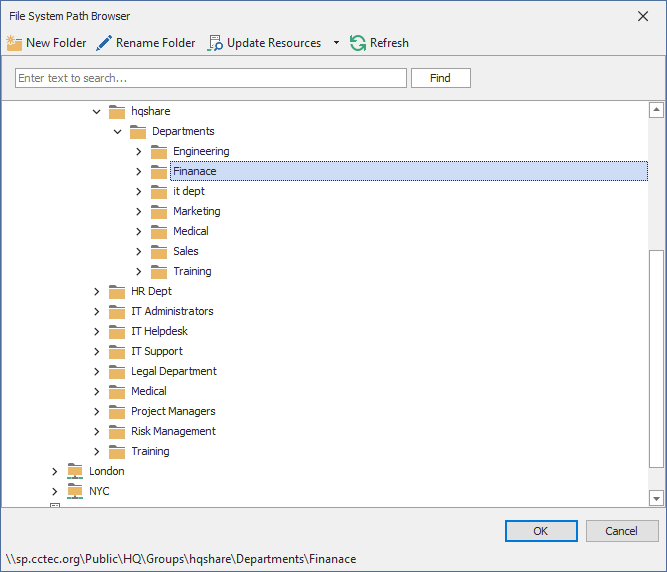
This check box is provided for administrators when they are editing a policy. Deselecting this check box lets you suspend all notifications scanning and notifications for this policy until the administrator has finished updating the policy or file system permissions. - Click the Browse button pertaining to the Target Path field and specify the share or folder for this policy.

- In the Email Recipients field, specify the email addresses of each user you want notified when access permissions to the selected folder or share are changed.
- In the Security Change Events region, specify the event types for which this policy will email notifications.
- In the Data Cleanup region, specify how long you want scan job information to remain in the database.
For more information, see Security Lockdown Policy. - In the Data Owners region, click Add to specify the users or groups that will serve as Data Owners for this policy.
Data Owners assigned for a Security Notification policy will be enabled to view changes in the security reports via the Data Owner Client. - Click the Description tab and in the Description field, specify any information you want to include pertaining to this policy.
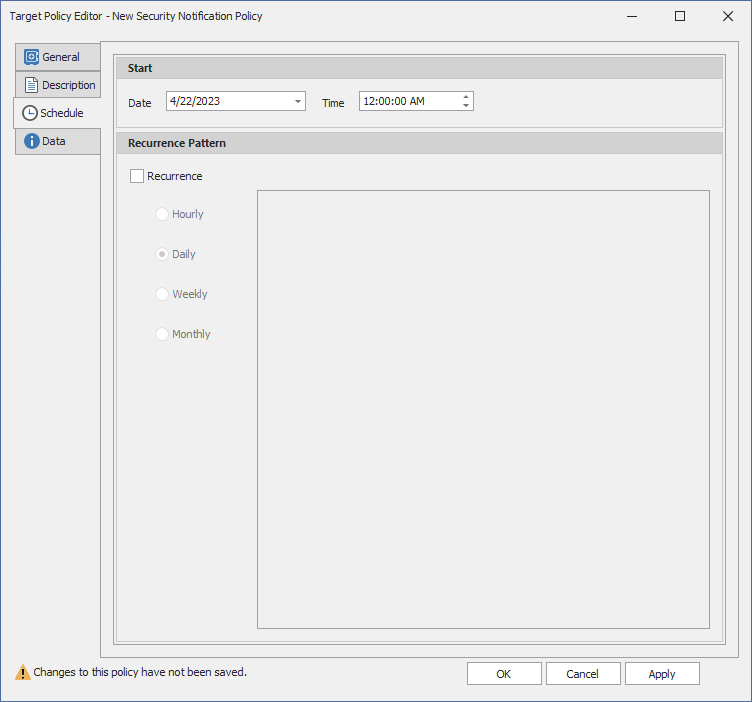
- Click Schedule.

- In the Date field, specify the date you want the policy to be initially invoked.
- In the Time field, specify the time you want the policy to be initially invoked.
- (Conditional) If you want the policy to run on a recurrent basis, select the Recurrence check box and then select one of the options.
- Click Apply to save the schedule.
- Click OK.

Email addresses can be separated by a comma, semicolon, or a space.
File Dynamics only reports on the changes in permissions between one scan and the next. Therefore, if there are no changes in access permissions between scans, no notifications will be emailed.