Preview Reports
A Preview Report is generated from scan data in the database and is temporarily cached in the Web Application's data folder. When you close a preview report, you cannot access the report again until you generate a new one using the same report definition.
When you view a report in Preview mode, you can print the report or save the report locally.
-
From the Report Definitions page, select the report definition from which you want to generate a report.
-
Select Generate > Generate Preview.
-
(Conditional) If you get a message stating that your browser prevented pop-up windows from appearing, enable pop-ups for this site.
All reports are structured similarly, with a title page, report parameters, for some report types a Top Ten summary, followed by a comprehensive breakdown of the data in the pages that follow.
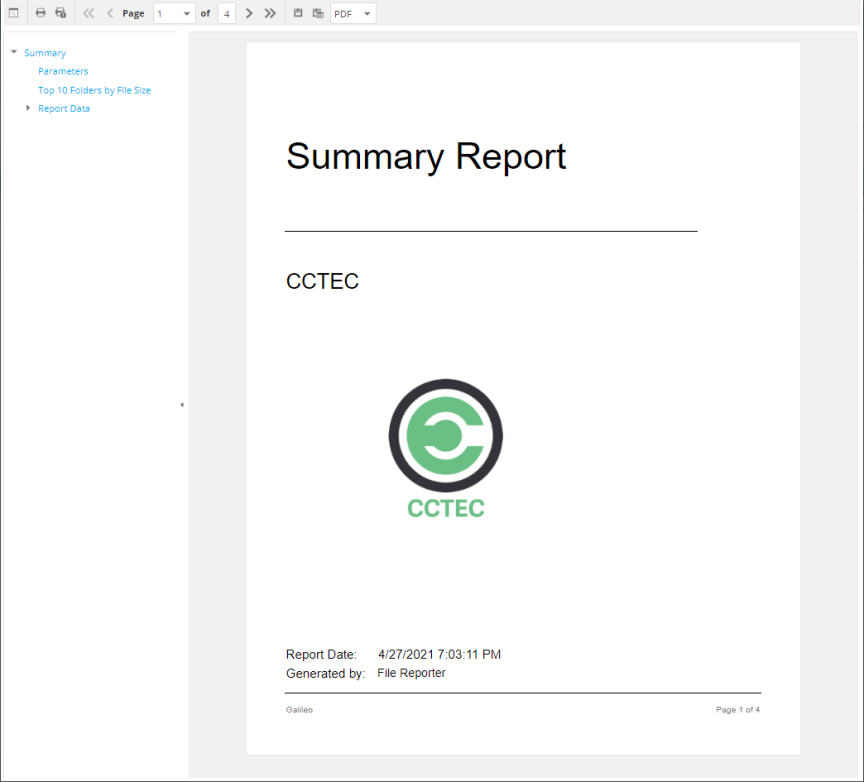
Display the Search Window button: Lets you conduct a search within the preview report.
Print the Report button: Prints the entire preview report.
Print the Current Page button: Prints the currently displayed page.
First Page button: Takes you to the first page of the preview report.
Previous Page button: Takes you to the page that precedes the page you are viewing.
Page drop-down menu: Lets you advance to a page number by selecting it.
Next Page button: Takes you to the page that follows the page you are viewing.
Last Page button: Takes you to the last page of the preview report.
Export a Report and Save it to the Disk button: Exports the preview report to the file type listed in the drop-down menu and lets you view or save it in the new format.
Export a Report and Show it in a New Window button: Exports the preview report to the file type listed in the drop-down menu.
File Type drop-down menu: Lets you select the file type format to export the report to.
Document Navigation: Lists the contents of the report. You can click any item to advance within the preview report.
-
Export, save, or print the preview report.