Agent365
The following describes the procedures for installing and hosting Agent365.
Minimum Requirements
- Any of the following dual-core 64-bit processor servers:
-
Windows Server 2025
-
Windows Server 2022
-
Windows Server 2019
-
The server must be joined to Active Directory.
-
.NET 8.0 Desktop Runtime (this will be installed if not already present)
-
200 MB RAM
Installation and Configuration
-
Double-click
FileReporter-Agent365-24.4.x64-xx.exeat the root of the FileReporter-24.4.iso image. -
Agree to the license terms and conditions, and click Install.
-
When notified that the setup was successful, click Run Setup Utility.
-
From this window, read the overview of what is to be installed and configured, and click Next.

-
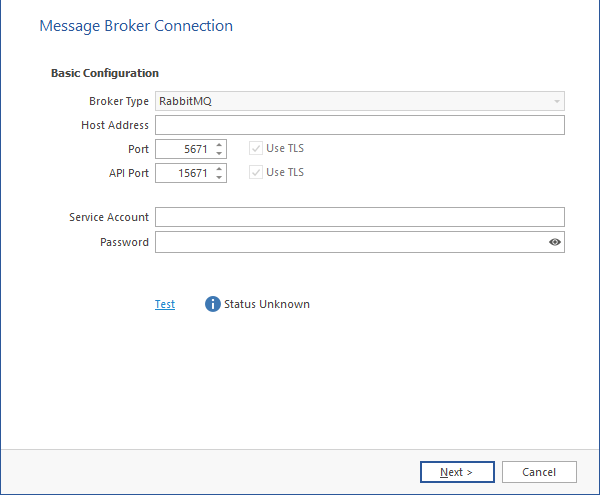
Broker Type: Displays the RabbitMQ messaging broker.
-
Host Address: Specify the IP address or DNS name of the server hosting RabbitMQ.
-
Port: Specifies the port that RabbitMQ's Management API listens on with TLS support enabled (default: 5671).
-
Use TLS: Already checked because File Reporter requires Transport Layer Security (TLS) as the cryptographic communications security protocol.
-
API Port: Specifies the port RabbitMQ’s Management API listens on with TLS support enabled (default: 15671).
-
Use TLS: Already checked because File Reporter requires TLS-enabled communication channels.
-
Service Account: Enter the name of the service account (default: srsbroker). For reference, your service account name is displayed in the Message Broker field of the Configuration Dashboard.
-
Password: Enter the password you established when configuring the Message Broker.
-
Test: Click to test the connection between Agent365 and RabbitMQ.
-
-
Complete the fields and click Next.

-
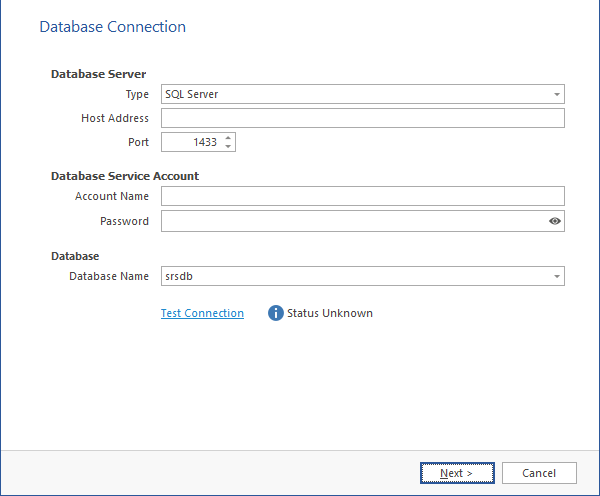
Database Server: Details fields specific to communication with the PostgreSQL or Microsoft SQL Server database.
-
Type: From the drop-down menu, specify the database type.
-
Host Address: Enter the IP address of the server hosting the database you configured earlier. For reference, the IP address is displayed in the Database field of the Configuration Dashboard.
-
Port: Leave the setting at 1433 unless you changed the default port address when configuring the database.
-
-
Database Service Account: This region includes fields for the database service account and password.
-
Account Name: Enter srsadminunless you changed the default name for the Database Service User. For reference, the name is displayed in the Database User field in the Database section of the Configuration Dashboard.
-
Password: Enter the database administrator password.
-
-
Database Name: Enter srsdb unless you changed the default name for the database name. For reference, the database name is displayed in the Database field of the Configuration Dashboard.
-
Test Connection: Click to test the connection between Agent 365 and the database.
-
-
Complete the fields and click Next.

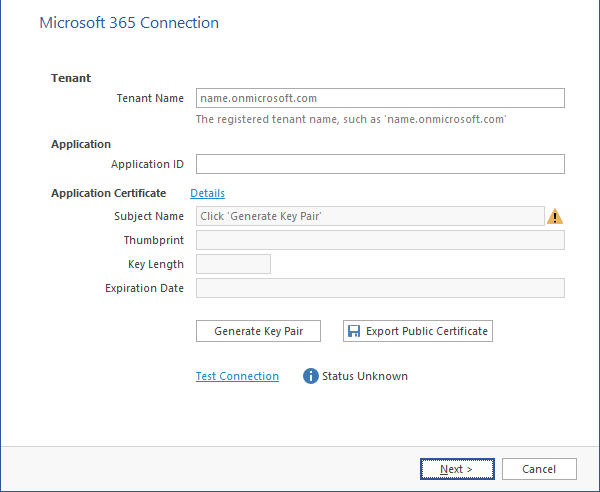
You must log in to your Azure AD tenant to complete the following fields:
-
Tenant: Enter the name of your tenant. For reference, you can select Azure Active Directory in the Azure Active Directory admin center interface to view this name.
-
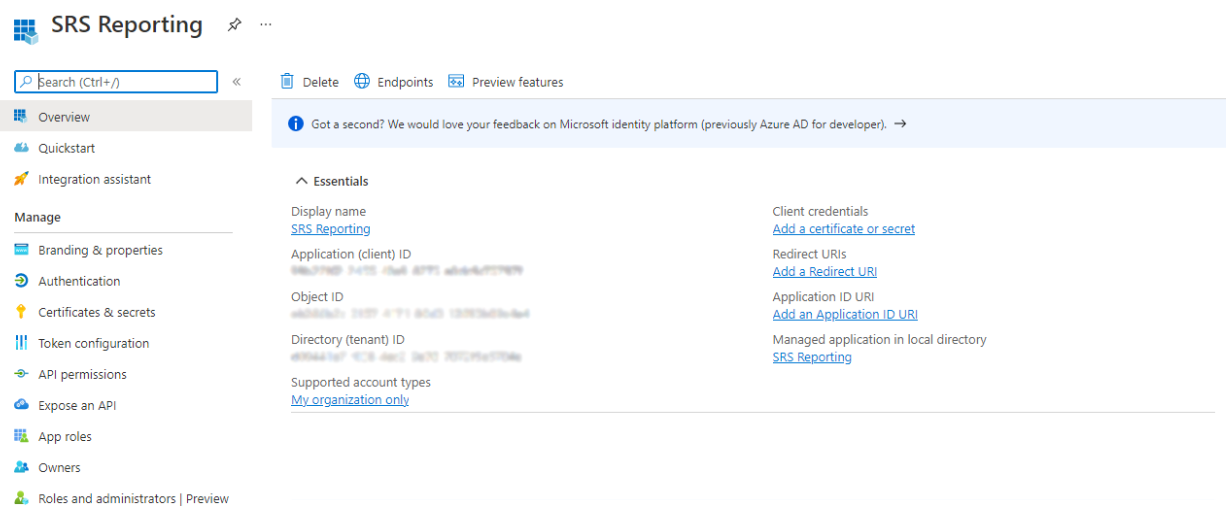
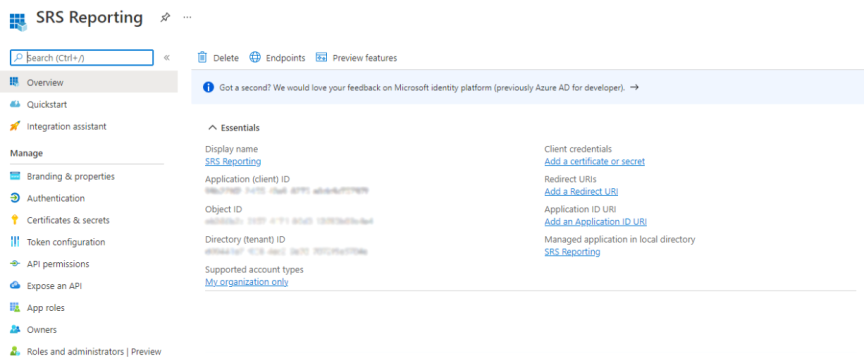
Application ID: Enter the name of the application you registered and configured previously. For reference, you can identify the application ID in the Azure Active Directory admin center:
-
Click App registrations.
-
Click the listed registered application.
-
Copy the Application (client) ID listing into the Application ID field of the File Reporter Agent 365 wizard.
-
Application Certificate: Generate the key pair for the application certificate. When complete, the fields fill in automatically.
-
-
Generate the application certificate.
-
Click Generate Key Pair.
-
When the Certificate Update Notice dialog box appears, click Yes to open the following dialog box:

-
Create a password for the certificate in the Certificate Password field.
-
Enter the password again in the Verify Password field.
-
Click Generate.
The application certificate details are now displayed in the remaining fields of the window.
-
Click Export Public Certificate.
-
Save the certificate to a preferred location on the server.
-
Click Certificates & secrets in the Azure Active Directory admin center.
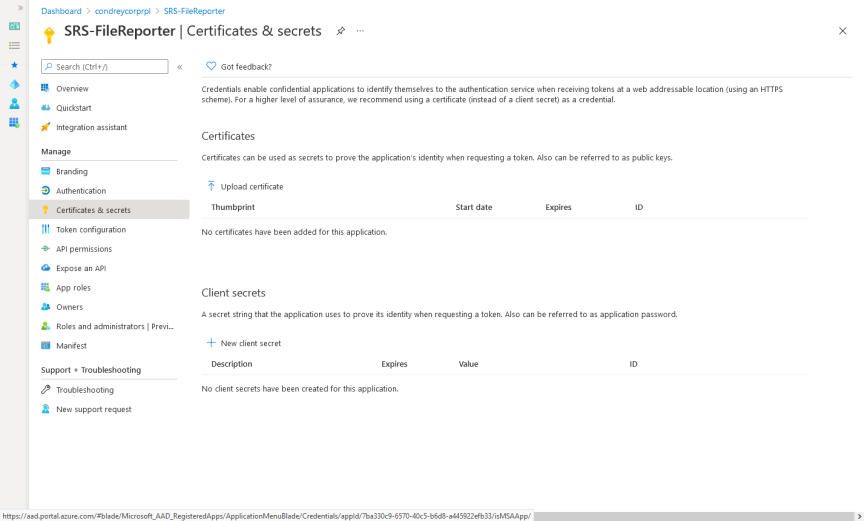
-
Click Upload certificate to select and Open the location where you saved the certificate, then click Add.
The certificate is now listed in the Certificates field of the Azure Active Directory admin center page.
-
Return to the File Reporter Agent365 wizard and click Test Connection.
NOTE: If you get a failure notice, it most likely means that the tenant has not had enough time to update.
Wait several seconds and click Test Connection again until you get a Connection valid indication on the wizard page and a Tenant Info dialog appears with the updated tenant information. Synchronization of the public certificate may take a couple minutes to complete.
-
Click OK to close the Tenant Info dialog box.
-
-
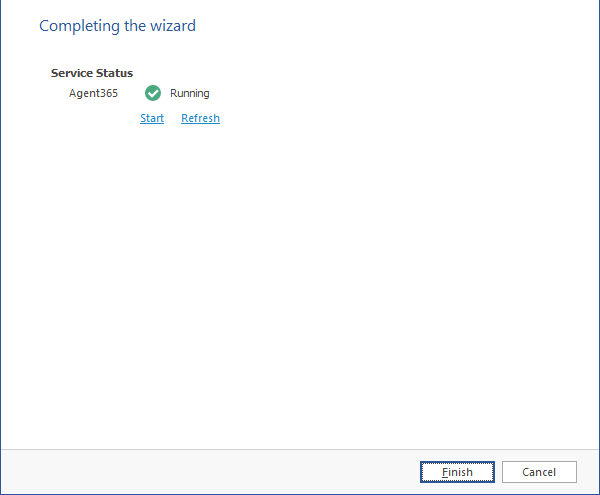
Click Next to advance the wizard.

-
Click Finish.