Generating issue reports
To generate an issue report:
-
From the Fortify extension menu, select Generate BIRT Report.
The Generate BIRT Report dialog box opens.
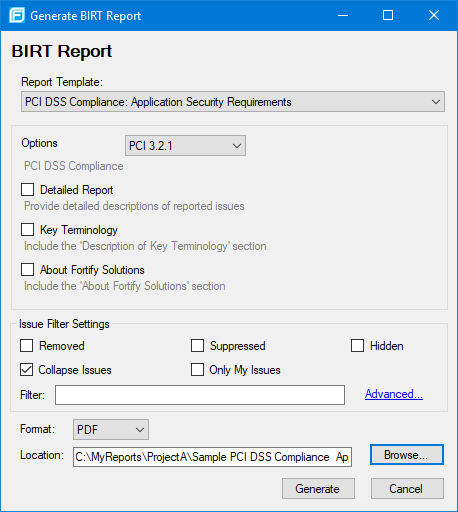
- From the Report Template list, select the type of report you want.
- If available for the template, select the template version from the Options list.
-
Select the information you want to include in the report.
Not all options are available for all report types.
- To include detailed descriptions of reported issues, select the Detailed Report check box.
- To categorize issues by Fortify Priority instead of folder names, select the Categories By Fortify Priority check box.
- To include Description of Key Terminology in the report, select the Key Terminology check box.
- To include the About Fortify Solutions section in the report, select the About Fortify Solutions check box.
-
To filter information from the report, select the optional issue filter settings as follows:
- To include removed issues in the report, select the Removed check box.
- To include suppressed issues in the report, select the Suppressed check box.
- To include hidden issues in the report, select the Hidden check box.
- To collapse issues of the same sink and type into a single issue, select the Collapse Issues check box.
- To include only issues assigned to your user name, select the Only My Issues check box.
- To build a search query to further filter the issues to include in the report, click Advanced. Your query will appear in the Filter box. For more information about the search modifiers, see Search Modifiers.
-
From the Format list, select a format for the report.
You can save the report in the following formats: Portable Document Format (PDF), HTML, and Microsoft Word, and Microsoft Excel.
When you open the report in Excel, you might get a warning that the file format and the file extension do not match. You can safely open the file in Excel.
- To specify an alternative location to save the report, click Browse, and then select a location.
- Click Generate.
-
If a report with the same file name already exists, you are prompted to either:
- Click No to overwrite the existing report.
- Click Yes to have the report saved to a file with a sequential number appended to the file name (for example:
Sample1_DISA_STIG(1).pdf).