Editing Vulnerabilities
After Fortify WebInspect assesses your application’s vulnerabilities, you may want to edit and save the results for a variety of reasons, including:
-
Security - If an HTTP request or response contains passwords, account numbers, or other sensitive data, you may want to delete or modify this information before making the scan results available to other persons in your organization.
-
Correction - Fortify WebInspect occasionally reports a “false positive.” This occurs when Fortify WebInspect detects indications of a possible vulnerability, but further investigation by a developer determines that the problem does not actually exist. You can delete the vulnerability from the session or delete the entire session. Alternatively, you can designate it as a false positive (right-click the session in either the Site or Sequence view and select Mark As False Positive).
-
Severity Modification - If you disagree with Fortify WebInspect’s ranking of a vulnerability, you can assign a different level, using the following scale:
Range Severity 0 - 9 Normal 10 Information 11 - 25 Low 26 - 50 Medium 51 - 75 High 76 - 100 Critical -
Record Keeping - You can modify any of the report fields associated with an individual vulnerability (Summary, Execution, Recommendation, Implementation, Fixes, and References). For example, you could add a paragraph to the Fixes section describing how you actually fixed the problem.
-
Enhancement - If you discover a new vulnerability, you could define it and add it to a session as a custom vulnerability.
Editing a Vulnerable Session
To edit a vulnerable session:
-
Do one of the following to select a session:
-
On the Findings tab in the Summary pane, right-click a vulnerable URL , or
-
On the navigation pane, right-click a session or URL.
-
-
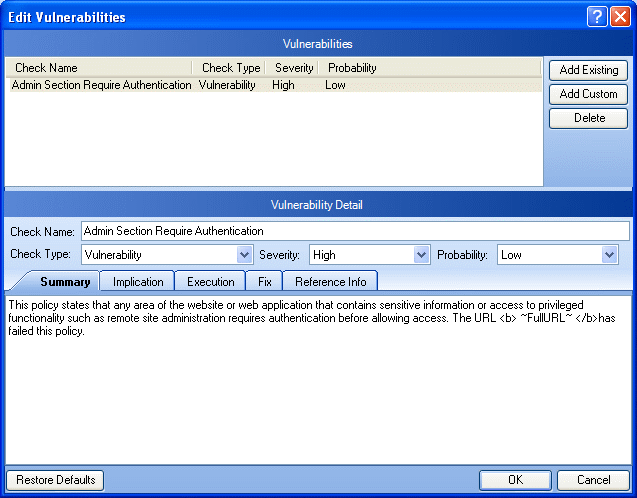
Select Edit Vulnerability from the shortcut menu.
The Edit Vulnerabilities window opens.
-
If the session includes multiple vulnerabilities, then select a vulnerability.
-
To add an existing vulnerability to the session (that is, one that exists in the database), click Add Existing.
-
On the Add Existing Vulnerability window, enter part of a vulnerability name, or a complete vulnerability ID number or type.
Note: The * and % characters can be used interchangeably as wildcards. However, a wildcard is allowed only at the beginning, at the end, or at the beginning and end of a string. If placed within a string (such as "mic*soft,"), these characters will not function as wildcards.
-
Click Search.
-
Select one or more of the vulnerabilities returned by the search.
-
Click OK.
-
-
To add a custom vulnerability, click Add Custom.
You can then edit the vulnerability as described in Step 7.
-
To delete the vulnerability from the selected session, click Delete.
-
To modify the vulnerability, select different options from the Vulnerability Detail section. You can also change the descriptions that appear on the Summary, Implication, Execution, Fix, and Reference Info tabs.
-
Click OK to save the changes.