Retesting Vulnerabilities
After you conduct a scan and report discovered vulnerabilities, developers may correct their code and update the site. Afterward, you can open the original scan and conduct a retest scan to verify the fix for:
-
A selected vulnerability
-
All vulnerabilities
-
All vulnerabilities with a specific severity
Fortify WebInspect starts a new scan to determine whether the issue or issues have been fixed. The retest scan prefixes "retest:" to the original scan name so that you can easily discern the retest scan from the original scan.
During the retest scan, the vulnerabilities that are queued for retesting are listed on the Findings tab in the Summary pane, along with a Retest Status column that indicates the results of the retest.
Important! Fortify does not recommend retesting vulnerabilities in scans created using earlier versions of Fortify WebInspect. While retesting scans from earlier versions may work in many instances, it is not always reliable because individual checks may not flag the same vulnerability during a retest. Failure of a check to flag the same vulnerability while retesting a scan from an earlier version of Fortify WebInspect may not mean the vulnerability has been remediated.
Understanding the Retest Status
The following table describes the values that may appear in the Retest Status column.
| Status | Description |
|---|---|
| Processing | The vulnerability is currently being retested. This is a temporary status that will be replaced with a final status when the retest is complete. |
| Detected |
The vulnerability was reproduced in the retest scan. |
| Not Detected, Possible Correlation Failure |
A vulnerability with the same check ID was detected during the retest scan, but the correlation did not match the finding that was being retested. Note: Correlation refers to how Fortify WebInspect uniquely identifies a vulnerability using the same parameter or location. |
| Not Detected | The vulnerability does not exist in the parameter or location being tested. |
| Not Supported | The vulnerability was not retested. Retesting is not supported for the specific vulnerability. For more information, see Recommendation for Failed and Not Supported Vulnerabilities. |
| Failed |
Retesting failed for the specific vulnerability. You may also see the following failed statuses that provide a reason for failure:
For more information, see Recommendation for Failed and Not Supported Vulnerabilities. |
| Dependency Failed | Retesting failed to complete because a dependency that existed in the original scan could not be duplicated in the verification scan. |
Recommendation for Failed and Not Supported Vulnerabilities
For vulnerabilities with a Retest Status of "Failed" or "Not Supported," Fortify recommends that you conduct a reuse remediation scan or a new scan. For more information about reuse remediation scans, see Reusing Scans.
Retesting All Vulnerabilities
To retest all vulnerabilities in a scan:
-
Do one of the following:
-
In the Manage Scans list, right-click a scan and select Rescan > Retest Vulnerabilities > Retest All.
-
In the Scan menu of an open scan, click the Rescan drop-down list and select Retest Vulnerabilities > Retest All.
-
In the Findings tab on the Summary pane of an open scan, right-click a vulnerability and select Retest > Retest All.
The retest scan starts with "
retest:" prefixed to the original scan name. -
Retesting All Vulnerabilities with a Specific Severity
To retest all vulnerabilities with a specific severity in a scan:
-
Do one of the following:
-
In the Manage Scans list, right-click a scan and select Rescan > Retest Vulnerabilities > Retest by Severity.
-
In the Scan menu of an open scan, click the Rescan drop-down list and select Retest Vulnerabilities > Retest by Severity.
-
In the Findings tab on the Summary pane of an open scan, right-click a vulnerability and select Retest > Retest by Severity.
-
-
Select the specific severity (Critical, High, Medium, or Low).
Note: If a severity is unavailable in the context menu, then the scan does not have vulnerabilities of that severity.
The retest scan starts with "
retest:" prefixed to the original scan name.
Retesting Selected Vulnerabilities
To retest one or more selected vulnerabilities:
-
In the Findings tab on the Summary pane of an open scan, do one of the following:
-
To retest one vulnerability, right-click the vulnerability.
-
To retest multiple vulnerabilities, press CTRL and click the vulnerabilities to select them, and then right-click.
-
-
Select Retest > Retest Selected.
The retest scan starts with "
retest:" prefixed to the original scan name.
Retesting Grouped Categories
If you have findings grouped into categories, you can select a group and retest all items in that category.
To retest a group:
-
Select the group to retest.
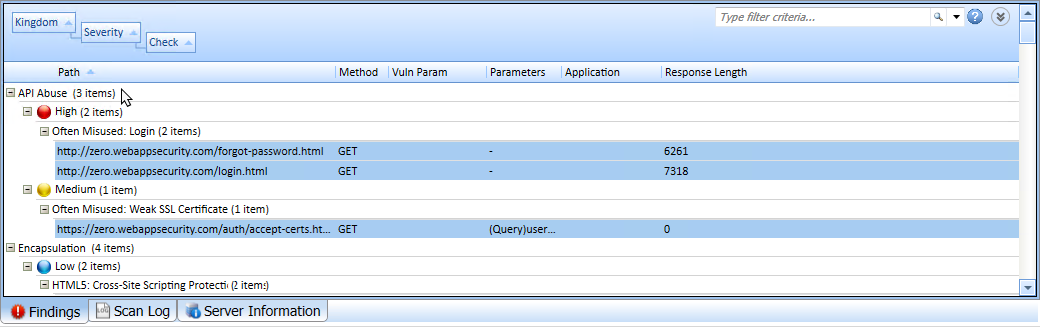
All findings in the group are selected. In the following image, for example, findings are grouped by Kingdom, then Severity, and then Check. The API Abuse group is selected, so all findings in that category are selected.
-
Right-click, and then select Retest > Retest Selected.
Tip: You can right-click the group to select all findings in the category and display the context menu in a single action.
For more information about groups, see Using Filters and Groups in the Summary Pane.
Retesting a Retest Scan
You can retest the findings in a retest scan in the same way you retest an original scan. However, you can only retest findings with a Retest Status of Detected. Findings with other Retest Statuses will not be retested.
Retest Scan Log
If you retest a large number of findings in a scan, you can view a snapshot of the results in the Scan Log tab for the retest scan.
Comparison Views
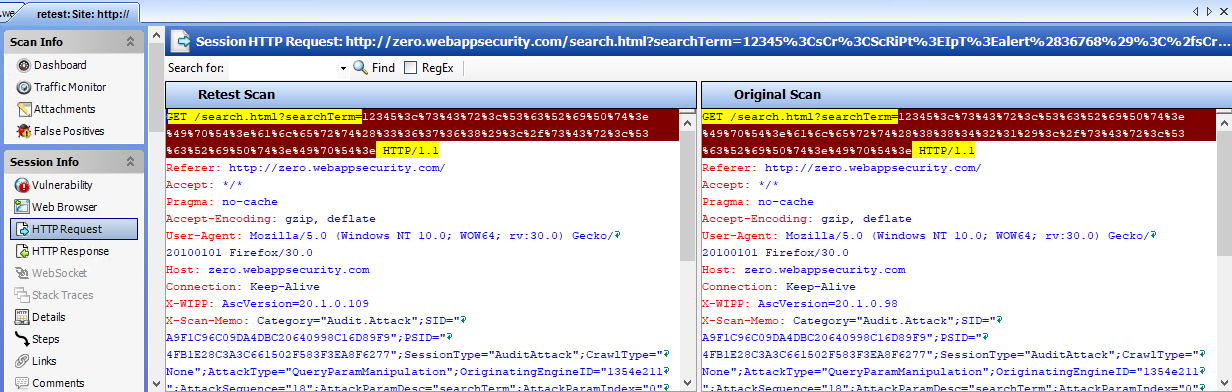
When you select a vulnerability in a retest scan, you can view certain data from both scans in a dual-pane view. Select HTTP Request, HTTP Response, or Steps to display a dual pane view comparing the retest scan to the original scan. If the original scan is not available, only the data for the retest scan is displayed.
To search for data in the HTTP Request and HTTP Response views:
-
Type the search term in the Search for field.
-
Optionally, to use regular expressions in the search criteria, select the RegEx option.
-
Click Find.
If the data is found, it is highlighted in both Retest Scan and Original Scan.
For more information, see HTTP Request, HTTP Response, and Steps.
Keeping or Deleting a Retest Scan
When you close an open scan, Fortify WebInspect detects whether it is a retest scan. If the following conditions are met, you will be prompted about keeping the scan:
-
It is a retest scan.
-
The parent scan exists in the scan database.
-
You have not been previously prompted for the scan.
When these conditions are met, a prompt asks Do you want to keep the scan "retest:<ScanName>"? If you close multiple tabs for retest scans meeting these conditions, a prompt appears for each retest scan.
Do one of the following:
-
To keep the retest scan, click Yes.
The scan is saved and added to the Recently Opened Scans list. Additionally, the scan’s settings are flagged to prevent the prompt from being shown again. This flag will be preserved even if the scan is exported and imported into another scan database.
-
To delete the retest scan, click No.
The Deleting Scans window appears. When the scan is deleted, click Done.