Set up the WPF Terminal User Control
In This Topic
The InfoConnect Windows Presentation Foundation (WPF) Terminal User Control can be embedded in your WPF applications to provide a terminal screen on a window along with another application or a different data source. This control renders a terminal emulator session within a given WFP application.
Note:
You can use the InfoConnect WPF Terminal User Control with Visual Studio 2017 targeted to .NET 4.7.1.
When creating applications on a 64-bit machine and using InfoConnect "Terminal Controls", make sure the application target is set to "x86" instead of "Any CPU" or "x64". This is required because a 64-bit application does not work directly with 32-bit controls. If the build target (Platform) is not set to "x86", the "COMException: class not registered" error is displayed during runtime.
To set up the WPF terminal User Control
- In the Visual Studio, create a WPF Application.
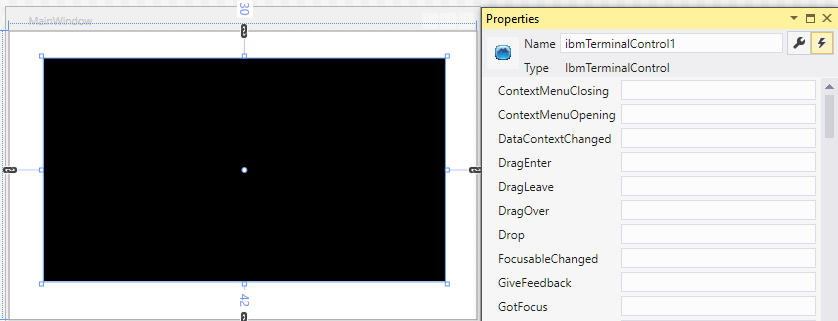
- In the Design view, drag and drop the control you want to use (for example, IbmTerminalControl) from the Toolbox to MainWindow.
- With the View selected, open the Properties window and enter the name for the control (for example, ibmTerminalControl1)
-
To allow the control to fill the window, remove the alignment attributes shown in the XAML view. For example:
Change:
<Grid>
<IbmHosts:IbmTerminalControl x:Name="ibmTerminalControl1"
HorizontalAlignment="Left" Margin="191,188,0,0"
VerticalAlignment="Top"/>
</Grid>
To:<Grid>
<IbmHosts:IbmTerminalControl x:Name="ibmTerminalControl1" />
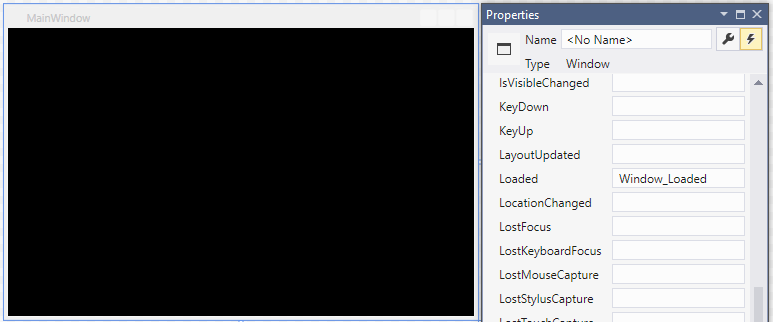
</Grid> - In the Design view, select MainWindow and then select
 to open the Property window Events view.
 - Add the Window_Loaded event handler for the MainWindow Loaded event.
-
In the code view for MainWindow.xaml.cs, add a call to InitInstance in the Window_loaded event handler. This call initializes the terminal control with a new host type or a session file.
-
If you are using an Open Systems control, add the following using directive:
using Attachmate.Reflection.Emulation.OpenSystems;
- Back in the Design view of the .xaml file, double-click on the control you added (for example, ibmTerminalControl1). This adds the default event handler for the ibmTerminalControl1 TerminalInitializedEvent event. This event is fired after the terminal is initialized from the InitInstance call (made after the window loads).
- In the code view for MainWindow.xaml.cs, add the event handler code as follows. The following code will set the host address and connect to that host.
Note: This code also checks for terminal initalization errors to make sure that the terminal is properly initialized before setting the host name and connecting. -
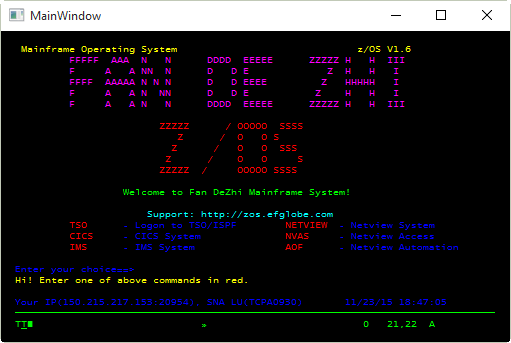
Build and run the solution. At runtime, you should get a window that renders a terminal host.
 Note: You may see the following compiler warning:
Warning A reference was created to embedded interop assembly 'c:\Windows\assembly\
GAC_MSIL\InfoConnect \<version>__13bff1b6907eadcf\Reflection.dll' because of an indirect reference to that assembly created by assembly 'c:\Program Files (x86)\Attachmate\InfoConnect \Programmer Interfaces\Attachmate.Reflection.UserControl.wpf.IbmHosts.dll'. Consider changing the 'Embed Interop Types' property on either assembly."
The simplest way to resolve this warning is to set the Embed Interop Types property of the InfoConnect Reference to False. For more about how to resolve this warning, see Technical Note 2579.