2.5 Work with the Keyboard
Host terminal and PC keyboards have different sets of keys; for example, many terminal keyboards have a Transmit key, but PC keyboards do not. InfoConnect pre-configures each session document with a built-in "keyboard map," substituting a PC key (or combination of keys) for the terminal function, so that a PC can communicate with a host in the same way as a terminal.
You can use the to customize how InfoConnect handles keystrokes. Keyboard customizations are saved to the currently selected keyboard map file. By default, new terminal sessions use built-in keyboard map files that are optimized for each terminal type. These built-in map files are not editable. If the currently selected keyboard map is one of these built-in keyboards, InfoConnect automatically creates an editable copy of the keyboard map file, saves your changes to this file, and saves it to the Keyboard Maps folder in your InfoConnect user data folder This folder location is configurable using the tab during installation. The default is C:\Users\username\Documents\Micro Focus\InfoConnect. .
2.5.1 Use Quick Keys for quick access to terminal keys
If you are using the Ribbon interface, you can use the Quick Keys gallery for quick access to terminal keys. The Quick Keys list for each host session type is customized to show actions appropriate to your terminal type.
To use Quick Keys
-
Open a terminal session.
-
From the Session ribbon, click s.

-
Click the action you want from the list of keys.
2.5.3 Select a keyboard map
InfoConnect pre-configures all session documents to use a built-in keyboard map file. You can choose to use a different built-in map, or a custom map that you've created.
To select a keyboard map
-
Open the dialog box.
The steps depend on your user interface mode.
Ribbon or InfoConnect Browser
With a session open, from the , click
 .
.TouchUX
With a session open, tap the Gear icon
 and then select .
Classic MDI
With a session open, go to >
-
Under , click .
-
Click .
-
Do one of the following:
To
Do this
Select a built-in keyboard map
Click , and then select a map from the list.
Select a custom keyboard map
Click , and then browse to a custom keyboard map file.
NOTE:The file must be in a trusted location.
-
Save your session file.
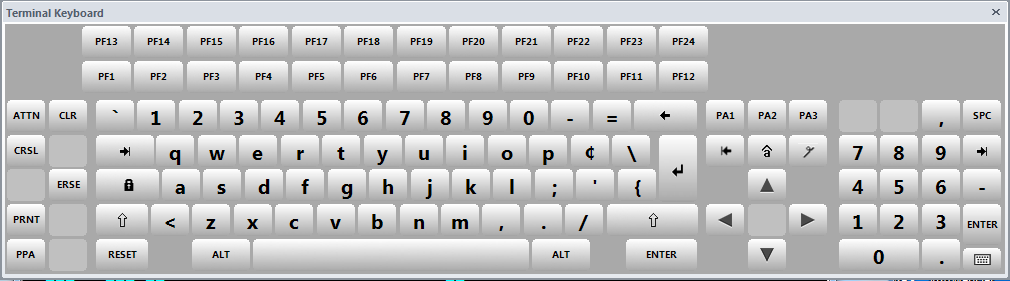
2.5.4 Use the Graphical Terminal Keyboard
NOTE:Graphical keyboards are available for 3270, 5250, and VT terminal sessions.
If you are working with a supported session type, you can display a graphical terminal keyboard that allows you to use your mouse or touch screen to enter data or use special keys. You can choose from several prebuilt keyboards that are customized for each of the supported session types.
NOTE:you can select different prebuilt keyboards but you cannot change the mappings for each keyboard.
To use the graphical terminal keyboard
-
Open a session in InfoConnect.
-
Display a graphical terminal keyboard as follows:
The steps depend on your user interface mode.
Ribbon
On the Appearance tab, click .
TouchUx
Tap the Wrench icon and then select .
Browser
On the InfoConnect menu, choose and then .
Classic MDI
On the session default toolbar, click
 .
. -
To switch keyboards, click
 in the lower right hand corner of the keyboard.
 -
To close the keyboard, select the same terminal keyboard menu item or icon you used to open it.
-
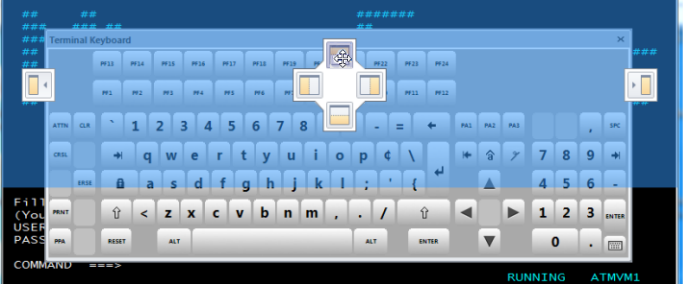
To dock the keyboard to the workspace, select the keyboard title bar and move the cross-hairs to one of the upper, lower, left or right arrows displayed above the keyboard.
The following example docks the keyboard to the top of the workspace.
-
Save the session. When you reopen the session, the keyboard is displayed just as it was when you saved the session.
2.5.5 Restore the default keyboard map
If you have problems using a customized keyboard map A keyboard map is a configuration file that allows you to use your PC keyboard as a host terminal keyboard. Keyboard maps also include definitions for keyboard shortcuts. in a session document, you can restore the default keyboard map.
To restore a default keyboard map
-
Open the dialog box.
The steps depend on your user interface mode.
Ribbon or InfoConnect Browser
With a session open, from the , click
.TouchUX
With a session open, tap the Gear icon
and then select .Classic MDI
With a session open, go to >
-
Under , click .
-
Click .
-
Click , and select a map from the list that matches your host session; for example, for a 5250 host session, choose Default 5250 en.xkb.
-
Click .
-
Save your session file.