Getting Started
Start InfoConnect Desktop
To open InfoConnect Desktop from the Start menu, select Micro Focus InfoConnect, then select InfoConnect Workspace.
When the workspace is open, you’ll see the Create New Document dialog box. Close this for now, so that you can get acquainted with the InfoConnect Desktop user interface.
Use the Quick Access toolbar
The Quick Access toolbar provides one-click access to common tasks.

The Quick Access toolbar is at the top of the workspace
Move your mouse pointer over each button to reveal a tooltip describing what it does.
You can add commands to this toolbar to provide quick access to your most frequently performed tasks. Simply, click  and select an action in the Action list.
Connect to a Session
To create a terminal session, complete the following steps:
-
From the Quick Access toolbar, click the New Document button
 .
. -
Select the type of session you want to set up, and click Create.
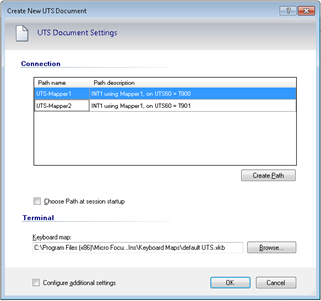
The Create New UTS Terminal Document dialog box
-
When you create a new ALC, UTS, or T27 session, you’ll see a list of paths that apply to the selected session type. If you’ve upgraded from an earlier version of InfoConnect, your existing paths are automatically included in this list.
- To connect using an existing path, select the path and click OK.
- To create a new path, click Create Path to launch the Path Wizard.
-
To save the session document, from the Quick Access Toolbar, click the Save button

In addition to using the Path Wizard as described above, you can use familiar administrative tools for managing paths. InfoConnect Manager 32 has been renamed and has an updated user interface. You can find both the new InfoConnect Manager and the Database Editor on the Windows Start Menu.