Installation Steps
Use the automated installer to install MSS.
Reminder
Be sure the Prerequisite Actions have been performed. Then, follow these steps.
Step 1: Run the automated installer
Consider installing your entitled activation files along with the automated installer.
-
From your product download location, locate the automated installer for your system’s platform. (In the file name,
<nnn>is the build number.)Operating system Automated installer Windows 64-bit mss-12.8.<n>.<nnn>-prod-wx64.exeLinux 64-bit mss-12.8.<n>.<nnn>-prod-linuxx64.shz Linux mss-12.8.<n>.<nnn>-prod-unix-nojre.sh -
(Optional) If you are entitled to Add-On Products, we recommend installing the current activation file(s) when you run the automated installer.
To install or update your Add-On Products at a later time, see Installing Activation Files.
To install the activation files now:
a. Download the current version of the activation file for each of your Add-On Products from the Micro Focus download site (where you downloaded Host Access Management and Security Server).
Activation files are in this format:
activation.<product_name-version>.jawb. Place each activation file in the directory with the MSS installer.
On Windows, for example: to install the Automated Sign-On for Mainframe Add-On, place the activation file in the same folder as the installer,
mss-12.8.<n>.<nnn>-prod-wx64.exe.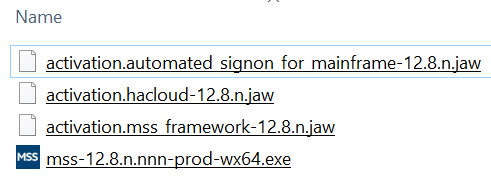
-
Run the MSS installer.
-
Click Next to continue. The installer lists the products that will be enabled.
-
Read and accept the license agreement.
-
Destination directory: Accept the default installation directory, browse to a new directory, or enter the directory where you want to install.
-
Select the components to install, and then click Next.
Host Access Management and Security Server. Check this box to install the Administrative Server, which includes the MSS Administrative Console and Metering Server, and the default servlet runner.
- Security Proxy Server, when entitled, can be installed now or later.
- Terminal ID Manager is enabled, when entitled.
-
Start Menu directory: On Windows, select the directory where you want to create the program shortcuts.
You have the option to create shortcuts for all users, or to suppress the creation of a Start Menu directory.
Click Next.
-
During a new installation, the automated installer copies files to the designated directory and launches a configuration utility.
Continue with Step 2: Enter configuration information.
(During an upgrade, the installer retains your settings, and you will not be prompted to run a configuration utility. For more information, see Upgrading MSS.)
Step 2: Enter configuration information
If you are installing Management and Security Server for the first time on this machine, the automated installer starts the Initial Configuration Utility. For a description, see Initial Configuration Utility
Note
Do not close the installer when the configuration utility is launched. You must complete additional steps in the installer after completing configuration.
Enter or verify your configuration information. Refer to Ports used by MSS as needed.
-
Installation Directory: Confirm or browse to the location where the Administrative Server was installed.
-
MSS Server Services: Select the services you want to enable. You must have an MSS Server service running on one machine at your site. If entitled, you can optionally choose to install the Security Proxy server.
-
Volume Purchase Agreement number: Optional. Enter the Volume Purchase Agreement (VPA) number. You can modify the VPA number later in the MSS Administrative Console.
-
Servlet runner ports: Accept the default entries or enter the port number that the servlet runner will use for HTTPS connections. The default port is
443. -
Security Proxy server ports: If you are installing the Security Proxy, specify the port numbers for the Security Proxy. The default listening port is
3000. The default monitor port is8080. You can change Security Proxy settings after installation using the Security Proxy Wizard. -
Administration password: Enter a password. Use this password to open the MSS Administrative Console and to administer Metering and Terminal ID management (if installed). You can create different passwords for each server later.
Note
To change the administrative password later, use the MSS Administrative Console (Configure Settings - General Security).
-
Server Names for URLs and Certificates: The information that you enter on this and the following panel enable you to create self-signed certificates that will be used to make secure TLS connections to the Administrative Server and Security Proxy after installation.
Enter a DNS name or IP address. The current DNS name is provided, when available. To change the servlet runner certificate later, use the HTTPS Certificate Utility.
-
Server certificates: organization and locality (optional)
This panel includes additional information for creating certificates.
-
Organizational Unit: Enter the name of your organizational unit, typically the name of your department or division.
-
Organization: Enter the name of your organization, typically the legal name of your company or organization.
-
City or Locality: Enter the full formal name (no abbreviations).
-
State: Enter the full formal name (no abbreviations).
-
Country: Provide a two-letter ISO country code, such as
US.
-
-
Confirm Configuration: Click Next to apply the specified configuration changes.
-
Configuration summary: A summary of the configuration changes is created in
InitalConfigurationUtility.login the<installation>\utilities\logsdirectory.Click Done. You are ready for Step 3: Start services.
Step 3: Start services
After completing the configuration, you are returned to the installer to select startup options.
The MSS Server must be started before you can run the MSS Administrative Console, the Metering Server, or the Terminal ID Manager.
-
Start Services is selected by default.
If you chose to not start services now, you can do so later. See Start services after installation.
-
Installation Complete. The components are installed and the services are started.
-
Continue with Open the MSS Administrative Console.
Note
About IIS. If you installed MSS on Windows, the automated installer detects whether IIS is installed on your machine and offers to integrate IIS with Management and Security Server. You can run the IIS Integration Utility later, if preferred. For more information, see IIS Integration Utility (on Windows).
Start services after installation
You can start the Micro Focus MSS Server after MSS is installed.
On Windows:
-
Open Windows Services.
-
Right-click Micro Focus MSS Server.
-
Click Start.
On Linux or UNIX:
-
In the
server/bindirectory, execute the script namedserver. -
Additionally, the administrator may create
initscripts to start the MSS Server on startup.