Install and Activate the Security Proxy Server
Use the MSS automated installer to install and configure the Security Proxy Server and to generate the required trusted certificates so you can begin creating secure sessions.
Note
About secure connections. The Security Proxy Server can be installed on the same machine as the Administrative Server or on a different machine. Although data between the terminal session and the Security Proxy server is encrypted, data between the Security Proxy server and the host is typically not encrypted.
If you install and run the Security Proxy server directly on the host, connections will be highly secure but CPU-intensive because additional processing is required to encrypt and decrypt the data stream.
You can increase the security of terminal session connections by ensuring that there is only one known, secure link between the Security Proxy server and the host. If you select End to end encryption when configuring a session, the connection between the Security Proxy and the host will use TLS.
Installation options
You can install the Security Proxy either at the same time or after you install Management and Security Server (the Administrative Server). Choose an option.
-
To install the Security Proxy WHEN you install the MSS Administrative Server
-
To install the Security Proxy AFTER you install the MSS Administrative Server
Note
If you are not able to use the automated installer, contact Support for guidance.
Installing the Security Proxy WHEN you install the MSS Administrative Server
Using this option, the MSS automated installer (and Configuration Utility) automatically installs, configures, and activates the Security Proxy. This approach saves time and reduces the risk of errors.
Be sure the Security Proxy Add-On activation file is available for download. (A separate license is required.)
-
Download the Security Proxy Add-On activation file,
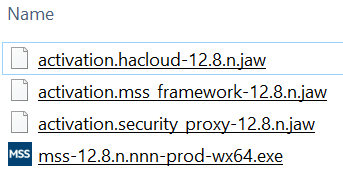
activation.security_proxy-12.8.n.jaw, and note the location. -
Place the security proxy activation file in the same folder as the MSS automated installer.
In this example, the Host Access for the Cloud activation file is also installed.
-
Run the MSS installer for your platform. During installation, be sure BOTH boxes are checked:
Host Access Management and Security Server
Security Proxy Server
-
When prompted, run the Initial Configuration Utility.
This utility generates cryptographic keys and self-signed certificates, automates configuration, and sets a port value for the Security Proxy.
The automated installer also places the activation file in the installation directory:
/MSS/securityproxy/lib/modulesThe Security Proxy is now installed, activated, and configured.
-
To view or change the configuration, open the Security Proxy Wizard from the Start menu.
For details, see Using the Security Proxy Server - Configure and Start the Security Proxy Server (in the MSS Administrator Guide).
Installing the Security Proxy AFTER you install the MSS Administrative Server
You can add the Security Proxy to MSS after the MSS Administrative Server is already installed.
Keep in mind that the Security Proxy needs to be installed, activated, and configured, which can be done either automatically or as separate actions. Choose a method:
Automatically install, activate, and configure the Security Proxy
To install the Security Proxy when the compatible version of the Administrative Server is already installed, you can re-run the automated installer.
Use the same steps: To install the Security Proxy WHEN you install the MSS Administrative Server.
Separately install, activate, and configure the Security Proxy
Or, you can install the Security Proxy server without the activation file, and later upload the security proxy activation file using the MSS Administrative Console. Then, use the Security Proxy Wizard to configure the Security Proxy server.
-
Install.
Run the MSS automated installer and check BOTH boxes – for Host Access Management and Security Server and the Security Proxy Server.
Host Access Management and Security Server
Security Proxy Server
Note
If only the Security Proxy Server is checked, the MSS files are removed.
-
Activate.
Download the activation file for the Security Proxy Add-On, and note the download location.
activation.security_proxy-12.8.n.jaw -
In the MSS Administrative Console, click Configure Settings - Product Activation.
-
Click Activate New and browse to
activation.security_proxy-12.8.n.jaw -
Click the file. The Security Proxy Add-On is installed and added to the Product list.
-
Copy the security proxy activation file, into the
/securityproxy/lib/modulesdirectory on the machine where Security Proxy Server is installed.The Security Proxy is now installed and activated.
-
Configure.
Use the Security Proxy Wizard to configure settings and manage certificates. Then, you can configure sessions to use the Security Proxy.
Follow the steps in Using the Security Proxy Server (in the MSS Administrator Guide).
In brief, you will:
- Configure and Start the Security Proxy Server
- Import the Security Proxy certificates
- Create Secure Sessions
- Assign Secure Sessions
- Run Reports