| Directory Facility | Forms-2 |
The Object COBOL Editor is a very powerful, yet easy-to-use, utility for developing and editing COBOL source code programs under the DOS, Windows, OS/2, or UNIX operating systems. It is designed with the COBOL programmer in mind, but it can also be used to create and edit other types of files.
The COBOL Editor has a hierarchical menu system that enables you to easily access each function with a simple keystroke. The COBOL Editor is often referred to as "the Editor" for brevity.
The COBOL Editor is supplied with Micro Focus Object COBOL. On DOS, Windows and OS/2, if you have Workbench the COBOL Editor has some additional features. Workbench-specific features are clearly indicated in this chapter.
When you use Editor with the Object COBOL system, you can syntax check and/or animate your program from the Editor using simple keystrokes. After syntax checking and/or animating, the COBOL system returns you to the Editor so that you can immediately resume work on your program.
In addition to features specific to COBOL program development, the COBOL Editor includes general text editing features for use on plain ASCII text files. You should not use the COBOL Editor on files produced by word processors, as formatting information embedded in the text by these word processors as control characters could be lost.
The COBOL Editor writes line sequential files, in which any characters with a value of less than ASCII 32 (space) are preceded by a null byte. Unexpected results sometimes occur if you load a file created or edited with the COBOL Editor into a non-Micro Focus tool which might not use null padding of ASCII control characters. You can disable this null padding by setting the N run-time switch to off (-N).
You can access the On-line Reference directly from the Editor. This enables instant access to the help in the On-line Reference and any other on-line help files supplied with this system. Thus, you can obtain information about COBOL syntax or call-by-name routines at the very point you need to know about the information - when you are writing your program.
Before you can use the On-line Help System, you must set the COBHNF environment variable to point to the directory containing the on-line help files. For example, if your COBOL system is installed on drive e:, and you accepted the default directory structure when installing, COBHNF should be set as follows:
set cobhnf=e:\cobol\on-line
To invoke the On-line Help System, press the hotkey Alt+1. The On-line Help System looks at the current screen. If a text cursor exists, it looks at that to determine which help topic to display. If a text cursor does not exist, it looks at the mouse cursor. If no cursor exists, it starts up at the home topic of the On-line Reference.
If the cursor is on a word, that word is used as a topic-name. If it is on a space, the word immediately following it on the line is used. If there is none, the word immediately preceding it on the line is used. If the line is blank, the system displays the home topic of the On-line Reference.
Once you have entered the On-line Help System, you can use it as described in the chapter On-line Help System to look at any files that are available. To return to Editor, press Escape from the On-line Reference main menu.
The following sections explain how to use the Editor, describing the functions available.
UNIX:
Throughout this chapter, references to pressing keys such as
function or status keys imply the logical pressing and releasing of these
keys rather than the physical keystrokes. Some keys are symbolic
key-names, which might not be present on your keyboard. See the appendix
UNIX Key Usage Chart for details of the actual keystrokes required
to achieve the documented function.
Examples throughout this chapter use the DOS and OS/2 file-naming format; that is, using a drive identifier and backslashes (\) as separators. For UNIX, replace the drive identifier with a device-name and the backslashes with forward slashes (/).
The following sections explain how to invoke the Editor from the different Micro Focus products with which it is supplied.
Note: Where you specify the command line depends upon the operating system you are running in. For example, in Windows and OS/2, if you have created a group for COBOL, you double-click on the appropriate program icon to invoke the component. Full details on the alternative methods of invoking system tools in your environment are provided in the chapter Introduction.
If you installed your COBOL system using the setup mechanism provided or followed the instructions for manual installation in your Getting Started, you can access Editor from any directory.
You can specify a file for editing when you invoke Editor. To invoke Editor, enter the command line:
component [d:pathname\filename.ext]
or:
trigger edit [d:pathname\filename.ext]
where the parameters are:
component |
The program-name for the system component
to be invoked, in this case Editor:
|
||||||
trigger |
An executable file to run the component in
one of the available development environments. This is the Run-time
Shell, Professional COBOL or Workbench:
If you are using Object COBOL, see the chapter Object COBOL Character Development Environment. If you are using Workbench, see the chapter Command Line Access in your Workbench Character Tools for additional details on these triggers. |
||||||
d: |
The operating system drive specifier for
the file if you choose to specify a file when you invoke Editor.
Default: current drive |
||||||
pathname |
The pathname for the file you want to
edit. You can specify any valid operating system path-name.
Default: current directory |
||||||
filename |
The name of the file you want to edit.
Default: no initial file loaded |
||||||
.ext |
The file extension of the file you want to
edit. By default, Editor searches for and loads the first found
extension to filename in the order .cbl,
.cpy, .cob, spaces (no extension) and .bak.
Default: .cbl |
On all environments, the total length of the name, including the
extension and path, must not be more than 65 characters. Table -1 shows
the maximum length of pathname, filename
and .ext on DOS, Windows and OS/2.
For example, if on DOS you specify an 8 character filename with a 3 character extension (including the period), the path cannot exceed 53 characters (that is, 65 - 12).
If you do not specify a filename, Editor opens a new file, and the prompt "workfile empty" appears on the screen.
Table 7-1 : Maximum Filename Length
| DOS/Windows | OS/2 | |
path-name |
< 65 characters | < 65 characters |
filename |
< 8 | < 65 |
.ext |
< 3 | < 65 |
As Editor is loaded, copyright notices and software version numbers are displayed. Then the initial Editor screen appears.
You can specify a file for editing when you invoke Editor. To invoke Editor, enter the command line:
editor [[pathname/]base-name[.ext]]
where the parameters are:
pathname/ |
The pathname for the file you want to edit
if you choose to specify a file when you invoke Editor. If you do
specify pathname/, it must consist of a valid
operating system pathname which can include environment variables
prefixed with a dollar sign ($). These environment variables are
expanded by the shell. For example, /tmp/file, $HOME/tmp/file,
and /tmp/$ABCD/file are all valid operating system pathnames
provided that the environment variables are first set to valid operating
system values.
Default: current drive |
base-name |
The name of the file you want to load. |
.ext |
The extension of the file you want to
edit. By default Editor searches for and loads the first found extension
to pathname/base-name in the order .cbl,
.cpy, .cob, .bak, .CBL, .CPY,
.COB, .BAK and spaces (no extension). |
On all environments, the total length of the name, including the
extension and path, must not be more than 65 characters. The following
list shows the maximum length of pathname, filename
and .ext on UNIX.
| Filename Component |
Maximum Length |
|---|---|
pathname |
< 65 characters |
filename |
< 14 |
.ext |
< 14
|
If you do specify a filename and it contains an extension, base-name
has a suggested maximum of 8 characters. If no extension is used, base-name
can have a maximum length of 14 characters. You should be aware that
saving files with base-names greater than 8 characters plus an extension
can have unexpected results.
If you do not specify a file, Editor opens a new file, and the prompt "workfile empty" appears on the screen.
As Editor is loaded, copyright notices and software version numbers are displayed. Then the initial Editor screen appears.
You can exit from Editor in any of the following three ways:
In all cases, the Editor first checks to see if there are any files or blocks which have been modified but not saved. If there are, the Editor displays a message of the form:
unsaved files exist - exit without saving Y/N ?
Where only a single file is loaded, the message is shortened to:
exit without saving Y/N ?
Pressing Y(Yes) tells the Editor to continue to exit and discard any unsaved modifications. Pressing N(No) abandons the exit, enabling you to save your changes. If you have many files open, you might find the facilities offered by the save file list boxes helpful in saving a number of modified files in one go. See the section The Save-file List Boxes for further details.
The screen that appears when you first invoke Editor displays a work area in which you can create a new file (or edit an old one), and three lines of text at the bottom of the screen: an Information Line and two lines displaying the options on the current menu. A fourth line is reserved for displaying messages such as reminders or errors; this is the message line and is initially blank. Each of these components of the Editor screen is described below.
The work area initially contains a single window in which all editing operations are performed.
If you invoke the Editor to create a new file, the message:
. . . workfile empty. . .
appears at the top of the window.
If you are working with an old file, the line:
------------------------top of text-----------------------
marks the beginning of the text file, and:
------------------------end of text-----------------------
marks the end of all text entered in the file.
Since the Editor is designed for the development of COBOL programs, the work area by default is initially divided into three sections that conform to COBOL programming standards, although you can easily configure this. Using this default setting, each time you invoke the Editor the cursor is positioned in column 8, the first column in which you can enter COBOL code. You can enter text and other characters in columns 8 through 72 inclusive. Columns 8 through 72 correspond to areas A and B in a COBOL program.
You can enter text such as sequence numbers or indicators in columns 1 through 7. (Note, however, that these numbers are not mandatory and are only checked if you use the SEQCHK Compiler directive is used. See the appendix Directives for Compiler for details.)
You can also use columns 73 onwards for comments you want to include in your program. Since the default margin settings are 7 and 73, you use the cursor keys (<left-arrow>, <up-arrow>, <right-arrow> and <down-arrow>) orHome and End keys to move into these two areas. You can change the default settings of the right and left margins so that you can use the Editor to create and view other types of files; this is described in the sections Entering Text and Configuring the COBOL Editor. Text lines of up to 250 characters can be created and viewed in an edit window.
The Information Line is the first line displayed by the Editor at the bottom section of the screen. Although the contents of this line vary, it appears on every screen invoked by the Editor. An example is shown in Figure 7-1.
![]()
Figure 7-1: The Information Line
The Information Line displays the following information:
The menu always appears below the Information Line. It displays the options, defined by keyboard keys and function keys, that you can access from the current menu. The number of options displayed varies according to the menu. When you first invoke Editor, the screen displays the main menu . You access two other menus - the Alternate menu and the Control menu - by pressing and holding down the Alt and Ctrl keys, respectively. The Alternate and Control menus display further options available in the Editor.
When you access options from the Alternate or Control menus, you continue to press Alt or Ctrl while you press the desired function key. This instruction is documented as Alt+Fn or Ctrl+Fn, where n is the function key number.
You can also set the Alternate and Control menus to remain visible on the screen by pressing Shift+F1 and Shift+F2 respectively. Press the appropriate key combination again (or Escape) to toggle back to the main menu.
The definition of function keys can vary according to the particular menu displayed. However, one function key carries the same definition throughout the Editor system. This is the F1=help option. When you press F1 from any menu, you access an on-line help system which displays information about the current function as well as defining the options available from that function. If there is more than one screen of help text, pressing F1 again displays the next screen. To return to the current function from the help screen, press F1 (from the last screen) or the Space bar.
The Escape option, though not present on every Editor menu and submenu, is consistent in its use where available: when you press Escape, you return to the previously displayed screen or function. Pressing Escape from certain menus causes a reminder to appear on the message line (the last line on the screen). For example, if you press Escape from the main menu without saving your file, the Editor prompts you to make sure you want to do this. When you are editing a single file and you press Escape at the main menu, you exit from the Editor. If you have loaded more than one file for editing, you are presented with the next file to edit.
The message line is the bottom line of the screen. This line is reserved for system messages such as error messages and reminders.
It is possible to edit more than one file at a time, or to open windows on different parts of the same file, as detailed below. The procedures for doing these things are explained in the section Using Edit Windows.
You can load a program and its copyfiles into one window, and bring any one of them to the front to view and edit. The others are temporarily hidden.
You can also open more than one window, and load one or more files into each of them. This enables you to see several files at once if you want. As with a single window, you can bring any file you want to the front of a window. There is still only one menu, since you can only edit one thing at a time: it applies to the window which you have selected.
If you load the same file into two or more windows, you can see two or more views of the file at once. That this does not create multiple copies of the file - changes you make to a file in one window are reflected in other windows containing that file as soon as you select them.
This section explains how to perform editing procedures. The section Using Edit Windows explains how you can edit more than one file at a time.
If you are creating a file or files from scratch, you do not need to load anything: you can just start typing in the window which is present when the Editor starts up. See the next section for details of the functions available for entering new text.
Editor provides two ways in which to load files for editing. You can either specify a filename at a file prompt or you can select the filename from the Directory Facility. This next section briefly describes these two methods. For details on how to access files which have already been loaded into the Editor, see the section Accessing Files in a Window in the section Using Edit Windows later in this chapter.
You access the Load-file menu by pressing Alt+F3 from the Editor main menu. The Information Line and menu shown in Figure 7-2 appear on your screen.

Figure 7-2: The Load-file Menu
The load-file function inserts the specified file at the current cursor location. This makes it easy to build a program from individual pieces of code stored as separate files. For each segment, just move the cursor to the insertion point and use Alt+F3.
The file prompt appears below the Load-file menu. It displays the current path by default. You can change to another drive and directory by typing over the current one. You can use Backspace to delete the characters at the file prompt.
You enter the name of the file you want to edit at the cursor position. If you do not specify a filename extension, the Editor searches for that filename using a default extension list. You can change this default configuration to the extension you want Editor to search for. See the section Defining File Search Extensions later in this chapter for details on the search order used in your given environment and on how to change these defaults.
After you type the filename, press Enter. The system loads the file for editing: the Editor main menu appears, with the file displayed in the work area of the screen.
You use the Directory Facility to display the names of all files available for editing. You select the filename of the file you want to edit from this listing.
To access the default Directory, press F2=directory on the Load-file menu. The default directory displays those filenames with the extensions defined in the extension list (see the section Defining File Search Extensions later in this chapter for details). If you have configured the Editor to search for either additional or different extensions, the directory displays files with those extensions. If you want to load a filename with another file extension, type the extension at the file prompt. Then when you press F2=directory, the listing of all files with that extension are displayed.
To select a filename from the directory listing, use the <up-arrow> or <down-arrow> keys to place the cursor on the desired filename and press Enter. The selected filename appears at the file prompt on the Load-file menu, and you can press Enter again to load the file into Editor.
When a file is specified for loading, either at the File prompt on the Load-file menu or on the command line when the Editor is started, the following search method is employed to locate the file:
The Editor matches files requested or already loaded without a path description to those specified with a path description. It does not
match filenames specified with different paths. For example, c:\programs\myapp.cbl matches myapp.cbl; c:\programs\newapp.cbl does not match c:\demo\newapp.cbl.
To edit two or more files with the same name from different paths, you must ensure that when you specify each file for loading, you specify the full path. If you do not, the Editor presents the same file each time you load.
file not found with defined extensions
If a file is located on disk, the Editor seeks to prevent multiple attempts to update the file when used in an environment with file locking capability (for example a multi-threading environment such as OS/2 or a multi-user environment using networking software). When a file is opened to be loaded into Editor one of the following conditions is true:
In this case a Lck indicator is displayed on the Information Line indicating that this file cannot be overwritten by any other thread/user.
Note: This does not prevent subsequent read access of the file by other threads/users.
In this case, the following message is displayed before the Editor loads the file:
file is read only - press space to continue
The Lck indicator is not displayed and subsequent save operations to the same filename are not permitted.
In this case the following message is displayed before the file load:
file already open, read access only - press space
to continue
The Lck indicator is not displayed and subsequent save operations to the same filename are not permitted.
In this case the following message is displayed:
file is locked, no access permitted
The file load cannot proceed.
This section describes the keys used to enter text in a window. It shows you how to change margin settings and turn on and off the word-wrap feature of the Editor.
As you enter text, the Editor beeps when the cursor approaches the right-hand margin. This is a reminder that you are nearing the end of the line.
The current line (that is, the one on which the cursor is positioned) is always highlighted.
The Editor accepts text entry in either upper- or lower-case alphabetic characters. To set text entry to upper-case characters, you press Caps Lock. This is a toggle which you press to turn the key on and off. The status of the Caps Lock key is displayed by the change in appearance of the Caps indicator on the Information Line. To set entry to lower-case characters, press Caps Lock again.
The Num Lock key is a toggle key similar to the Caps Lock key. You press Num Lock to lock the numeric keyboard so that it produces numbers rather than cursor movement key functions. The status of the Num Lock key also appears on the Information Line; the Num indicator is highlighted when Num Lock is on.
When you reach the end of the line, the word-wrap feature (on by default) moves the last word to the next line if the number of characters in the word exceeds the available character positions on the current line. If word-wrap is off, the word splits over the two lines. When word-wrap is on, the indicator Wrap is displayed on the Information Line.
The word-wrap option is located on the Control menu. You first press Ctrl to access the Control menu. Then, while holding down Ctrl, you press F8 which toggles word-wrap on and off. The default setting of the word-wrap option is configurable. See the section Configuring the COBOL Editor for more details.
If you are using the Editor in an environment which supports file locking, whenever you load a file to which you have exclusive access, the file lock indicator (Lck) is displayed on the Information Line immediately before the word-wrap indicator. If you are running in an environment that does not support file locking or a lock could not be obtained, the indicator is not displayed. Further details of when file locks are granted or refused can be found in the earlier section File Access Considerations.
The Enter key has three functions in the Editor:
This section discusses the Enter key in its role as the carriage return key.
When you are entering text and have not reached the end of the current line, you use Enter to position the cursor on the next line. The first time you press Enter, the cursor returns to the same column in which the previous line began.
For example, the current line is indented 4 spaces from the left margin and begins in column 12. When you press Enter once, the cursor moves to column 12 on the next line. If you press Enter again, the cursor returns to the beginning of the next line (column 8).
When you are working with a file you have already created, pressing Enter from any character position on the current line places the cursor at the first character entered on the next line. However, if Insert mode is "on" (set by the Ins key), pressing Enter inserts a new line below the current line and moves all characters to the right (including the character at the current cursor position) to this new line.
The default margin settings for standard COBOL files (.cbl, .cob, .cpy, .bak, or spaces) conform to COBOL program development standards. The left margin is set at column 7, the right margin at 73, enabling you to enter your source code between those columns. You can use the remaining columns (1-7 and 73-250) for sequence numbers and comments.
The section Configuring the COBOL Editor describes how to set up new margins or adjust the defaults. For example, you can configure the Editor to set different margins when loading files with specific extensions. The remainder of this section describes margin handling and functions in terms of the default COBOL margin settings.
If a file loaded into the Editor does not have one of the standard COBOL extensions, the margins by default are set to 0 and 81 (again, you can configure this).
If margins other than the COBOL margins are selected, tabbing includes tabs at columns 4, 76, 80 and every 4 columns up to column 248 (with COBOL margins, the tab keys skip these positions).
You can change the margins to settings between columns 1 and 250, as well as take advantage of the full window, by using the F5=margins option on the Control menu. This option consists of a Margins menu which displays various ways to change margin settings.
From the Editor main menu, press and hold down Ctrl to access the Control menu (shown in Figure 7-3).

Figure 7-3: The Control Menu
Continue to press Ctrl as you press F5=margins, then release both keys. The Margins menu appears on the screen as shown in Figure 7-4. Two vertical bars might also appear in the window, displaying the boundaries of the current margin settings. You see them if they are in the region of text enclosed by the window.
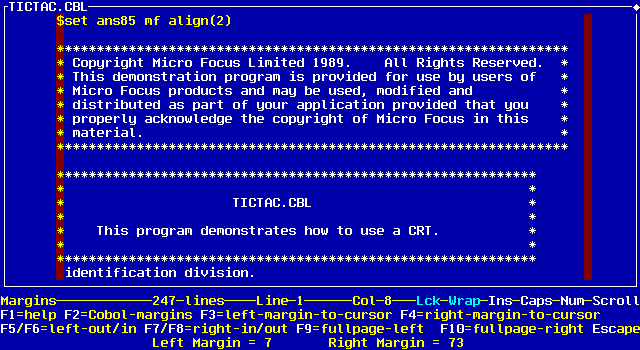
Figure 7-4: The Margins Menu
There are various ways to change the margin settings depending on the results desired. These are listed below:
Move the cursor to the column in which you want to begin entering text. Press F3=left-margin-to-cursor to position the left vertical bar at the new left margin setting.
Move the cursor to the last column in which you want to enter a character. Press F4=right-margin-to-cursor to position the right vertical bar at the new right margin setting.
Press F5=left-out to move the left vertical bar to the left (out) by one character, or F6 to move it to the right (in) by one character.
Press F7 to move the right vertical bar to the left (in) by one character, or F8 to move it to the right (out) by one character.
Press F9=fullpage-left. The left vertical bar disappears from the window verifying that you can begin entering text in column 1. The left margin position is set to column 0.
Press F10=fullpage-right to extend text entry through column 250. The right vertical bar also disappears from the window, and the right margin position is set to column 251.
The vertical bars reappear when you reset the margins to another location in the window. The margin settings are also displayed in the message area below the Margins menu.
Note: You can enter text outside of the margin boundaries by using the cursor movement keys (<left-arrow> and <right-arrow>) Home, or End keys to position the cursor in these areas. Note, however, that when you press Enter, the cursor remains in the current area. You must use the cursor movement keys to reposition the cursor inside the margins.
If you change the margin settings for a window, they remain set until you exit from, and close, the window. A new window has its margins set to those defined by the INIT-MARGINS configuration command (see the section Configuring the COBOL Editor for more details). If no INIT-MARGINS command has been specified, the Editor defaults to using COBOL margins (7 and 73) for each new window. If a file is subsequently loaded into the window, the margins are reset to the values defined for the particular file's extension. If no margins are defined for the extension, the margins used when the window was created are retained.
Press Escape to continue editing with the currently set margins.
This section describes the keys and function key options that you use to insert and delete text. It also describes how to restore text that you have deleted in the same editing session. This section is divided into three subsections:
Some of the keys you use to insert and delete characters can also be used to insert and delete words. Those procedures you use to insert and delete words, in turn, can be applied to inserting and deleting lines of text. However, each of the above categories also has its own specific function key to provide the fastest and easiest way of executing the procedure.
This section describes how to insert and delete individual characters from your text. You can restore in sequence up to 250 characters deleted at a time during the current editing session.
You can insert text between characters, words and lines by turning on Insert mode. The Ins key is a toggle key that turns this mode on and off. When Insert mode is on, the Ins indicator on the Information Line appears highlighted. The shape of the cursor also changes.
To insert a character(s) on a line, move the cursor to the character position before which you want to insert text. Insertion is always made at the cursor position with the current text moved one character position to the right. Then type the character(s).
Remember that when you press Enter while Insert mode is on, all the characters to the right and including the current cursor position move to the next line in the window.
You can use three different keys to delete characters from the screen. These are Space (with Insert mode off), Del and Backspace.
Pressing Space when Insert mode is off overtypes the character at the current cursor position with a space.
The function of Del erases the character at the current cursor position and causes the text following the deleted character to move one character space to the left.
The Backspace key functions differently according to the setting of Insert mode. When Insert mode is on, Backspace behaves similarly to Del: it deletes the character to the left of the cursor position and causes all text to the right to move one character position to the left.
When Insert mode is off, pressing Backspace deletes the character to the left of the cursor position and restores any characters that were previously overtyped.
The Editor remembers up to a maximum of one line of characters (250) deleted during an editing session. It places them in a buffer, enabling you to recover them by using F7=retype-char or F8=restore-char on the main menu. The buffer is used by all windows, enabling deleted characters to be restored in any window.
You use F7=retype-char to recover the character last deleted with the Backspace key. Its behavior depends on the status of Insert mode. If Insert mode is on, the recovered character is inserted at the current cursor position. If Insert mnode is off, pressing F7=retype-char types the recovered character over the character at the current cursor position. You can change the case of the recovered character by pressing Caps Lock before you press F7=retype-char.
The F8=restore-char option enables you to insert the character last overtyped or deleted with the Del key at the current cursor position, insertnig it into a line regardless of the Insert mode.
If you change a word by typing over it, you can use Backspace to replace the original word. Simply press Backspace to restore the most recently replaced characters.
This section describes how to insert and delete entire words from your file. You recover deleted words using the same method to recover deleted characters.
Inserting entire words into your text is the same as inserting characters. You place the cursor at the position at which you want to insert text. Then, with Insert mode on, you begin typing the inserted material as the characters to the right and including the cursor position move further to the right.
The Editor enables you to delete entire words with one keystroke. The options to do this are located on the Alternate menu and are defined by F9=untype-word-left and F10=delete-word-right.
Note: Editor defines a word as a string of characters preceded and followed by a space, as well as two or more contiguous spaces.
If the cursor is positioned on a non-space character, deleting a word left/right means deleting all characters left or right until a space is encountered.
If the cursor is positioned on a space character and the adjacent character(s) left or right are spaces, deleting a word means deleting all spaces left or right until a non-space character is encountered.
The behavior of the F9=untype-word-left option depends on the setting of Insert mode. If Insert mode is off, F9 replaces the word with spaces and text after the word does not move. If Insert mode is on, F9 erases the word and drags the text after the word to the left.
You can recover the deleted word by pressing F7=retype-char on the main menu.
Press Alt+F10=delete-word-right to delete the word to the right of the cursor position. You can recover the deleted word by pressing F8=restore-char on the main menu.
The Editor offers various ways to insert and delete entire lines of text. All of the menu options for these functions are located on the main menu.
You can insert entire lines of text in your file using either Insert mode or the F3=insert-line option on the main menu.
Using Insert mode (by pressing the Ins key), you insert a blank line below the current line by positioning the cursor at the end of the current line and pressing Enter. The cursor moves to the beginning of the blank line.
To insert a blank line above the current line in Insert mode, place the cursor in the first column of the current line and press Enter. The blank line is inserted, but this time the cursor remains with the current line.
A faster way to insert lines is to use the F3=insert-line option. This inserts a line above the current line. Position the cursor anywhere on the current line and press F3=insert-line. The existing text moves down one line while the cursor remains in place.
You can delete an entire line of text using one keystroke. Place the cursor on the line you want to delete and press F4=delete-line. The line is deleted and the text below moves up one line.
Any lines that you delete in an editing session remain in a buffer so that you can restore them to the file. The system restores the most recently deleted line first. The buffer is used by all windows, enabling deleted lines to be restored in any window.
Restored lines are inserted on the line above the cursor. To restore the deleted lines, place the cursor on the line below the one where you want the insertion. Then press F6=restore-line. You can press F6=restore-line again to insert the next line or move the cursor to another location to restore the next line in the buffer. You can use the combination of F4=delete-line and F6=restore-line to move lines of text from one location in your file to another. The action of restoring a line removes that line from the buffer. When all of the deleted lines held in the buffer have been restored, the Editor beeps at further attempts to restore.
The Editor also enables you to repeat the current line. It inserts this line above the current one. You do this by using the F5=repeat-line option.
Note: You can copy multiple consecutive lines to another location in your file. To first store them in the buffer, alternately press F5=repeat-line and F4=delete-line for each consecutive line you want to copy. Then move the cursor to the desired location and repeatedly press F6=restore-line until all the lines have been copied to the new location.
Other features of the COBOL Editor enable you to split a line of text and, optionally, join it back together. You can then insert text at a specific character position or eliminate unnecessary gaps in your file. The Alt+F5=split-line and Alt+F6=join-line options are located on the Alternate menu.
Pressing Alt+F5=split-line splits a line at the current cursor position. All text from the cursor to the end of the line moves to the next line, causing the following lines of text to move down one line. The columns occupied by the text remain the same.
Pressing Alt+F6=join-line joins lines at the current cursor position. To join lines, place the cursor on the first of the split lines. Press Alt+F6=join-line. The text on the line below appears to the right of the word on the line containing the cursor. If the number of characters on the second line exceeds the available space on the line above, the Alt+F6=join-line feature moves as many whole words as possible and then places the cursor on the second line with the remaining text. The join-line option is particularly useful for formatting paragraphs. To do this, position the cursor on the first character of a paragraph and press Alt+F6=join-line until the paragraph is formatted.
You can move the cursor to any location in your file by using special keyboard keys, key combinations and function keys defined on the Main and Control Menus. This section lists the different ways you can move through a file and describes the use of the keys associated with the particular operation.
You use the cursor movement keys (<right-arrow>, <down-arrow>, <left-arrow> and <up-arrow>) to place the cursor anywhere in the file. However, there are quicker ways to position it at specific locations.
You move the cursor back and forth across a line using Home, End and Tab, and the F9=word-left and F10=word-right function keys defined on the main menu.
The effect of using the Home and End keys depends on the current cursor position and whether text exists in each region of the line. The following sequence for the Home and End keys assumes that the current cursor position is between the margins, not at the beginning of a line, and that text only exists in the text area between the margins.
Pressing Home once positions the cursor at the left margin on the current line. Pressing Home again then places the cursor in column 1 of your window, regardless of the margin setting. If you press Home a third time, the cursor moves to column 1 of the first line in the window.
The function of the End key is opposite to that of the Home key. You press End to position the cursor after the last character on the line. Pressing End a second time moves the cursor just outside the right margin. Pressing End again moves the cursor to column 250. If you press End one more time, the cursor moves to the column 250 of the last line in the window.
If the cursor is in the left or right margin areas, pressing End first positions the cursor after the last character in the region, and pressing End again moves the cursor just outside the region.
If you were editing a non-COBOL file, you would probably not press these keys more than twice in succession. However, for COBOL program development, you might use these keys to position the cursor inside columns 1-7 and 73 onwards for entering comments.
You can use Backtab and Tab to move the cursor four positions to the left or right. To indent an existing line of text, place the cursor at the beginning of the first word on the line. Then press Ins to turn on Insert mode, and press Tab. The entire line moves four character positions to the right.
The Editor also enables you to move word by word through the screen using the F9=word-left and F10=word-right options on the main menu. It is important to remember that Editor defines as a word a string of characters preceded and followed by a space, as well as two or more contiguous spaces.
Press F9=word-left to move the cursor to the first character of the word to the left of the current cursor position. If the cursor encounters two or more spaces, it moves to the first of these spaces.
Using the F10=word-right option moves the cursor to the beginning of the next word to the right. Again, if it encounters two or more spaces, it stops on the first of these spaces.
As you reach the end of a line, pressing Tab or F10=word-right (described above) positions the cursor on the first tab position or word on the next line. Pressing F9=word-left eventually moves the cursor to the first word encountered on the previous line. However, a more expedient way to move the cursor to the next line is to press <down-arrow> or Enter (with Insert mode off). Simply press <up-arrow> to position the cursor on the previous line.
When you are entering text, you press the Enter key to position the cursor at the first character position on the next line. However, if word-wrap is on, when you reach the end of the line the text you are typing automatically wraps to the following line. If you are working with a previously created file, pressing Enter places the cursor on the first character of the following line.
When used with Ctrl, the Home and End keys place the cursor at the beginning and end of a file. These two functions are defined on the Control menu.
Press and hold down Ctrl to display the Control menu. The Home/End (of text) option is displayed on the second line. Continue to hold down the Ctrl key and press Home to position the cursor at the top of the file, the cursor moving to the first column to the right of the left margin. Pressing Ctrl+End places the cursor at the end of the file (on the "end of text" indicator) the cursor retaining the same column position from which it moved.
You use specific keys or combinations of keys to view parts of your file not visible in the window. You can also scroll through the file to position the cursor at another location.
The Page-up and Page-down keys display the previous or following page of text not currently visible on the screen. You simply press Page-up to view the previous page, or Page-down to display the following page.
The height of a window determines the size, in lines, of a page. The page height is the number of text lines available in a window minus 1. For example, if a window is 19 lines high, excluding the border, the page height is 18 lines.
Page-up and Page-down behave differently when used with the Ctrl key. These two keys are defined on the Control menu. Press Ctrl to view the Page-up/Page-down option.
Press Ctrl+Page-up to move the cursor up 200 lines of text. Press Ctrl+Page-down to move the cursor down the same number of lines.
There are three different ways to scroll through a file. These are described below.
When you use the <left-arrow> and <right-arrow> keys with the Ctrl key, you scroll the current line up and down in the window. The cursor remains on the current text line.
To do this, press Ctrl to display the Control menu. The "<left-arrow>/<right-arrow> (move in window)" option appears on this menu. Continue to press the Ctrl key as you press <left-arrow> to scroll the current line up. Press Ctrl+<right-arrow> to scroll the current line down.
You can also use the <up-arrow> and <down-arrow> keys with Scroll Lock set to scroll text up and down, line by line, as the cursor remains in place.
Press Scroll Lock to turn on the scroll function. Then press <up-arrow> to move the text up, or <down-arrow> to move the text down.
You can scroll quickly through your file by using the scroll option on the Control menu. Press Ctrl+F10=scroll to enter the Scroll menu, which is displayed as shown in Figure 7-5.

Figure 7-5: The Scroll Menu
To scroll up through your file, press <up-arrow> ; to scroll down, press <down-arrow> .
When scrolling through the file, the speed can be adjusted using the numeric keys 0 through 9. 0 indicates the slowest speed, which is progressively increased until the maximum speed 9 is reached.
You can stop the scrolling action at any time by pressing any other key on the keyboard. The Scroll menu also provides scrolling through the current line of the file. To scroll left through the line press <left-arrow> ; to scroll right press <right-arrow>. Again the speed of scrolling is adjustable as described in the paragraph above.
See information on the Page-up, Page-down, Home, and End keys for other ways to move through a file.
You can use the tag facility of the Editor to tag a text line so that it can be selected by other keystrokes while editing the file. Any number of text lines can be tagged while editing the file.
To access the tag facility, press and hold down Ctrl from the Editor main menu to display the Control menu. Continue to press on the Ctrl key as you press F7=tags, then release both keys. The Tags menu shown in Figure 7-6 appears.

Figure 7-6: The Tags Menu
A tag is set by pressing F2=set-file-tag. The tag is set on the current text line. The tagged line is displayed using an alternative screen attribute making the tagged lines visible in the displayed file. Any text line in a file or block can be tagged.
A tag is cleared from the current text line by pressing F3=clear-tag. All the tags are cleared from a file or block if F4=clear-all-tags is pressed. Tags are only maintained while the file is being edited. If a file is saved and escaped from, the file tags are lost. Deleting a tagged text line also clears the tag. Creating, inserting, or restoring blocks does not include tags on any text line.
A tag can be located by pressing F7=prev-tag or F8=next-tag. The search is made from the current text line. If, when searching, the start or end of the file is reached, searching wraps to the end or start of the file, depending upon the search direction. When a tag is located, the Editor positions the cursor on the tagged line. The column number is unchanged.
You can use the Find facility of Editor to locate a string of text in a file and optionally replace it with another string. You can either replace individual occurrences of a string of text or globally replace all of them. As you use this facility, you can edit the file but you cannot use those editing functions that require the use of function keys. This section describes all of the features of the Find facility.
The Find facility of the Editor is region-orientated with the search area being defined by the cursor position in relation to the current margins when the search is begun. Depending on the particular margins you are using, a line can consist of up to three different regions : the columns before the left margin, the columns between the left and right margins, and the columns beyond the right margin. Taking COBOL margins as an example, if the cursor is in column 5 when the search is started, only columns 1 through 7 of each line are searched. Similarly, if the cursor lay in column 25, the search region is columns 8 through 72. In practice this means that if a word you are searching for overlaps a margin column, the Find facility does not recognize the word, since it is not wholly in the search region. To find the word, you must adjust the margin settings so that the word does not cross a margin column.
To access the Find facility, press and hold down Ctrl from the Editor main menu to display the Control menu. Continue to press the Ctrl key as you press F2=find, then release both keys. The Find menu (including the Information Line) appears as shown in Figure 7-7.

Figure 7-7: The Find Menu
The variety of functions in the Find facility requires more than one menu to display all of its options. Therefore, further options are displayed on the Find Options menu. Press and continue to hold down the Ctrl key to display the Find Options menu shown in Figure 7-8.

Figure 7-8: The Find Options Menu
Refer to these two menus as you read through this next section.
You use the Find and Replace fields below the Find menu to enter the string of text you want to locate and optionally replace in your file. When you first select the Find option, the cursor appears in the Find field.
There are a number of ways in which you can enter the text string to be found and, optionally replaced, in the Find facility. You can simply enter the text string at the cursor position in the Find or Replace field; each field accepts a maximum of 32 characters.
Another way is to position the cursor on an occurrence of the character string you want to locate in your file. Then press Ctrl+F3=cursor<right-arrow>Find to place the text string in the Find field.
You can also use this method to enter text in the Replace field. Press F2=set twice and position the cursor on the replacement string in the file. Now press Ctrl+F3=CursorRepl to place this character string in the Replace field.
Pressing F2=set cycles you through the Find and Replace fields and then back to the window. You can use Tab and Backtab to move back and forth between the two fields.
Pressing Ctrl+F4=clear enables you to clear the Find and Replace fields so that you can enter another text string. All characters from the cursor position to the right are deleted.
You can use Space, Backspace, or Del to erase characters from the Find and Replace fields. However, you should be careful using Space in the Replace field - you could add unexpected trailing spaces.
Once you have entered the text string in the Find field you can search back and forth through the file to find each occurrence of the string. To search forward through the file, you press F10=FIND-fwd.
Each time the cursor locates the text string, the following message appears at the bottom of your screen:
"F8=forward" to replace, "F10=forward" to find next
You have the option of either continuing with the search or replacing the text string at this time (see the section Replacing the Text String below). If you use F8 and there is nothing in the Replace field, the find text string is deleted.
You can move backward through the file to locate the previous occurrence of the text string by pressing F9. Each time the Editor finds an occurrence of the text string, the message:
"F7=back" to replace, "F9=back" to find previous
appears at the bottom of the screen. You can continue to locate each previous occurrence, or you can choose to replace the text string with the text string in the Replace field (see below).
Note: If you press Enter when the cursor is in the Find or Replace field, the Editor finds only the first occurrence of the string.
There are two other options which you can specify to further define the text you want to locate. By default, the cursor searches for a text string without attention to alphabetic case. You can specify a search with alphabetic case by pressing Ctrl+F6=case. This causes the Editor to find only those occurrences that match the alphabetic case specified in the Find field. When you specify case, the word "case" appears on the Information Line. For example, if case is turned off and you specify "Abc" as the find string, the Editor finds both "abc" and "ABC", If case is turned on it finds only "Abc". To turn off case sensitivity, press Ctrl+F6=case again.
The three punctuation characters comma (,), period (.) and semicolon (;) are, by default, treated as spaces during a search. However, you can include these characters in the search by pressing Ctrl+F5=punc. The abbreviation "punc" appears on the Information line. Pressing Ctrl+F5=punc a second time turns "punc" off.
You can also move to a particular line of text by specifying its line number. You do this by pressing F3 (line). The word "Line" replaces the word "Find" in the Find field. A message appears at the bottom of the screen prompting you to enter the line number at the cursor position. Then press Enter. The specified line becomes the current line on the screen.
You can replace each occurrence of a text string either individually or globally.
When you first access the Find menu, the Information Line displays the indicator "stp" (for "Step"). This means that the replacement mode is set to step to each occurrence of the text string specified in the Find field. The first time you press F8=REPLACE-fwd to locate the next text string, the cursor moves to that text string. The same message that appears when you use press F10=FIND/fwd also appears when you press F8=REPLACE-fwd:
"F8=forward" to replace, "F10=forward" to find next
If the cursor is not currently on an occurrence of the text string, it moves to the next occurrence the first time you press F8. Pressing F8 a second time confirms that you do indeed want to change the text string and makes the replacement. You use F7=REPLACE-back to replace the previous text string in the file. If the cursor is not currently on an occurrence of the text string, it moves back to the previous occurrence the first time you press F7. Pressing F7 a second time confirms that you do indeed want to change the text string and makes the replacement.
The difference between the F7/F8=REPLACE-back/fwd function and the F9/10=FIND-back/fwd function is that the former replaces the text string while the latter simply finds the next or previous occurrence. You can use them in conjunction with each other depending on the desired results.
You can choose to replace all occurrences of a text string with another, using global replacement. The cursor moves either forward or backward from the current cursor position through the file making all changes.
To change to global replacement mode, press Ctrl+F9=repl-mode. The indicator "all" replaces "stp" on the Information Line.
To go forward through the file, press F8=REPLACE-fwd. The following message appears:
WARNING: next "F8=forward" will replace ALL remaining occurrences
This warning message reminds you that global replacement mode is active.
When you press F8=REPLACE-fwd a second time, the cursor begins its movement through the file, changing each occurrence of the text string on its way. The cursor stops to the right of the last change made. The number of occurrences replaced appears on the Message Line at the bottom of the screen.
Note: You can interrupt the search or replace process at any time by pressing Ctrl+Break
You can move or copy text from one part of a file to another using the Editor's Block function. You first copy or move the block of text to a temporary buffer in which you can edit it. You then insert it anywhere in your current file or into any other file loaded into an Editor window. You can define and use multiple blocks in the same Block session. Even entire files can be loaded as a block into the current file.
These features are displayed on the Block menu, available from the Control menu. This section describes all of the functions available to move or copy blocks of text.
To access the Block menu, press Ctrl+F3=block. The word "Block" appears on the Information Line above the menu shown in Figure 7-9.

Figure 7-9: The Block Menu
You must first define the block of text you want to copy or move to another location in the file. Press F4=define-block to begin this process. The submenu shown in see Figure 7-10 appears displaying further options.

Figure 7-10: The Block Definition Menu
The instruction on the Message Line at the bottom of the screen tells you to use the cursor movement keys (<down-arrow> and <up-arrow>) to mark the block of text. As you press <down-arrow>, the marked text appears highlighted. You press <up-arrow> to unmark the text. You can also use Page-up, Page-down, Home and End keys to mark a larger block of text.
You can use the F2=find option on this menu to locate the string of text you want to include in the block. This enables you to access the Find facility of the Editor (described above). When you press F9=FIND-back or F10=FIND-fwd, all text from the current cursor position to the first occurrence of the text string specified in the Find field becomes part of the block. When you exit the Find facility, you return to the Block menu shown above.
You can define multiple blocks of text for insertion elsewhere in your file. To do this, you simply define one block of text at a time, which is then placed in a buffer.
You now have the option of copying the marked text or removing it entirely from its current location. If you want to simply copy it to another location in your file, press F3=copy-to-block. If you want to move it to another location, press F4=remove-to-block. You can also exit from this Block submenu without defining a block by pressing Escape.
When you press F3=copy-to-block or F4=remove-to-block, the initial Block menu reappears. You can now move to any location to insert the defined block of text.
Place the cursor on the line before which you want to insert the block of text. Press F3=insert-block to place the entire block of text in this location. You can continue to insert a copy of this block of text anywhere in your file.
If you defined multiple blocks of text, you can use F6=restore-block to restore the blocks in the reverse order in which you defined them. First, place the cursor on the line above which you want the last-defined block to appear. Then press F6=restore-block. Then move the cursor to the location where you want the next block in the buffer to appear and press F6=restore-block again.
Note: When you move or copy a block of text, the Editor places the block in a stack. When you define multiple blocks to be moved or copied, they are located in the stack in the reverse order in which you selected them. For example, the second block selected sits on top of the first selected block.
When you press F3=insert-block, a copy of the first block on the stack is inserted at the desired location. You can then insert this same block at other locations in your file.
Pressing F6=restore-block removes the top block from the stack and inserts it at the desired location.
If you want to edit a block of text before you insert it in a file, press F2=edit-block on the initial Block menu. The block appears alone in the work area of a screen below which is the Editor main menu. All of the Editor functions are available from this menu. Notice that the filename on the Information Line is "Block".
The cursor is positioned at the left margin if this is the first time the block has been edited or at the previous cursor position if the block has been edited before. This cursor positioning can be useful if a particular string is to be edited before each insertion (when the block is to be inserted in many places).
Once you have finished editing the block of text, press Escape to return to the current file. Then, to return to the Block menu, press Ctrl+F3=block. Move the cursor to where you want to insert the block, then press F3=insert-block or F6=restore-block. As part of the function of block editing, you can load an entire file into a block (see the section Loading a File). The file is opened and the records copied into the block. The file is then closed. You can also save the block as you would save any other file (see the section Saving a File).
Each save operation is performed as if a new file is being created. If a file had been loaded into a block which was now being saved to the same filename, the Editor warns you that this file already exists on starting the save operation.
Note: If you exit Editor while there are still modified blocks of text in the buffer, the following warning message is displayed on the Message Line below the Editor main menu:
unsaved blocks outstanding in Editor - exit without saving? Y/N
Saving the file does not automatically save blocks of text. If you want to save the blocks of text remaining in the buffer, press N (No) in response to this message. Then press Ctrl+F3=block to return to the Block menu.
Now press F2=edit-block to display the last block you defined. (To save all blocks, you must combine them into one block - see below.) The Editor main menu appears at the bottom of the screen. You can now save this block by pressing Alt+F4=save-file. During your next editing session, you can load this file into any location in your current working file.
If you have multiple blocks in the stack, you can combine these blocks into one block and then save this block as one file or insert it in your current file.
To do this, press F2=edit from the Block menu (Ctrl+F3=block). The first block on the stack appears on the screen. The Editor main menu is also displayed.
Now press Ctrl+F3=block to invoke the Block menu again. Then press F6=restore-block. The second block appears on the screen on the current line. You can now either save the combined block as you would save any other file or insert it into your current file. To insert this block into your current file, press Escape twice. Your main file appears on the screen. Once again, press Ctrl+F3=block. Then from the Block menu, press either F6=restore-block or F3=insert-block. The combined block now appears on the current line.
The procedure for saving a file is similar to that for loading a file. You invoke the Save-file option by pressing Alt+F4=save-file from the Editor main menu. The Information Line and menu shown in Figure 7-11 appear on the screen.
The Information Line is the same as that for the Load-file option except for the name of the function. The Save-file menu displays the same options F1=help, F2=directory as the Load-file menu. Two list box functions are also accessible from this menu. These list boxes give you the ability to save one or more files at a time and are described in the section The Save-file List Boxes

Figure 7-11: The Save-file Menu
The F3=backup-file option enables you to have a backup file automatically created when you save a file. Pressing F3=backup-file alternately selects and deselects the option. When selected, "Backup" appears on the status line. The backup-file option renames the original file with a file extension of .bak and gives the edited file the original filename and extension. The default setting of this toggle is configurable. See the section Configuring the COBOL Editor for more details.
Additional information is displayed at the file prompt the first time you are saving a file. The system supplies the extension .cbl as the default filename extension for the new file although this is configurable. See the section Configuring the COBOL Editor. You enter the name you want the file to have. If you want to change the default filename extension to any other extension, just enter the filename followed by a period (.) and the new extension.
If you are saving a file that already has a name, its filename appears by default at the file prompt. You can retain this or enter another one. Once the desired filename is shown at the file prompt, you press Enter to save the file. For details on how to save multiple files with their current names, see the section The Save-file List Boxes.
The Save-file list boxes are used to specify one or more files that you want to save in one operation. They contain the names and details of files you are editing. You bring up one of the lists, mark those files you want saved, then give the go-ahead to save them.
F7=files-in-window brings up a list of all the files which can currently be viewed in the selected window, for instance a program and its copyfiles.
F8=list-all brings up a list of all the files which have been loaded into the Editor, regardless of which window they can be seen in.
The steps are as follows:
Ensure that the window you want to work in is selected. From the main menu, select the Save-file menu (press Alt+F4=save-file) and press F7=files-in-window or F8=list-all as appropriate.
The appropriate list box is displayed. Figure 7-12 shows the "list-all" list box for the Save-file menu.
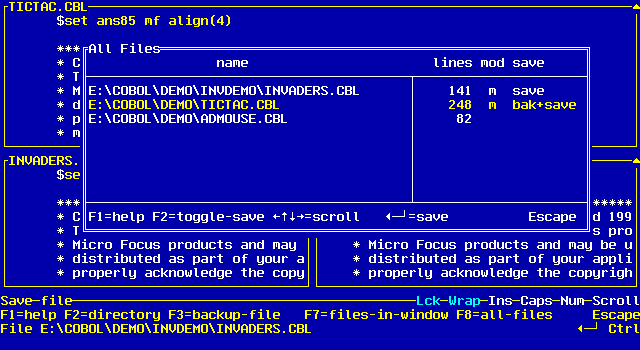
Figure 7-12: The List-all (Save) Listbox
For each file, the length in lines is shown, together with an "m" indicator in the Mod column if the file has been modified. A third indicator shows whether the file is marked for saving, and if so, whether a backup is to be kept.
To mark a file which you want to be saved, first of all move the highlight over its entry using the up and down cursor keys. (If there are too many entries in the list to be shown in the box, they scroll when the highlight comes to the top or bottom of the box. If the entry is too wide to fit in the box, use the left and right cursor keys to scroll it.)
Pressing F2=toggle-save rotates between selections in the Save column. If the column entry is blank the file is not saved. Save means the file is to be saved. Bak+Save means the existing file on disk is to be renamed with a .bak extension and the file saved. The setting of the "Backup" toggle on the Load and Save-file menus is not connected with the Bak+Save setting of this toggle.
Use the cursor keys and F2=toggle-save key until you are happy with your selections, then press Enter to perform the save. Only those files marked Save or Bak+Save are included.
In some circumstances the Editor might not be able to save a file you have marked. In this case, it pauses and tells you so, and invites you to press Space to continue. One likely cause is that the file has not been saved before, and so has no name. In this case, the message:
no name active on file, save from menu - press space bar to go to next file
is displayed. In this case you must save the file manually using the File prompt on the Save-file menu. Once the file has a name and exists on disk you are able to subsequently save it using the list boxes.
When the save operation is complete, the list box is removed leaving the workspace as it was.
If you want to escape from the list and return to the Save-file menu without performing a save, press Escape rather than Enter.
DOS, Windows and OS/2:
On DOS, Windows and OS/2 you can also use a mouse to operate the
list box. See the section Using the Mouse for further details.
When saving a file the Editor displays messages dependent on the conditions controlling file access.
This section describes the creation and use of edit windows.
Initially the Editor has one window which is used to contain a textual view of the line sequential file being created or updated. The line sequential file can contain up to 999,999 records and each record can contain up to 250 characters. Navigation of the file is presented through the window, the window appearing to scroll vertically or horizontally over the underlying file contents.
The initial window created when the Editor is started fills the available work area and includes a border. The border can be turned off if the full work area is required for Editor operation.
Each new window is created half the size of the work area including a border, the border providing a visual indication of the extent of the window. Once the window has been created, you can either load an existing file into it or you can create a new file.
When a file is specified for loading into a window, the Editor checks to see if the file has already been loaded, either in the current window (for example, as a copyfile) or in a different window. If the file is already loaded in the current window, the Editor re-presents that view in the window. If the specified file is already loaded in another window, the Editor informs you of this and opens another view onto the file, in the current window. The file can then be edited in any of the windows which have a view onto it, although changes are displayed only in the current window. Any changes made are reflected in the other windows when they are selected.
The active window has a highlighted border and contains the cursor. When a new window is created, it becomes the active window.
The window functions are available in a menu entered from the Editor main menu. Press and hold down the Ctrl key to access the Control menu (shown in Figure 7-13).

Figure 7-13: The Control Menu
Continue to press the Ctrl key as you press F9=window, then release both keys. The Window Control menu appears as shown in Figure 7-14.

Figure 7-14: The Window Control Menu
A new window can be created using the open window function F5=open-window. Windows can also be created using the window list box - see the section The Window Navigation List Box for more details.
The border of the window can be removed or added using the border on/off function (F2=border-on/off).
When a new window is created it overlays previously created windows and becomes the active window.
Previously created windows can be selected as the active window using the F7=previous-window and F8=next-window functions. The previous window function enables you to select windows created before the current active window. When the current window is the first window created, this function wraps and selects the last window that was created. Similarly the next window function selects windows created after the current one. If the most recent window to be created is current when the next window function is used, the command wraps and selects the first window to be created.
In addition to being able to cycle between windows in terms of creation time, it is also possible to select windows you want to work with directly using the window list box. See the section The Window Navigation List Box for more details.
DOS, Windows and OS/2:
On DOS, Windows and OS/2, you can also use the mouse to select
windows you want to work with. See the section Using the Mouse for
more details.
When using multiple windows you might want to vary the size of the windows and position them to enable a number of windows to be viewed simultaneously. You can resize and move the windows to provide non-overlaid windows.
To size a window using the keyboard, press F3=size on the Window Control menu. The Window Control menu is updated to provide resizing using the cursor control keys as shown in Figure 7-15.

Figure 7-15: The Window Size Menu
The sizing of a window is controlled by first selecting a border and then moving the selected border. The first cursor control key pressed selects the border of the window corresponding to the cursor control key, Cursor-left (<left-arrow>) selects the left border, Cursor-up ( <up-arrow> ) selects the top border, Cursor-down (<down-arrow>) selects the bottom border, and Cursor-right (<right-arrow>) selects the right border.
When a border is selected, the screen attribute of the border line is changed to indicate that it is selected. If the top or bottom border is selected, the Cursor-up/down keys move the selected border up/down. If the left or right border is selected, the Cursor-left/right keys move the selected border left/right.
When using the keyboard to size a window, two borders can be selected at any time, but only one each of the top and bottom, or left and right borders can be selected. If the border is at the edge of the work area, further attempts to move in this direction cause the Editor to beep. The minimum window size is four characters high by four characters wide.
To deselect the active borders and to re-enable the Window Control menu functions press Escape. Alternative borders can then be selected by pressing F3=size to re-enable the sizing functions.
As the window sizing operates on the border of the window, it is advisable to have the border switched on. The keyboard sizing functions operate in the same way with the border switched off but it are not apparent from the window display which borders are selected.
A window can be resized to the complete work area by a single keystroke, press F9=max/restore-window to maximize the window. Other windows are then hidden as the active window overlays the complete work area. As other windows are selected, they each in turn become the active window overlaying the inactive windows. To restore the window to its pre-maximized size, press F9=max/restore-window again. This key toggles a window between its maximized and previous, non-maximized size.
An indicator in the upper right corner of the window's border displays which of these two states the window is currently in. If the indicator is an upward pointing triangle, the window can be maximized. If the indicator is a diamond, the window is already maximized and can be restored to its pre-maximized state.
UNIX:
The actual character used for these indicators might vary on
different UNIX terminals. The character used is defined in Terminfo.
DOS, Windows and OS/2:
On DOS, Windows and OS/2, you can also use the mouse to size a
window you want to work with. See the section Using the Mouse for
more details.
A window can be moved anywhere in the work area. To move a window using the keyboard press F4=move on the Window Control menu. The Window Control menu is updated to provide window movement using the cursor control keys as shown in Figure 7-16.

Figure 7-16: The Window Move Menu
The cursor movement keys now move the window in the work area. The Cursor-up ( <up-arrow> ) and Cursor-down (<down-arrow>) keys move the window up and down respectively in the work area, and Cursor-left (<left-arrow>) and Cursor-right (<right-arrow>) move the window left and right respectively in the work area. If the window is at the edge of the work area, further attempts to move in this direction cause the Editor to beep.
As with sizing a window, the keyboard controls for moving a window operate regardless of whether the window's border is on or off.
DOS, Windows and OS/2:
On DOS, Windows and OS/2, you can use a mouse to move a window. See
the section Using the Mouse for more details.
To re-enable the Window Control menu functions press the Escape key.
A window remains open until you explicitly close it using the close window function (F10) or you exit from the last file contained in the window which automatically closes the window.
When you close a window using either method, the Editor checks to see if any of the files loaded into the window have been modified and are not loaded in any other window. If such files exist you are informed and asked if you want to "exit without saving?". Replying no cancels the close function. If you reply yes, the modifications are discarded and the window closed. The first available window is then selected as the active window. If no open windows remain, you exit from the Editor.
If a modified file is being viewed from more than one window, the "exit without saving?" message is displayed only on exit from the last window with access to the file.
The Window Navigation list box (known as the window list box) is a facility to enable you to open new windows and select existing windows for editing. It is useful for quickly accessing a window that is completely hidden behind others. The list box is accessed using the show windows function (F6).
DOS, Windows and OS/2:
On DOS, Windows and OS/2, you can also access the window list box
using a mouse. This method is described in the section Using the Mouse.
When accessed, the window list box displays a list of all open windows detailing the file currently being viewed in each, together with the file's size (in lines) and an indicator showing whether the file has been modified but the changes not saved. The first entry in the list is always "-- Open New Window --" . Selecting this item opens a new window, just as if you had used the open window function (F5) on the window control menu. The current selection in the list is shown in highlighted text.
A window is selected or created by moving the highlight to the appropriate entry and pressing Enter. The highlight is moved using the cursor keys - <up-arrow> and <down-arrow> move the highlight up and down the list, while <left-arrow> and <right-arrow> scroll the text of the entries right and left respectively. If the list box contains more entries than can be displayed, a vertical scroll bar is displayed on the extreme right of the list box. As the highlight reaches the top and bottom extents of the displayed items, the list box contents scroll revealing further entries, one at a time. If you try to move beyond the first or last item in the list, the Editor sounds the bell.
If you select an existing window, that window is made active with the cursor placed at the same position it was at when the window was last accessed. Additionally, if any modifications have been made to the file in another window, the display is updated to show these changes.
If you select the "Open New Window" entry, a new window is created and the cursor placed at the left margin column in the window.
You can exit from the list box without changing the current active window by pressing Escape. This removes the list box and places the cursor back in the current window. On making a selection, the list box is automatically removed.
From the Load-files menu (Alt+F3=load-files from the main menu), you can access files which are already loaded, but are either hidden behind others in the same window, or were originally loaded into another window.
F7=files-in-window brings up a list of all the files which can currently be viewed in the selected window. Selecting one brings it to the front, with the cursor where it was last time you edited it. The previous view is hidden behind it.
This facility is useful for switching between a program (previously loaded using Alt+F3=load-file), and its copyfiles (previously loaded using Alt+F2=library).
F8=list-all brings up a list of all the files which have been loaded into the Editor, regardless of which window they can be seen in. Selecting one adds it to the files which you can view in the selected window, and brings it to the front.
This is useful if you want to see two or more parts of one file at the same time.
The steps are as follows: Ensure that the window you want to work in is selected. From the main menu, select the Load-files menu (press Alt+F3=load-file) and press F7=files-in-window or F8=list-all as appropriate.
The appropriate list box is displayed; they are very similar, and each contains a list of files. For each file, the length, in lines, is shown, together with an "m" indicator in the Mod column if the file has been modified.
To select a file to view, move the highlight over its entry and press Enter. The <up-arrow> and <down-arrow> keys move the highlight up and down the list, while <left-arrow> and <right-arrow> scroll the text of the entries right and left respectively. If the list box contains more entries than can be displayed, a vertical scroll bar is displayed on the extreme right of the list box. As the highlight reaches the top and bottom extents of the displayed items then the list box contents scroll revealing further entries, one at a time. If you try to move beyond the first or last item in the list, the Editor sounds the bell. When an entry has been selected, the list box is removed leaving the selected file being viewed in the window. The previous view (if any) is stacked ready for possible re-use later by the same method.
DOS, Windows and OS/2:
On DOS, Windows and OS/2, you can also use a mouse to operate the
list box. See the section Using the Mouse for further details.
If you want to exit from the list box and return to the Load-files menu without selecting a file to view, press Escape rather than Enter.
After you save a file, it remains in the window until you either clear it, close the window, or exit from the Editor.
To clear a file and present an empty workfile for editing or loading another file, ensure that the required window is the currently active window and press Ctrl+F4=clear from the Editor main menu. If you have loaded more than the current file into the window none of those files are affected by the clear operation - it applies only to the current file being edited and/or viewed.
If you are in danger of losing modifications to a file, you are warned and given the chance to cancel the clear operation. A message such as:
clear without saving? Y/N
appears on the Message Line. Respond by pressing Y (Yes) to clear the current file and discard any unsaved changes or N (No) to cancel the operation.
You can also use the clear option when you want to clear an edited block of text. When you are editing a block of text, all of the Editor editing features are available for use. If you press Ctrl+F4=clear without first saving the block, it cannot be recovered. If you save the block of text (Alt+F4=save-file), you can then use Ctrl+F4=clear to clear the block (and still be able to recover it later from the file).
You can send a file to the printer using the print option on the Editor's Alternate menu. You press Alt+F7=print to access the Print submenu from which you can define how the file is printed. This menu is shown in Figure 7-17.

Figure 7-17: The Print Menu
You can set the system to pause at each page by selecting the F3=pause-at-new-page option. Printing stops each time a "/" (page-break character) is encountered in the column where the left hand margin is set. For example, if you are using the default COBOL margins, you would enter page break characters at column 7. You restart printing by pressing Space.
You can also print the entire file without pausing by pressing F4=no-pause. However, a new page is still begun each time the page-break character is encountered. Pressing F3=pause-at-new-page or F4=no-pause initiates the printing process.
If you want to cancel printing at any time, press F2=cancel-print. You return to the Editor main menu as printing is aborted.
You exit from the Print menu without printing anything by pressing Escape.
DOS, Windows and OS/2:
If you are running on DOS, Windows, or OS/2, see the section Printer
Control Codes for more information about print features.
In addition to its comprehensive set of editing features, the Editor also offers additional functionality that enables you to:
The above features are described in the following sections.
The Editor draw feature enables you to be creative in the display of your text on the screen. You can draw diagrams and charts as well as enclose text in boxes.
DOS, Windows and OS/2:
On DOS, Windows and OS/2, the draw feature has its own menu, which
you access by pressing Ctrl+F6=draw/forms from the Editor main
menu, and F2=draw from the Editor Draw/Forms menu.
UNIX:
On UNIX, the draw feature has its own menu, which you access by
pressing Ctrl+F6=draw/screens from the Editor main menu and F2=draw
from the Editor Draw/Screens menu.
The Draw Information Line and menu are shown in Figure 7-18.
When you invoke the draw feature, the cursor changes shape, appearing similar to the cursor when Insert mode is on. As soon as you press one of the cursor movement keys (<right-arrow>, <down-arrow>, <left-arrow>, or <up-arrow>), the beginning of a single line appears on the screen. You can switch back and forth between drawing single lines and double lines by pressing the F3 toggle. When you press F3 to draw double lines, the appearance of the Information Line changes to display a double line.
You change the mode indicator by pressing F2=draw/erase/move. This key toggles from one function to the next and changes the effect of cursor movement; its current function is displayed both on the Information Line and next to the <down-arrow> <left-arrow> <up-arrow> <right-arrow> display on the Draw menu. The default behavior of the cursor is draw (which is displayed when you first invoke this menu). When you set the cursor to erase by pressingF2=draw/erase/move, you use the cursor movement keys to go back over those lines, deleting them. When you set this toggle to move, the cursor changes shape, and you can then move through the screen without drawing any lines.
Lines can be made to join, cross over or cross under when they meet by using the "Join" toggle. Pressing F4=join/over/under toggles between the settings "Join", "Over" and "Under". The default setting is "Join". When the toggle shows "Join", lines are merged when they cross. "Over" causes the current line to appear to pass over the existing line while "Under" causes the current line to appear to pass below the existing line.
When drawing lines, the full record width (250 characters) of the Editor is available for use. If you try to move the cursor beyond the borders of the current window, the window contents scroll in the same manner as when entering text. In addition, you have unlimited movement downwards - the Editor extends the number of lines in the file each time you try to move beyond the end of text marker. If you try to move above the top of text marker, to the left of column 1 or to the right of column 250, the Editor sounds the bell. When drawing left and right, the current margin settings are ignored although the line highlighting indicates the region on each line enclosed by the margins.
The text editing options are not available when you are in draw mode. You press Escape to return to the Editor main menu to continue editing your file. The lines you have drawn remain visible on the screen.
You can perform mathematical calculations on values in your file by using the calculate feature. This feature is useful for totaling figures in tables or lists.
You invoke this option by pressing Alt+F8=calculate on the Editor main menu. The Editor main menu remains on the screen. However, the word "Calculator" replaces the word "Edit" and the name of the current file on the Information Line. The phrase "Tally=0" appears on the Message Line at the bottom of the screen.
When you are using the calculator option, the +, -, * and / keys become mathematical operators. Each time you press one of these keys, the cursor moves to the end of the next numeric value encountered in the file. The current mathematical operation is performed on that value and the result is displayed on the Message Line. The Tally field displays a cumulative value that changes as you continue through the file. You can insert the total value at the current cursor position by pressing "=".
To cancel Calculate mode and return to editing, press Escape.
You use the library facility to edit a file identified in your COBOL program by one of the following statements:
CALL filename
COPY filename
INCLUDE filename
++INCLUDE filename
-INC filename
You can then edit this file, save it and return to your main program file. You access this function of Editor from the library option on the Alternate menu. When you press Alt+F2=library, Editor scans the current line for a CALL, COPY, INCLUDE, ++ INCLUDE or -INC statement. If it locates one of these statements, the word following the statement is assumed to be a filename and the Editor looks for a file with that name.
If you do not specify a filename extension, Editor searches for that filename using a default extension list. You can change this default configuration to the extension you want Editor to search for. See the section Defining Copyfile Search Extensions later in this chapter for details on the search order used in your given environment and on how to change these defaults. If the file is located, the current file being viewed is stacked and the window displays the contents of the new file, with the name of the file being displayed on the Information Line. If the file is not found, the view onto the current file is stacked and a blank workfile is presented in the window.
If the Editor does not locate one of these statements, the word at, or to the right of, the current cursor position becomes the filename.
If multiple COPY, CALL, INCLUDE, ++INCLUDE, or -INC statements are located on the same line of text, the Editor selects only the first occurrence. The filename must follow the statement identifier and be completed on the same text line; if the statement is continued onto a second text line, the required file is not found.
Editor searches for the named file as follows:
For further information about the COBCPY environment variable, see your Object COBOL User Guide.
DOS, Windows and OS/2:
Mouse support is available with this system on DOS, Windows and
OS/2. UNIX users can skip ahead to the section The Directory Facility.
If you have a mouse attached to your workstation and you have included the necessary commands in your operating system configuration files, you can use the mouse with the Editor to perform such operations as moving, sizing, and selecting windows, and moving the cursor. This section describes how to perform each operation.
Each operation uses the following terminology to describe actions with the mouse:
| Term |
Description |
|---|---|
| Click | Press and then release the left mouse button once. |
| Double-click | Press and release the left mouse button twice in rapid succession. |
| Drag | Press and hold down the left mouse button then move the mouse in a particular direction. The dragging ends when you release the left mouse button, regardless of whether the mouse is moving or not. |
To move the cursor to a particular row and column in the displayed extent of your text in a window, move the mouse pointer to the desired location and click. The cursor moves to that position and the line is highlighted to signal it as the current line.
If you click while the mouse pointer is beyond either the "top of text" or "end of text" markers, the Editor sounds the bell and the cursor does not move from its present location. This facility is also available when using the draw feature to position the cursor for draw or erase operations directly.
If you have more than one window open you can select a particular window to become current by positioning the mouse pointer on any visible part of the required window and clicking the left mouse button once. The border (if on) of the particular window changes color to indicate that the window has become current and is the one used when you enter further commands or text. The border (if on) of the window that was previously active also changes color, to indicate that the window is no longer current.
When the window has been selected, the cursor is positioned at the same position as it was when the window was last active. If you double-click when selecting a window, in addition to selecting the window, the cursor moves to the text position lying beneath the mouse pointer, if that is a valid location as described above in the section Moving the Cursor in a Window.
Note: It is not possible to select, and therefore switch, between windows while a file is loading or printing in the current window. If you try to do so, the Editor sounds the bell and displays a message indicating that the function is disabled. Pressing Space clears the message and enables the file loading or printing to continue.
You move a window using the mouse by positioning the mouse pointer on the top border of the window, pressing and holding the left mouse button and dragging the window to the desired position on the screen. It is not possible to move a window with the mouse if the window does not have its border turned on. As you click on the border, the text in the window is temporarily removed from the display and the entire window border changes color to indicate that you are moving the window. When you release the left mouse button, the text is restored to the display and the border resumes its normal color.
It is not possible to move a window over the menu area or off any edge of the screen - any attempt to do this results in the bell sounding and the window remaining in its previous position.
You can size a window by moving its left, right, or bottom border in the desired direction to shrink or enlarge the window's extent (the top border is used to move a window with the mouse and, therefore, cannot be used to size a window). It is not possible to size a window with the mouse if the window's border is turned off. The procedure is the same as moving a window - you click on the border you want to shrink or enlarge and drag the border to achieve the desired effect. As you click on the particular border, it changes color to indicate it is currently active for resizing. When you release the left mouse button, the border resumes its normal color.
Unlike moving a window with the mouse, when you size a window the text displayed in the window is not temporarily removed - this is so you can see the effect on the visible text as the window's size changes. The Editor always keeps the current cursor position in the text visible, regardless of the size of the window.
Note: You cannot size a window so that a particular border lies beyond the edge of the screen or over the menu area - any attempt to move a border beyond these limits causes the Editor to sound the bell, and the border remains in its previous position.
Editor provides easy methods for instantly sizing a window to occupy all of the work area and to restore it to its pre-maximized size.
If the indicator in the top-right corner of a window is showing that the window can be maximized, clicking on the indicator maximizes the window. Conversely, clicking on the indicator when the window is already at its maximum size restores the window to its previous size.
It is not possible to access this function with the mouse if the border of the window is turned off.
Note: When the Editor is started, the initial window is maximized by default. Clicking on the indicator causes the window to shrink to half its maximized height automatically. Until you explicitly size the window using some other method (either mouse or keyboard), this is the default pre-maximized size.
The Window Navigation list box (known as the window list box) lists and gives access to all windows currently open in the Editor. In addition to enabling you to select windows for editing, it enables you to create new windows easily. The window list box facilities are described in more detail in the section The Window Navigation List Box.
To access this list box using the mouse instead of the F6=show-windows function on the Window Control menu, click the left mouse button while the mouse pointer is over any unused portion of the Editor work area or the menu area; that is, on a part of the underlying screen not covered by the existing window. Clicking inside a window selects the window. Provided the list box is not already active, it is then displayed.
The use of the mouse to select list box items or cancel a particular list box is described below. The window list box is the only list box that can be accessed using the mouse. To access the other list boxes, you need to use the actual key functions on the Load and Save-file menus.
Note: You cannot access the window list box while a file is loading or printing or you are marking a block. If you try to do so, the bell sounds and a message of the form:
Function disabled while file loading
is displayed. Pressing Space removes the message. If you were marking a block, you can then continue to define the block, while if you were printing or loading a file, the print or load operation continues as before.
The mouse can be used in conjunction with all of the file and window list boxes provided by the Editor. However, the window list box is the only list box where access is provided by clicking the left mouse button on any unused portion of the Editor work-area or menu.
Once a list box has been displayed, the mouse can be used to select items, scroll the list of items displayed (where applicable) and cancel the list box. To move the selection highlight to a list entry, position the mouse pointer over the entry and click the left mouse button. The current entry loses the selection highlight, which passes the entry you clicked on. To select a particular entry and thus remove the list box, double-click on the particular entry. For example, in the window list box, to open a new window double-click on the "Open New Window" entry. The list box is removed and the new window created.
If the list contains more entries than can be displayed at any one time, a vertical scroll bar is displayed on the extreme right of the list box. The dark shaded slider represents the portion of the list currently being displayed. Clicking above this slider causes the list to page up. Similarly, clicking below the slider causes a page down. Clicking on the slider itself has no effect.
To cancel a list box without making a selection simply click on either the window that was active before the list box was accessed or another window that you want to edit. The list box is removed and the window that you clicked on made current. Canceling a list box in this way is slightly different from just pressing Escape. If you press Escape you are placed back into the menu from which you accessed the particular list box. Using the mouse bypasses this menu and returns straight to the main menu.
The Directory Facility is available whenever you need to provide the Editor with a filename (for example when you load or save files). The Directory Facility includes functions for listing, browsing, renaming and deleting files. This facility is described fully in the chapter Directory Facility.
Whenever you are prompted for a filename, the File Specification menu is invoked. In the Editor, this menu contains two extra function keys: F7=files-in-window and F8=all-files. These functions are described in the section Accessing Files in a Window earlier in this chapter.
When you use Editor to develop COBOL programs, functions are available to assist you in the development process. These functions enable you to syntax-check and animate your COBOL program.
In addition, Workbench and Object COBOL users can query program characteristics using COBOL Source Information created during the checking process.
The functions available are described in the following sections.
Syntax-checking
Compiler error handling
Animating
Editor uses the first file loaded into a window as the main COBOL program root file for that window when accessing any of these functions. It is possible to have loaded in the Editor more than one program provided that each main program file is loaded in a different window and is the first file loaded for each of those windows. Any files loaded after the initial file in a window by using the library facility (Alt+F2=library from the Editor Alternate menu) are assumed to be components of the main program file. Blocks are assumed to contain only temporary information related to editing any of these files.
When accessing any of the COBOL support functions, the particular function uses the program file associated with the current window. If you are editing more than one program in different windows, you need to make the window containing the main file for that required program active (that is, highlighted) before you access the function. The main program file does not necessarily have to be the file currently being viewed in that window, however. It is sufficient to simply select the window.
All of these functions are available from the COBOL menu, accessed by pressing F2=COBOL from the Editor main menu. The functions available from it depend on whether you are using the Editor as part of COBOL Workbench, or as part of Object COBOL.
For Workbench users, the COBOL menu is as shown in Figure 7-19. The Object COBOL for UNIX menu is similar, with the exception noted below.

Figure 7-19: The COBOL Menu (Workbench)
Note: The compiling process is split into two phases: syntax checking and generating. In Object COBOL for DOS, Windows and OS/2, the Compiler automatically performs these two steps sequentially. In Object COBOL for UNIX, these phases can be specified separately by specifying the options for compiling or generating. Editor performs only the first of these steps, thus F2=check/animate appears on the Object COBOL menu for DOS, Windows and OS/2, while this option appears as F2=compl/animate on the Object COBOL menu for UNIX. In any environment, this option enables you to syntax check or animate your source code. You cannot generate code in Editor.
UNIX users should take references to the Check menu throughout this chapter to mean the Compile menu.
For Object COBOL users, the COBOL Source Information (CSI) and insert-statement functions are not available and do not appear on the menu.
When you use the Editor to develop programs to be generated and executed with the Micro Focus COBOL system, you have the additional options of syntax-checking and animating your program. See your Object COBOL User Guide for full details on syntax-checking and animating programs.
Syntax-checking is the first phase of the compiling process. Each time the Compiler finds a syntax error in your source code, it interrupts the syntax-checking process and displays the appropriate error message and corresponding line number in error on the screen. It then gives you the option of returning to Editor to correct the error immediately or continuing with the compilation process. See your Error Messages for a list of syntax error messages.
Once syntax checking is completed, program animation can begin. Program animation, under the control of Animator, enables you to control and view the execution of your source code. When you exit Animator, you are returned to the Editor and you can correct any logic errors in your program. You can initiate checking and/or animation of the program associated with the current window by pressing F2=check/animate to display the check menu, then Enter.
When you press Enter the program to be checked and/or animated is determined by the main program file for the currently active (that is, highlighted) window. The root-name and path of this program file is shown on the bottom line of the Check menu. If the name shown is not that of the program required, you must first select the correct window before pressing Enter. For details on how to select windows see the sections Using Edit Windows and Using the Mouse (DOS, Windows and OS/2 users only).
Note: You must save your program (Alt+F4 from the main menu) before you can check and animate it. If you don't save, the message:
exit without saving? Y/N
reminds you to do this.
When you press Enter to initiate syntax checking, the screen is initially blank except for the information displayed at the bottom of the screen. This line shows the name of the file being checked.
The first line that appears in the working area of the screen lists the options (Compiler directives) that are preset by the system. It then displays the source code of your program.
Each time the Compiler detects a syntax error, it stops and displays the following message:
CONTINUE CHECKING PROGRAM ? Yes/No/Zoom
If you respond by pressing N (No), you are returned to the COBOL Editor screen on the first line that caused an error so that you can correct the error. To recheck the program, first save your changes then press F2=COBOL to reenter the COBOL menu followed by F2=check/anim to access the Check menu. Finally press Enter to restart the checking process. If you press Y (Yes) in response to the "Continue checking..." message, the system continues to check the program, informing you about any further errors it detects.
The checking process ends by displaying the number of errors found in your code. It also displays the size of the generated data area, the size of the generated code, and the size of the internal dictionary used by the code generator.
On completion of the checking phase the system returns you to Editor with your text file displayed on the screen. If the checking process detected errors, the Editor positions you at the first line that caused an error.
Workbench and Object COBOL for UNIX:
During the syntax-checking phase, a COBOL Source Information
(CSI) file is created. This file provides an information base for
the program that is used to support query functions from the Editor,
Animator, and, in Workbench, Animator V2. If you do not want to produce
the CSI file during the syntax-checking phase, press F8=CSI on the
Check menu to deselect the option. The CSI indicator is then cleared from
the Information Line. You can reselect the option by pressing F8=CSI
again. The default setting of this option is configurable. See the section
Configuring the COBOL Editor for more details.
The query functions are described in the section COBOL Source Information (CSI).
You might want to syntax check a program with directives other than the default, or to animate as well as or instead of syntax checking it. These directives can be entered from the Check menu. For Workbench users, the Check menu is displayed as shown in Figure 7-20.

Figure 7-20: The Checker Menu (Workbench)
UNIX:
For UNIX users, the Compiler menu provides the same functions, but
the Information Line contains the words Compiler and Compile where the
words Checker and Check appear in the Workbench menu, and the F2 option
appears as F2=compl/anim rather than F2=check/anim.
DOS, Windows and OS/2:
For Object COBOL users on DOS, Windows and OS/2, the CSI and
strc/anlz functions are not available and do not appear on the menu.
If during the syntax-checking phase, you do not want the Compiler to stop at errors, press F3=pause which deselects the option and clears the "Pause" indicator from the Information Line. You can reselect the option by pressing F3=pause again.
The F4=list option enables you to specify either no listing ("Nolist") which speeds up the syntax-checking process, list to file ("List-File"), print ("Print"), or list to console ("List-Con"). Pressing F4=list cycles through these settings with the Information Line being updated to show the current setting.
To enter additional directives, press F10=directives to access the Compiler Directives menu. Type in the directives you require and press Enter to return to the Check menu. Pressing F9=directives on the Check menu toggles the "Opt-On" indicator on the Information Line. When "Opt-On" is displayed, the directives entered on the Compiler Directives menu are passed to the Compiler. When "Opt-On" is not shown, they are ignored.
The check and/or animate phase is started by pressing Enter.
The default settings of the toggles on the Check menu are configurable. It is also possible to specify a default set of additional directives. See Configuring the COBOL Editor for more details.
During the syntax-checking phase, any errors encountered are displayed on the screen and written to an error file. The error file produced by the Compiler is used by the Editor to position at the identified errors. The file is created with the root-name of the program being checked and is given a file extension of .msg.
If errors are encountered during the check phase, on return to the Editor, the error file and program main file are loaded. The Editor reads the first error file record and positions the cursor on the identified error line. The error message associated with the error line is displayed on the message line.
If the error is in a copyfile, the Editor first loads the main program file and then loads the copyfile containing the error and positions to the required line. The copyfile load action is similar to the library function (Alt+F2=library); that is, the current edit view (onto the main program file that has just been loaded) is stacked and the copyfile is loaded.
To position the Editor on the next program error, press F8=locate-next from the COBOL menu. To position on the previous program error, press F7=locate-previous. The current error position can be relocated by pressing F9=locate-current.
The section File Handling Considerations later in this chapter contains further information about the Editor's handling of program and copyfiles.
If it is not convenient to process the errors immediately after syntax-checking the program, you can close the error message file and process it at some later time. The error message file can be opened and closed explicitly from the Command File menu. See the section Command File Processing later in this chapter.
Animation of the program can be selected using F2=check/anim from the Check menu. Pressing F2=check/anim selects the next of the following three options, Check, Check+Animate and Animate. The default option is Check but this is configurable (see the section Configuring the COBOL Editor). As you press F2=check/anim, the selected option is displayed on the Information Line and immediately preceding the program-name on the bottom of the Check menu.
16-bit:
If you are using the Editor in the concurrent COBOL environment of
Micro Focus Workbench on the 16-bit COBOL system, the F2=check/anim
key can also select a fourth setting, Background. See the section Concurrent
Editing and Checking.
If the Animate option is selected, the program must previously have been syntax-checked to create the files required for animation. If the Check+Animate option is selected, once the checking process has ended and no errors have been found, program animation begins. Animator enables you to control the execution of your program while you view the process. The screen displays the program with the cursor positioned under the first executable statement.
See the chapter Animator for full details of the features available in Animator.
When the system completes program animation, the following message is displayed on the Message Line of your screen.
STOP RUN encountered with RETURN-CODE= +00000: use Escape to terminate
When you press Escape, the system then asks if you want to leave Animator. If you press Y (Yes), the system returns you to the Editor with your main program file displayed in the initial window.
Workbench and Object COBOL:
During animation of your program you can include additional COBOL
statements at breakpoints (Brk, Do). These COBOL statements are written to
a command file on exit from the Animator. A program with breakpoint Do
statements has a file created with the same name as the program source
file, but with an extension of .edo.
The command file can be loaded into Editor and the COBOL statements inserted at the breakpoint location, see the section Command File Processing.
The command files created during syntax-checking and animation of a COBOL program together with pasted text copied from the on-line documentation system can be loaded at any time into Editor. The functions to load these files are provided, through the COBOL menu (F3=cmd-file), by the Command File menu. The Command File menu for Workbench and Object COBOL is as shown in Figure 7-21.

Figure 7-21: The Command File Menu (Workbench and Toolbox)
For COBOL users, the option F4=load-DO-statement-file does not appear.
Text copied from the on-line documentation system can be inserted at the current point in your file by pressing F2=insert-paste-text. The Editor looks for a file called paste.txt in the current directory. If the file is found, the Editor loads the entire contents of the file and inserts the text immediately before the current line. The same text can be inserted as many times as you require, either at the same place or at different locations in your files.
The error message file created by the Compiler can be loaded by pressing F3=load-error-file. The Editor searches for a file with the same name as the main program file associated with the current window but with a file extension of .msg. If the file is found, the Editor positions to the first error defined in the error message file and returns to the COBOL menu with the error message displayed on the message line.
The Editor can be positioned to other error locations using F7=locate-previous, F8=locate-next and F9=locate-current from the COBOL menu.
On next entry to the Command File menu, the Information Line contains "Error-File-Active". The currently active file can be closed by pressing F5=close file.
Workbench and Object COBOL:
The COBOL Breakpoint-Do statement file created during Animation and
containing the COBOL statements associated with breakpoints can be loaded
by pressing F4=load-DO-statement-file on the Command File menu.
The Editor searches for a file with the same name as the main program file
associated with the current window, but with a file extension of .edo.
If the file is found, the Editor positions to the first breakpoint location in the Breakpoint-Do statement file and returns to the COBOL menu with the COBOL statement displayed on the message line. The statement can be inserted into the source by pressing F10=insert-statement from the COBOL menu.
The Editor can position the cursor on other breakpoint locations using F7=locate-previous, F8=locate-next and F9=locate-current from the COBOL menu.
On next entry to the Command File menu, the Information Line contains "Do-Statement-File-Active". The currently active file can be closed by pressing F5=close file.
Workbench and Object COBOL for UNIX:
This section is applicable to Workbench and Object COBOL for UNIX
users only. Object COBOL users on DOS, Windows and OS/2 can skip ahead to
the section Configuring the COBOL Editor.
COBOL Source Information provides various program-wide functions, which enable you to find out information such as:
During the syntax-checking phase of a COBOL program, a COBOL Source Information (CSI) file can be produced. This file contains an information base for the COBOL program enabling query functions in the COBOL Editor to operate on the complete COBOL program source.
The information base is created for COBOL programs that complete the check phase. The information is written to a file with the same name as the program file and with a file extension of .csi. The file is written to the same directory as the program's .idy file. If the program completes the syntax-checking phase with errors, you can still use CSI, although the information can be inaccurate in some circumstances.
The query functions operate and provide information on a data item, procedure-name, reserved words (for example CALL, for called subprograms, COPY, for the file structure of the program) and special queries such as TIMES for statistics on the program or DEADDATA for locating data items which are never used.
Three query functions are provided from the COBOL menu. F6=CSI-at-cursor provides a query function which displays information about the word at or to the right of the cursor. F5=CSI-enter displays a submenu enabling the word to be entered from the keyboard.
The submenu displayed is shown in Figure 7-22.

Figure 7-22: The Find Menu
F4=return-CSI causes re-entry to CSI to display the previously active information.
When using the Editor to position the cursor in a file as a result of a COBOL error, query (CSI posn-exit), or library function, the following actions are taken.
If the required file position is in the current file, the file is positioned at the defined text line. If the required file position is not in the current file, the current file is stacked and the required file is loaded and positioned at the defined text line.
If the required file is already loaded and stacked, the current file is stacked. The required file is taken from the stack and positioned at the defined text line. On exit from this file or on load of another file, the unstacked file is placed back into its original position in the stack.
For example, if the main file, a-prog.cbl, is loaded and is stacked when the file a-copy.cbl is entered, a subsequent positioning function to a text line in a-prog.cbl causes a-copy.cbl to be stacked and a-prog.cbl to be displayed, positioned at the required text line. On exit from a-prog.cbl or on subsequent positioning to a different file, the file a-prog.cbl is returned to its original position in the stack.
If you try to exit from the main program file associated with a window, the Editor always restacks the file if other files are still loaded into the window. This enables further COBOL support functions to be used until you explicitly close the window or exit from the main program file when it is the only file loaded in the window. Other files in the same window are not automatically restacked and are thus closed when you elect to exit from viewing them.
When using either COBOL Source Information (CSI) or the COBOL Error feature in the Editor you should regard the Editor as operating on the complete COBOL program. When different parts of the COBOL program are selected for editing, it is advisable not to save any changes until you have completed all the changes you want to make. This is particularly important when using CSI, as text line selection with CSI is based on information constructed when the program was last syntax checked. If changes are made to a program source file and saved, the text lines highlighted by CSI are displaced by the number of added or deleted text lines in the file.
When using CSI and amending source files, use the CSI features to navigate the COBOL program source and select files for editing. When you have completed all the changes you want to make, you can save all of the modified files together in one batch. See the section The Save-file List Boxes for more details. Alternatively you can save and exit from each file individually.
16-bit :
This section applies only if you are using Workbench on the 16-bit
COBOL system; if you have a different COBOL system, you should skip ahead
to the section Check Menu Functions.
The special Editor feature available in the Workbench concurrent environment enables automatic invocation of the Compiler to run simultaneously with Editor. This enables you to syntax check your source code lines as you are editing them, with the additional benefit of having an executable program ready to run as soon as you have finished editing.
When background checking is available the F2=check/animate menu, accessed from F2=COBOL, has additional options to control the checking process. The F2=check/anim key on the Check menu cycles through a fourth option, Background and a new submenu, the Background menu, is available via the Ctrl key. When background checking is selected (press F2=check/anim until the Information Line shows "Background") the indicator preceding the program-name shows "back-check".
Once syntax checking is started, the main menu extends to three lines. The new menu line enables you to perform actions related to the checking process: to position the Editor on a line the Compiler has found to be in error, to view the Compiler listing, to cause the Compiler to pause, resume, or to kill the checking process altogether.
The COBOL options menu enables you to determine whether the Compiler should pause on error, whether, if the Compiler detects that you have edited a line it has already checked, it restarts the checking process from the beginning, and how closely the Compiler should follow the lines being edited (it can check each line as you edit it, or wait for you to edit a whole screen or just check straight through to the end regardless of where you are editing). Set these options according to how you want to work.
To access Editor from the concurrent COBOL environment, press F3=edit+background-check from the main concurrency menu, or simply enter the Editor from the main Workbench menu in the concurrent COBOL environment. The standard Editor menu is displayed.
When you invoke background checking from Editor, a new concurrent run-unit is created in which the Compiler is run. The Editor passes source lines to the Compiler for syntax checking. If you look at the main concurrency menu you see two run-units linked together identified as Editor (or COBOL Workbench) and Background Compiler. If you are going to edit an existing program, load it before initiating the Compiler. For a new program, you can initiate the Compiler straight away.
To initiate the Compiler in background mode, press F2=COBOL then F2=check/animate to access the Check menu. To select background checking, repeatedly press F2=check/anim until the Information Line shows the indicator "Background". Now press Enter to start the check. The default settings of the check/anim indicator together with all of the other toggles shown (including those on the options (control) menu) are configurable. Further details are given in the section Configuring the COBOL Editor.
When you press Enter to start the check, you are returned to Editor's main menu, the menu having changed as shown in Figure 7-23.

Figure 7-23: The Concurrent Main Menu
Underneath the two Editor menu lines, you can see a third menu line. This is used both to display the status of the syntax-checking process, and to describe the function keys which enable you to modify the syntax-checking process.
The status, displayed in the leading portion of the menu line, can have one of the following values:
| Value |
Meaning |
|---|---|
| Check | The Compiler is syntax checking source lines. The number of the line it is currently checking is displayed. |
| Wait | The Compiler is waiting for source lines. This is the status it is most likely to show as it waits for you to edit more lines, or to move down through the source code. |
| Error | The Compiler has encountered an error. The line number where the error was found is displayed. The Compiler is waiting. |
| Paused | The Compiler has been suspended by the pause function. The Compiler is restarted by the go function. |
| Complete | The Compiler has syntax checked all the
source lines of the program.
|
When an error has been detected and the status is "Error", you can position the Editor on the error line by pressing Shift+F10. PressShift+F4 to view the error message on the Compiler listing. If you want to ignore the error, pressing Shift+F3, which will have changed from "suspend" to "resume", makes the Compiler continue. The functions associated with these keys are described in more detail in the following section.
This key combination instructs the Editor to complete the checking of the current program. The action is as if Limit were set to End in the Check menu, although the Limit toggle is not affected; it is overridden by this action.
The Compiler is terminated if it has been initiated: otherwise, the key is ignored and the bell sounded. On termination of the Compiler, the status line is updated to indicate "Complete."
The action taken by this key depends on the status of the Compiler:
This item is only displayed when the Compiler is suspended on error. The key combination enables positioning to the indicated error line. When this item is displayed, "Error" is also displayed on the additional menu line.
If the error is in a copyfile not currently being edited, the file is opened and loaded and the cursor is positioned on the error line. When you escape from editing this copyfile, Editor is positioned at its previous edit position.
If the indicated line is in the main file (or a copyfile) and additional copyfiles have been loaded for editing (by using F2=library), the required file is redisplayed at the indicated error line (see the section File Handling Considerations).
When you press this key combination, the display of the Check screen appears, as shown in Figure 7-24.
Figure 7-24: The Checker "Virtual" Screen
During initiation of the Compiler, a virtual screen is created for the Compiler listing. If when you press Shift+F4 the Compiler screen is not available and the Compiler has not been initiated, the bell sounds.
When the Compiler is waiting for source lines from the Editor, the previously checked source line is not displayed unless an error is present on that source line.
The functions on the Check and Background menus influence the behavior of the Compiler. Some of the options are only available if you are using Workbench and/or Concurrency (for background checking). The availability of these options is indicated alongside its description.
This key is a toggle and causes "AutoRestart" to be switched on or off. The Information Line indicates when automatic restart is on. The default setting is on, but this is configurable.
When restart is on it enables automatic restart of the Compiler if a source line that the Compiler has already processed is edited.
When restart is off, the Compiler continues checking to the end of the program source file even if changes are made to the checked program source. However, if restart is subsequently turned on, checking is automatically restarted.
This key selects the source line limit for checking. The Information Line indicates the limit currently in force which is one of Screen, Line, or End as described below. The default setting is Line, but this is configurable.
To complete syntax checking of the source file after completing all editing, you can set the limit to End, or save the edited file, and press Escape. The Editor then requests that checking continues to the end of the file or is abandoned.
Starts checking and/or animation of the indicated program.
This key toggles Pause on and off. The Information Line indicates when pause is on. The default setting is on, but this is configurable.
When pause is on, the Compiler pauses if an error is found during syntax checking and the Compiler is suspended on error. At this time, if the main menu is displayed the additional menu line is updated to enable the Shift+F10=to-error function.
The Compiler screen can then be viewed to establish the nature of the error. You can now position the Editor to the indicated error line using Shift+F10, as described above.
When pause is off, the Compiler errors are stacked on the Compiler screen in the normal way but no indication is given apart from the Compiler sounding the bell.
For Concurrency users, the Pause function on the Check and Background menus is identical and is provided for convenience of use.
This function key enables you to define whether you want to have a Compiler listing produced or not. This function is disabled under Concurrency once the Compiler is running. Its default setting is configurable.
If you are using Workbench or Object COBOL, this key enables you to select whether you want to have your program checked such that it is suitable for use with Structure Animator, Analyzer or both. The default setting for this toggle is both options off but this is configurable. The key toggles through the settings "Struct", "Analyze" "Strc+Anlz" and off (no display).
This key selects the language variant that you want your program to be checked with, and is fully configurable (see Configuring the COBOL Editor for more details of how to configure the Lang toggles and directives).
Workbench and Object COBOL:
In Workbench and Object COBOL, a configuration file is shipped to
enable the key to toggle through the following selections by default. This
file contains the following:
| Displayed toggle |
Directives selected |
|---|---|
| OSVS | OSVS NOANS85 NOVSC2 |
| ANS85 | NOOSVS ANS85 NOVSC2 |
| VSC2(2) | NOOSVS NOANS85 VSC2(2) |
| VSC2(3) | NOOSVS NOANS85 VSC2(3) |
| VSC2(4) | NOOSVS NOANS85 VSC2(4) |
| DOS/VS | DOSVS |
| COB/370 | COBOL370 |
| "blank" | (no directives)
|
For Mainframe Development Environment (MDE) users (where MDE is the primary environment), the following selections are shipped:
| Displayed toggle |
Directives selected |
|---|---|
| OSVS | USE($cobdir\wbosvs.dir) |
| VSC2(2) | USE($cobdir\wbvsc22.dir) |
| VSC2(3) | USE($cobdir\wbvsc23.dir) |
| VSC2(4) | USE($cobdir\wbvsc24.dir) |
| DOS/VS | USE($cobdir\wbdosvs.dir) |
| COB/370 | USE($cobdir\wbcob370.dir) |
| "blank" | (no directives)
|
MDE users who have installed Workbench as their default environment only have available by default the Workbench toggles; however, you can reconfigure this. See the section Configuring the COBOL Editor.
For Professional COBOL users, the following selection is shipped:
| Displayed toggle |
Directives selected |
|---|---|
| ANS85 | NOOSVS ANS85 NOVSC2
|
Object COBOL:
In Object COBOL, a configuration file is shipped to enable the key
to toggle through the following selections by default. This file contains
the following:
| Displayed toggle |
Directives selected |
|---|---|
| XOPEN | XOPEN NOOSVS ANS85 NOVSC2 |
| OSVS | OSVS NOANS85 NOVSC2 |
| ANS85 | NOOSVS ANS85 NOVSC2 |
| VSC2(1) | NOOSVS NOANS85 VSC2(1) |
| VSC2(2) | NOOSVS NOANS85 VSC2(2) |
| VSC2(3) | NOOSVS NOANS85 VSC2(3) |
| "blank" | (no directives)
|
If no Lang configuration details are located by the Editor on start-up, the Lang toggle defaults to its "blank" setting.
Enables you to specify the "REF", "XREF" (or both) directives. The default setting for this toggle is both options off, but this is configurable.
F10 gives access to the Compiler Directives menu, where you can enter additional directives not available from the Check menu. F9 turns the directives toggle ("Opt-On") on or off, determining whether the additional directives are included during the checking/animation or not. The setting of the "Opt-On" toggle does not affect any toggles set on the Check or (for Concurrency users) the Compiler Options menus via the supplied function key options. The settings of these options are always included.
You can configure the initial settings of many of the toggles used in the Editor as well as define the margins you want to use with specific files, file extensions you want the Editor to look for, and attributes for both monochrome and color screens.
The configuration options you require can be specified in the local configuration file under the tag of [EDIT-USER]. See the chapter Configuring Development Tools in your Getting Started for information on configuration files.
Each configuration option, or command, must start on a new line and occupy a single line (up to 250 characters). Case is significant only in the arguments of the LANG, MARGINS, INIT-MARGINS, EXTENSIONS and COPYEXT commands when on UNIX. All are case insignificant on DOS, Windows and OS/2. Space and colon (:) are treated as separators and are ignored.
If the Editor detects an error when it reads the configuration options, a message is displayed indicating what is wrong. Once all of the commands have been read, the Editor pauses and waits for you to press a key to continue. If there are no errors, the Editor continues without messages or a pause.
The following sections describe all the commands that you can use to configure the Editor. Some commands only apply to the Editor on certain COBOL systems. In this case, the description indicates on which system the command is available; if you try to use such a command on another system, the command is ignored.
All of the toggles contained on the Check menu can have their initial settings configured, as well as the global Word-wrap and Backup options. These entries appear alphabetically in this section.
This command applies to Workbench Concurrency users only and can be used to determine the initial setting of the autorestart toggle on the Background menu.
If you specify AUTORESTART ON, during background checking, if any line that has already been checked is modified, the Editor causes the Compiler to restart from the top of the program thereby taking account of the source change. Specifying AUTORESTART OFF means the Editor does not cause the Compiler to restart, ignoring the source change.
The default setting of this toggle is ON.
Determines the initial setting of the Backup toggle. The default setting is OFF. The state of the toggle can only be seen when you are using either the Load or Save-file menus. The setting of this option does not affect the initial setting of the "save" toggle on the Save-file list boxes.
Determines the initial setting of the check/anim toggle on the Check menu. For Object COBOL users, three modes are supported:
CHECK
CHECK+ANIM
ANIMATE
For Workbench Concurrency users a fourth mode is available, BACKGROUND. The default setting of this toggle is CHECK. If you specify CHECK-MODE BACKGROUND and the Editor is not running under Concurrency, the mode resets to CHECK automatically. No message is displayed.
Determines the initial setting of the CSI toggle on the Check menu. The default setting is ON.
This command enables you to specify an initial set of directives which appear on the Compiler Directives menu. Specifying a set of directives also turns on the directives toggle ("Opt-On") on the Check menu automatically.
You can enter up to a maximum of 60 characters of directives - excess directives are ignored with a warning message being displayed. Each directive must be separated by a space, for example:
DIRECTIVES NOQUAL NOQUERY ANIM LIST()
inserts the directives NOQUAL, NOQUERY, ANIM and LIST() into the Editor's directives buffer. Any directives entered in this buffer take priority over toggles set via the function keys on the Check menu.
Note: If a particular directive contains embedded spaces, you can include it in the command by enclosing that directive entirely in quotation marks.
By default the Editor's directives buffer is initialized to spaces and the directives toggle is off.
This command applies to Workbench Concurrency users only and can be used to determine the initial setting of the limit toggle on the Compiler Options menu.
The toggle is used to specify when the Editor should pass lines to the Compiler and has three settings:
| Setting |
Effect |
|---|---|
| LINE | The current line is passed for checking as soon as the cursor moves off it |
| SCREEN | The current window-full of lines is passed when the display is scrolled |
| END | All lines from the current position to the end of the file are passed |
The default setting of this toggle is LINE.
Determines the initial setting of the list toggle on the Check menu. Four settings are available:
| Setting |
Effect |
|---|---|
| OFF | No listing |
| CON | Listing to CONsole |
| Listing to LIST(LST) | |
| FILE | Listing to a file with the same root-name as the
program but an extension of .lst
|
The default setting is CON.
Determines the initial setting of the pause toggle on the Check menu. The default setting is ON.
These two commands both affect the Ref toggle on the Check menu.
The REF command determines whether addresses are shown on any program listing produced during checking of your program. Specifying REF ON turns on this capability, while REF OFF does not cause addresses to be shown.
The XREF command determines whether a cross-reference listing is produced when checking your program. Specifying XREF ON means a cross-reference is produced, while XREF OFF does not cause a cross-reference listing to be created.
You can specify the REF and XREF commands independently of each other or you can specify only one and ignore the other. For example, if in your configuration file you had specified:
REF ON
XREF OFF
and then a few statements further on had the command:
XREF ON
both commands would be set to ON, causing the toggle to display Xref+Ref on entry to the Check menu and a cross-reference file with addresses to be produced when your program is checked.
The default setting for both toggles is OFF.
These two commands both affect the Strc/Anlz toggle on the Check menu.
The STRUCT command determines whether your program is checked for Structure Animator or not. Specifying STRUCT ON turns on this capability, while STRUCT OFF removes it.
The ANALYZE command determines whether your program is checked for use with Analyzer. Like STRUCT, specifying ANALYZE ON turns on the capability, while ANALYZE OFF removes it.
You can specify the STRUCT and ANALYZE commands independently of each other or you can specify only one and ignore the other. For example, if in your configuration file you had specified:
STRUCT ON
ANALYZE ON
and then a few statements further on had the command:
STRUCT OFF
ANALYZE would still be ON, causing the toggle to display ANALYZE on entry to the Check menu.
Specifying both commands to be ON causes the toggle to display "Strc+Anlz" on entry to the Check menu.
The default setting for both toggles is OFF.
Determines the initial setting of the Word-wrap toggle. The default setting is ON.
Determines whether the full path is shown on the window title bar.
If off (the default), window titles show only the base filename and extension of the file currently being edited. If on, they show the full path (where specified) as well.
The settings toggled through by the F6=lang function on the Check menu and their associated directives are configurable using the LANG configuration command. Up to 20 different LANG toggles can be defined in the configuration file: if you define more than 20 the excess statements are ignored and a warning message displayed.
The LANG command enables you to define particular subsets of directives or USE() directives and attach those directives to a toggle of your choice. The format of the command is as follows:
lang toggle-text directive-text
where the parameters are:
A default "blank" toggle is always supplied by the Editor.
This enables you to override your specified toggles by repeatedly pressing
the F6 key until the Information Line "lang" toggle is
not displayed. When this toggle is selected, no directive-text
from any LANG command is sent to the Compiler.
If the particular directive-text you want to
specify is longer than 30 characters, place the directives in a file and
specify the USE"filename" Compiler directive in your
directive-text, where filename is the name
of the file containing the directives.
Examples
Specifying the command line:
lang ans85 noosvs ans85 novsc2
defines a toggle-text of ANS85 to be associated
with the directives NOOSVS ANS85 and NOVSC2; that is, when ANS85 shows on
the Information Line, NOOSVS ANS85 NOVSC2 is sent to the Compiler. The
following command line:
lang osvs use($cobdir/wbosvs.dir)
defines the directive USE($cobdir/wbosvs.dir) for a displayed toggle of OSVS. Specifying:
lang prog1 use(prog1.dir)
lang prog2 use(prog2.dir)
defines two toggles, prog1 and prog2, which select two different directives file. These files could hold Compiler directives unique to two different programs. A common set of directives could also be specified using the DIRECTIVES Compiler directive described earlier. You could then toggle between the two .dir files depending upon which program you are currently working on.
Notes:
The margins you want to use when editing files with specific extensions can be specified using the MARGINS command. You can also set the default margins to use if the file you are editing does not have margins explicitly set by a MARGINS command and you can specify, using the INIT-MARGINS command, the margins to use whenever a new window is opened (that is, while you are at the "...workfile empty..." prompt).
Up to 20 unique margin settings can be defined. Excess commands are discarded and a warning message displayed. If you should define margins for the same extension more than once, the last margins defined are used - the earlier definitions are overwritten.
The MARGINS command has three variations which are outlined below.
MARGINS ext left-col right-col
This command specifies that files which have the extension ext
to have a left margin column of left-col and a right
margin column of right-col. If ext
has previously been defined, the existing definition is updated otherwise
a new entry is made in the Editor's margin table. The values of left-col
and right-col should enclose the area in which you
want to enter text. For example, for COBOL programs the margins would be 7
and 73, enabling you to enter text in columns 8 through 72 inclusive. To
enable full line width working use the values of 0 and 251.
MARGINS ext1 ext2
This command specifies that files which have the extensions ext1
are to assume the margins already specified for files with extension
ext2. ext2 must have been
defined previously. If it is not found, the entire command is ignored and
an error message displayed.
This format of the MARGINS command can be used to easily replicate a particular set of margins for similar file types (for example for COBOL files the margins defined for .cbl extensions can be easily copied to a .cpy file type (say) by specifying MARGINS CPY CBL).
MARGINS {OTHER} left-col right-col
This command enables you to modify the Editor's undefined margins,
which are always present when you work with the Editor. The {OTHER}
keyword specifies that the margin settings are to be used if you are
working with a file for which no explicit MARGINS command is available.
The values for left-col and right-col
are the same format as those used in the first variation of this command.
Only one set of {OTHER} margins can be defined. Subsequent
definitions merely overwrite the earlier ones.
Examples
MARGINS DOC 0 79 MARGINS CBL 7 73
MARGINS CPY CBL
MARGINS {SPACE} CBL
Note the use of {SPACE} in the last example to
specify a space extension. The Editor always replaces this keyword where
it is valid in configuration commands with spaces.
Neither of the above examples modified the {OTHER}
definition which is set to 0 and 81 by default.
If you want to define margins for files with a numeric extension, for example file.321 or file.456 you must enclose the extension in quotation marks, that is to set margins of 10 and 70 for the two files shown you would specify
MARGINS "321" 10 70
MARGINS "456" "321"
You must also specify alphabetic extensions in quotation marks if the extension contains embedded spaces, for example:
MARGINS "C B" 0 251
The maximum size of an extension is 65 characters. Excess characters are truncated and a warning message displayed. Do not include the leading "." in the extensions used, unless the extension itself starts with a period (for example, file..ex). If a leading period is detected, it is removed; however, further periods are left intact.
If no MARGINS commands are present in your configuration file, the Editor sets itself to behave as if the following commands had been present:
MARGINS CBL 7 73
MARGINS CPY CBL
MARGINS {SPACE} CBL
MARGINS COB CBL
MARGINS BAK CBL
MARGINS {OTHER} 0 81
However, if any MARGINS commands are detected, the above defaults are canceled and only those MARGINS commands found are used.
The INIT-MARGINS command enables you to specify which margins you want to use when a window is opened (including the initial window) if a file has not been loaded into that window. The format of the command is:
INIT-MARGINS ext
This command specifies that the margins defined for file extension
ext using a previous MARGINS command are to be used.
ext must have been defined. If it is not found in
the margin table then the command is ignored and a warning message output.
The Editor then sets itself to the default initial margins of CBL if they
are available, otherwise it uses the current {OTHER}
definition.
As well as an explicit extension, you can also specify INIT-MARGINS
{OTHER} which, since {OTHER} margins are
always defined, will never fail.
If subsequent INIT-MARGINS commands are found, the latest commands override the earlier commands.
If you specify a filename without an extension, the Editor searches for that filename using a default extension list as follows:
DOS, Windows and OS/2:
The default extensions for DOS, Windows and OS/2 are:
.cbl, .cpy, .cob, spaces (no extension) and
.bak
UNIX:
The default extensions for UNIX are:
.cbl, .cpy, .cob, .bak, .CBL, .CPY, COB, .BAK and spaces (no extension)
You can change this default configuration to the extensions you want Editor to search for and specify which extension you want to have offered by default when saving a new file using the EXTENSIONS command. The format of the command is:
EXTENSIONS ext1 ext2 ext3 ... extn
where ext1, ext2, ext3
and extn are individual file extensions. You can
define up to 20 extensions; however, the entire EXTENSIONS command must
fit on a single line (250 characters). The length of an individual
extension can be between 1 and 65 characters. The extensions specified
must be separated by one or more spaces. If you want to define an
extension that contains embedded spaces, enclose the particular extension
in quotation marks (" ").
DOS, Windows and OS/2:
On DOS, Windows and OS/2 , the extensions you specify are all folded
to upper case. It is not possible to specify and distinguish between, say,
.cbl and .CBL. Do not include an initial period with the
extension unless the extension itself starts with a period, for example,
file..ex. The first period, if present, is always removed but
subsequent periods are retained.
UNIX:
On UNIX, file extensions are case sensitive. The extension is
searched for in the case specified.
The first extension specified is the one offered by default when saving a new file, so you can change the default by changing the first extension.
As the command is processed, extensions are checked to see if they have been defined previously in the current command. If so, the duplicate definition is ignored.
Only a single EXTENSIONS command can be specified. If a subsequent command is found, the extensions defined in the later command override those specified initially. When specifying extensions that are composed entirely of spaces, the keyword {SPACE} can be used. When the Editor processes this keyword, it fills the current extension entry with spaces (up to 65 characters). The keyword can be specified in either upper or lower case but it must be enclosed in braces ({ }).
DOS, Windows and OS/2:
On DOS, Windows and OS/2, if no EXTENSIONS command is specified in
your configuration file, the Editor defaults to behaving as if the
command:
EXTENSIONS cbl cpy {SPACE}
had been defined.
UNIX:
On UNIX, if no EXTENSIONS command is specified in your configuration
file, the Editor defaults to behaving as if the command:
EXTENSIONS cbl cpy cob CBL CPY COB {SPACE}
had been defined.
If an EXTENSIONS command is present, these definitions are canceled and the extensions defined in the current command used instead; hence, if you want to continue searching for .cbl, .cpy and {SPACE} extensions, in addition to your own specialist extensions then you need to include cbl, cpy and {SPACE} definitions in your EXTENSIONS command.
You can also specify the extensions of copyfiles to be searched. This is useful when trying to locate a copyfile; for example, when using Alt+F2=library function.
These generally follow the rules for file extensions.
DOS, Windows and OS/2:
On DOS, Windows and OS/2, if no EXTENSIONS command is specified in
your configuration file, the Editor defaults to behaving as if the
command:
COPYEXT .cpy .cob {SPACE}
had been defined.
UNIX:
On UNIX, if no EXTENSIONS command is specified in your configuration
file, the Editor defaults to behaving as if the command:
COPYEXT .cpy .cob .CPY .COB {SPACE}
had been defined.
DOS, Windows and OS/2:
This section applies only to users of a COBOL system on DOS, Windows
or OS/2. If you are using Object COBOL for UNIX you are unable to colorize
the Editor, so should skip this section and move to the section Default
Configuration of the COBOL Editor.
The Editor defaults to the same display attributes as the rest of your COBOL system and is not shipped with any preset attributes. However virtually all of the attributes can be configured independently. For example you can specify the attributes used to indicate which window is currently active and those that are inactive.
The color configuration options are prefixed by "COLOR" and the monochrome options are prefixed by "MONO". The table below shows the options available.
| Configuration Option |
Attribute Used For |
System Attribute |
|---|---|---|
| CURRENT-LINE | Source line on which cursor is positioned | 12 |
| NORMAL-TEXT | Source lines on which cursor is not currently positioned | 11 |
| TAGS | Source lines which have been tagged | 5 |
| MARGIN-COL | The current margin columns shown when using the Margins menu (if they are visible in the window) | 10 |
| KEYTOPS | The function keys active on the current menu | 4 |
| MENU-TEXT | All menu text other than function key identifiers | 3 |
| MESSAGE-NORM | All "information" type messages | 3 |
| MESSAGE-HIGH | All "error" and "warning" type messages | 4 |
| ENTRYFIELD | Editor's entry prompts | 6 |
| BLOCK | Block currently being marked | 10 |
| TELLTALES | Information Line toggles (except keyboard toggles) | 5 |
| CURRENT-WINDOW | The border (if on) of the current window | 4 |
| INACTIVE-WINDOW | The borders (if on) of all other windows | 3 |
| MOVING-WINDOW | The border (if on) of the window currently being moved | 6 |
| RESIZING-WINDOW | The current border side (if on) being
sized
|
5 |
Color attributes are specified as foreground ON background followed optionally by "BLINK". For example, to alter the current line attribute to light-red on black you should include the line:
COLOR-CURRENT-LINE LIGHT-RED ON BLACK
Monochrome attributes are specified as "REVERSE-VIDEO", "UNDERLINE", or "NORMAL", together with "HIGHLIGHT" and/or "BLINK". To change the current line attribute to highlighted underline you should include the line:
MONO-CURRENT-LINE UNDERLINE HIGHLIGHT
When the Editor starts up, it detects whether you are running in a color or monochrome environment and reads only those attribute settings (if present) that apply to that environment.
Note: It is not possible to colorize the keyboard toggles (Ins, Caps, Num and Scroll) - these inherit your current COBOL system defaults. You might also find that some of these system attributes are used whenever the Editor interacts with another component (for example Name when asking for a filename - the prompt uses the Object COBOL or Workbench attribute rather than the Editor's Entryfield attribute). The attributes noted above are used solely for items that belong to the Editor.
The example configuration file contained in the next section shows the default color settings for the Editor (both monochrome and color) and also illustrates the various foreground and background options from which you can choose.
The following section provides a set of example commands that set up the Editor to run in its default state in the specified environments. The configuration files are described in the chapter Configuring Development Tools in your Getting Started. All the possible configuration options for all the installed systems (Workbench and Object COBOL) are in the configuration file.
[EDIT-USER]
BACKUP OFF
WORD-WRAP ON
CSI ON
CHECK-MODE CHECK
PAUSE ON
LIST CON
STRUCT OFF
ANALYZE OFF
REF OFF
XREF OFF
LIMIT LINE
AUTORESTART ON
WINSHOWPATH OFF
MARGINS {OTHER}0 81
MARGINS CBL 7 73
MARGINS CPY CBL
MARGINS {SPACE} CBL
MARGINS COB CBL
MARGINS BAK CBL
INIT-MARGINS CBL
EXTENSIONS CBL CPY COB {SPACE} BAK
COPYEXT CPY COB {SPACE}
;COLOR-CURRENT-LINE        YELLOW ON BLACK
;COLOR-NORMAL-TEXT         BROWN ON BLACK
;COLOR-TAGS                LIGHT-CYAN ON BLACK
;COLOR-MARGIN-COL          YELLOW ON RED
;COLOR-KEYTOPS             YELLOW ON BLACK
;COLOR-MENU-TEXT           BROWN ON BLACK
;COLOR-MESSAGE-NORM        BROWN ON BLACK
;COLOR-MESSAGE-HIGH        YELLOW ON BLACK
;COLOR-ENTRYFIELD          WHITE ON BLACK
;COLOR-BLOCK               YELLOW ON RED
;COLOR-TELLTALES           LIGHT-CYAN ON BLACK
;COLOR-CURRENT-WINDOW      YELLOW ON BLACK
;COLOR-INACTIVE-WINDOW     BROWN ON BLACK
;COLOR-MOVING-WINDOW       WHITE ON BLACK
;COLOR-RESIZING-WINDOW     LIGHT-CYAN ON BLACK
;MONO-CURRENT-LINE         NORMAL HIGHLIGHT
;MONO-NORMAL-TEXT          NORMAL
;MONO-TAGS                 UNDERLINE
;MONO-MARGIN-COL           REVERSE-VIDEO
;MONO-KEYTOPS              NORMAL HIGHLIGHT
;MONO-MENU-TEXT            NORMAL
;MONO-MESSAGE-NORM         NORMAL
;MONO-MESSAGE-HIGH         NORMAL HIGHLIGHT
;MONO-ENTRYFIELD           UNDERLINE HIGHLIGHT
;MONO-BLOCK                REVERSE-VIDEO
;MONO-TELLTALES            UNDERLINE
;MONO-CURRENT-WINDOW       NORMAL HIGHLIGHT
;MONO-INACTIVE-WINDOW      NORMAL
;MONO-MOVING-WINDOW        UNDERLINE HIGHLIGHT
;MONO-RESIZING-WINDOW      UNDERLINE
If no configuration data is found, the Editor initializes itself to behave as if the above statements had been present.
The color and monochrome statements that specify default attributes are commented out in this default configuration file to prevent them overriding any attributes you might have changed in the Workbench, Professional COBOL, or MDE environments. You can change these statements to your own requirements by removing the semicolon (;) comment indicator from the front of the line and specifying new values for color and monochrome attributes.
The LANG options differ depending upon whether you have installed Workbench with or without the MDE. The statements used and shipped in each case are as follows:
For Workbench without the MDE as the primary environment:
LANG OSVS OSVS NOANS85 NOVSC2
LANG ANS85 NOOSVS ANS85 NOVSC2
LANG VSC2(2) NOOSVS NOANS85 VSC2(2)
LANG VSC2(3) NOOSVS NOANS85 VSC2(3)
LANG VSC2(4) NOOSVS NOANS85 VSC2(4)
LANG DOS/VS  DOSVS
LANG COB/370 COBOL370
For Workbench with the MDE installed as the primary environment:
LANG OSVS USE($COBDIR\WBOSVS.DIR)
LANG VSC2(1) USE($COBDIR\WBVSC21.DIR)
LANG VSC2(2) USE($COBDIR\WBVSC22.DIR)
LANG VSC2(3) USE($COBDIR\WBVSC23.DIR)
LANG DOS/VS  USE($COBDIR\WBDOSVS.DIR)
LANG COB/370 USE($COBDIR\WBCOB370.DIR)
If no LANG statements are defined, only the permanent "blank" option is used.
When you use a menu system that is not your default, for example, if you enter the MDE when your default is the Workbench Development Environment, selecting F6=lang from the Editor does not cause the relevant wbxxxx.dir file to be used. Instead, the single directive for the dialect given is specified.
To solve this problem, you must edit the local configuration file (see the chapter Configuring Development Tools in your Getting Started) to include the additional required directive toggles in the [EDIT-USER] section.
DOS, Windows and OS/2:
The following sections describe how you can make the most of the
features of your personal computer on DOS, Windows and OS/2. They include
information on how to display text when using your personal computer and
how to control the printer.
UNIX:
This information is not relevant to Object COBOL for UNIX users.
Your personal computer can display text on the screen in many ways. On a monochrome display the text can be displayed at different intensities, underlined, in reverse video or blinking. On a color display, the text can be displayed in different colors on a colored background, and with text blinking.
Each text character displayed on the screen has an associated character (byte) of information. This is the attribute. This attribute byte controls the way the character is displayed. The following sections describe the attribute bytes for monochrome and color displays.
You can change the value of the attribute byte and, therefore, change the way characters are displayed on the screen by using the Screen attribute and the User attribute.
The Screen attribute enables you to specify an attribute associated with each character position on the screen. You can define areas of the screen as having different attributes. Whenever a character is displayed on the screen, it has the attribute associated with that position on the screen. You use F10 (paint-attr) in Forms to change the screen attribute of characters on the screen, for example.
The User attribute is associated with the whole screen. All of the characters that are displayed have the same attribute. A program must set the User attribute, which is enabled for the duration of the program. Another program in the same suite might change the attribute.
The User attribute overrides any Screen attributes that you might have already defined. Therefore, any text that is displayed when the User attribute is enabled takes the User attribute rather than any Screen attributes that are already defined. A program must specifically enable the User attribute, and it must also change the setting if anything other than the normal display (light green text on a black background) is required.
The following diagram shows the structure of the attribute byte for a personal computer with a monochrome display.
The effects of setting (making equal to 1) and unsetting (making equal
to 0) these bits in the attribute byte are shown in the following table:
| bits 6, 5, 4 set | bits 6, 5, 4 unset | bits 6, 5, 4 other settings | |
| bits 2, 1, 0 unset | reverse video | no display | normal display |
| bits 2, 1 unset,
bit 0 set |
underlined text | ||
| bits 2, 1, 0 other settings | normal display | ||
Example
When bit 7 is set to 1, blinking is on.
When bit 3 is set to 1, text is displayed at high intensity.
Note: Normal text on a monochrome display (green text on black background) can be obtained by a number of different bit settings since several bits which are used to control color are ignored by the monochrome display. However, only one combination produces this normal text on both monochrome and color displays:

To ensure consistent results from programs that are used on both color and monochrome displays, you should make sure that you use this setting to achieve "normal" text.
The following diagram shows the structure of the attribute byte for a personal computer with a color display.
The effects of setting (making equal to 1) and unsetting (making equal to 0) these bits are shown below.
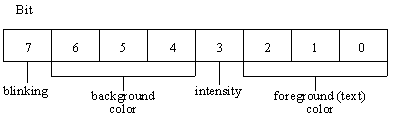
Example
When bit 7 is set to 1, blinking is on.
Bits 6, 5, 4 control the background color as follows:
| 000 | black | |
| 001 | blue | |
| 010 | green | |
| 011 | cyan | |
| 100 | red | |
| 101 | magenta | |
| 110 | brown | |
| 111 | light gray |
When bit 3 is set to 1, the intensity of the foreground color is changed (see below).
Bits 2, 1 and 0 control the foreground (text) color as follows:
| bit 3 unset | bit 3 set | |
|---|---|---|
| 000 | black | dark gray |
| 001 | blue | light blue |
| 010 | green | light green |
| 011 | cyan | light cyan |
| 100 | red | light red |
| 101 | magenta | light magenta |
| 110 | brown | yellow |
| 111 | light gray | white |
Note: The IBM 3270 PC has no facility for setting intensity.
The Editor supports several facilities for printing text files. The print option (Alt+F7=print) prints the current file. As it is being printed, you can continue editing beyond the page being printed.
Editor enables you to send form-feed characters to the printer to throw new pages. You key a slash character (/) in column 7 (under the left margin). The "/" is not printed but causes a new page to be thrown. If you print the file under DOS, the "/" is treated as a text character and appears on the print-out. It does not throw a new page.
The documentation accompanying an IBM printer (designed to be inserted in the IBM Guide to Operations), includes a list of control codes that you use to control the printer. However, since it addresses programming in BASIC, this next section explains how to use these printed codes from Editor.
Other printers support a wide variety of codes to control printing. Refer to your printer manual for details of these codes.
You can include printer control codes in text files created and edited in Editor. You can see from your IBM Guide to Operations that most control codes must be preceded by an ESC character. However, in Editor, the Escape key exits the current function; it is not treated as a text character.
To produce an ESC character, hold down the Alt key and key 2, then 7 on the numeric keypad of your keyboard (an Alt+27 is the alternate code for the escape character). Then release the Alt key. A <left-arrow> symbol appears at the cursor position. This arrow is the text representation of the ESC character. You then key after the ESC character whatever control codes you want to send to the printer. These neither print nor take space on the line on which they appear; that is, they occupy a space on the screen but not on a printed line.
The following example shows how to underline text on the IBM graphics printer.
"I will try to arrange a meeting for May or June"
To underline the word "or":
"I will try to arrange a meeting for May <left-arrow>-1 or June"
"I will try to arrange a meeting for May <left-arrow>-1or <left-arrow>-0June"
and prints as:
"I will try to arrange a meeting for May or June"
Other printer control codes can be keyed in the same way using the Alt key and entering 2 and 7 from the numeric keypad. The control codes that you include in this way remain in the file when it is written to disk and are understood and acted on if you send your file to an appropriate printer under DOS.
There are a few control codes which are not preceded by an ESC character. To include these you use the same technique with the Alt key and the numeric keypad. For example, to set compressed characters, press Alt+15. To unset them, press Alt+18. For further information about printer control codes, see the section about printers in your IBM Guide to Operations.
Other printers support a wide variety of codes to control printing. Refer to your printer manual for details of these codes.
Copyright © 1999 MERANT International Limited. All rights reserved.
This document and the proprietary marks and names
used herein are protected by international law.
| Directory Facility | Forms-2 |
