12.1 Managing Printer Drivers
A printer driver or PostScript Printer Description (PPD) file is software that directly supports a physical printer, enabling it to carry out its functions.
Hardware vendors develop printer drivers and PPD files, which are specific to each printer. Most printers require different printer drivers for each operating system they interact with. You can use iManager to view a list of printer drivers and PPD files you have uploaded to the Driver Store. On Windows10 and Windows 11 platforms, you can also upload printer drivers by using a command line option. You can add printer drivers and PPD files from diskettes, CDs, and the workstation operating system.
The Driver Store daemon must be running in order to add printer drivers, and the iPrint Client must be installed on a Linux or Windows workstation. To install the client, go to http://dns_name or IP_address/ipp and click the link.
12.1.1 Adding a Printer Driver
To add printer drivers to the Driver Store:
-
Right-click the tray icon in the system tray on the taskbar and choose . The iPrint Management Client is launched.
-
Login to the .
-
From the drop-down list, select the Print Manager where you want the driver to be stored and made available to the printers on that manager.
-
Select the on the left pane.
-
Do one of the following:
-
If the client platform is Windows, perform the following:
-
Click the tab.
Figure 12-1 Windows Driver Upload

-
You can choose Windows 8/8.1/10(x64) or Windows 8/8.1/10(x86) as Driver Platforms.
-
Click , and the with the available printer drivers is displayed. The drivers installed on your workstation are made available to be uploaded to the Driver Store. You can upload only drivers for the platforms installed on your workstation.
-
Select the driver and click .
-
If you want to delete the driver(s), you can select the driver(s) that is added and click .
-
Click to refresh the screen and display the changes you just made.
-
-
If the client platform is MAC perform the following:
-
Click the tab.
Figure 12-2 Driver Upload
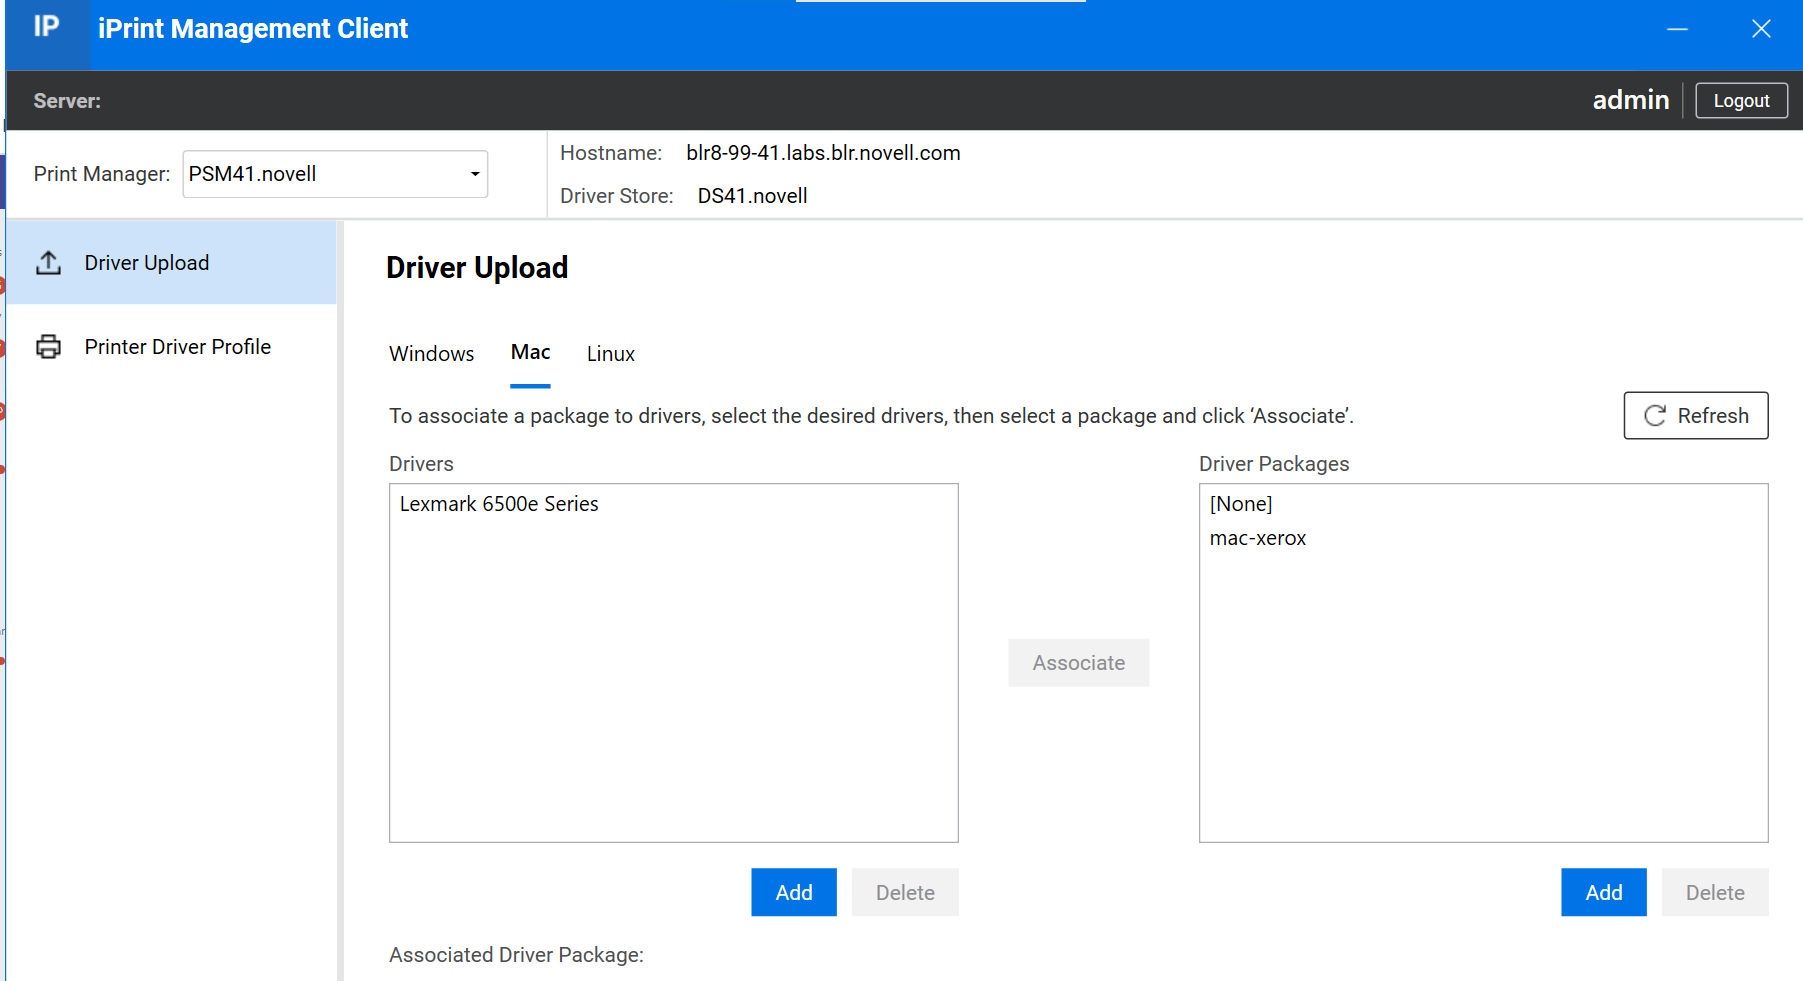
-
Click under the pane, and the with the available printer drivers is displayed. The drivers installed on your workstation are made available to be uploaded to the Driver Store. You can upload only drivers for the platforms installed on your workstation.
-
Select the driver and click .
-
Click under the pane. Browse and select the package from the list.
-
Click .
-
Click . This associates the selected driver to the package. When a user installs the printer, the driver and its associated files from this package are installed on the workstation. If the dependent files are missing, the printer installation fails.
-
To disassociate a driver from the package, select the driver and select None from the Driver Packages list and click Associate. The driver is no longer associated to any package.
-
If you want to delete the driver(s), you can select the driver(s) that is added and click .
-
Click Refresh to refresh the screen and display the changes you just made.
Associated Driver Package: Displays the driver package, if any, associated with the selected drivers. This is the dependent package for the driver and is installed with the printer. This option is available only on a Mac machine.
-
-
If the client platform is Linux, perform the following:
-
Click the Linux tab. Generic PostScript Printer Foomatic/Postscript(recommended) and Generic PCL 4 Printer Foomatic/laserjet (recommended) are the two default printer drivers.
-
Click , the with the available printer drivers is displayed. The drivers installed on your workstation are made available to be uploaded to the Driver Store. You can upload only drivers for the platforms installed on your workstation.
-
Select the Driver and click .
-
If you want to delete the driver(s), you can select the driver(s) that is added and click .
-
Click to refresh the screen and display the changes you just made.
-
-