1.4 Setting up a Basic Deployment
This video and walkthrough show a way to deploy Reflection out-of-the-box by installing an image of Reflection on a file server and then sending a link to its Setup.exe program to users. When users are ready to install, they click on the link to the Setup.exe program.
It also shows how to use the Installation Customization Tool to create a package of customized files that can be installed in the same way.
1.4.2 Create and Deploy Customized session files
After you create an administrative installation point, you can use it along with a local installation of Reflection to create and deploy customized session files to your users.
First, you'll need to install Reflection on a workstation so you can create and customize your configuration files.
Install Reflection on a workstation
-
On the workstation, navigate to the network share where you have created the administrative installation point, and double-click setup.exe.
-
From the Reflection Setup program, click , and then accept a license.
-
To select which features, components, or languages are installed, click the tab. The default installation does not include all features and components.
NOTE:If you are working with legacy macros or other legacy files, select the compatibility features that support the products you are upgrading or migrating from.
-
Click .
Create a custom compound session document file
After you install Reflection on the workstation, you can use it to create custom session document files.
You can simplify your deployment by saving your customized settings in a compound session document file. Compound session document files save all of the settings for QuickPads, keyboard maps, themes, mouse maps, hotspots, and ribbons in a single file.
This video and the instructions that follow show how to create a session with a custom keyboard map, save all of the settings in a compound session document file, and then package that file in an .msi file.

-
On the workstation, open Reflection. If the Create New Document box doesn’t open automatically, select | to open it.
-
Select 3270 terminal and then click .
-
In the box, enter the host name. To use the Reflection onboard demo, enter
demo:ibm3270.sim
-
After the session opens, click the Document Settings button
 on the Quick Access toolbar and then select .
 -
In the dialog box, select .
-
In the Create a New Keyboard Map file dialog box, select to base the new keyboard map on the default map.
-
In the Keyboard Mapper, press the key combination to map (for example, Ctrl+F8) and then click .
-
In the Select Action dialog box, select an action.
-
Enter a new file name for the keyboard map and save it.
-
From the menu, choose and then save the session as a compound session file type:
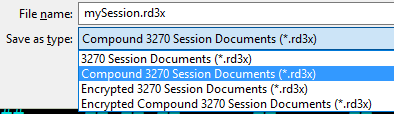
NOTE:Saving a session in a compound session document file simplifies your deployment. When you save the session as a compound session document, the custom keyboard map settings are saved in your session file. If you were to save the session as a regular session document, these settings would be saved in a separate file that you would need to deploy along with your session file.
The Installation Customization Tool is designed to be opened from a command line. However, you can create a desktop shortcut that opens this tool. This will save time when you are working with the tool.
Set up a shortcut that opens the Installation Customization Tool
-
On your administrative installation point, right-click the setup.exe file, and choose .
-
Right-click the shortcut and choose .
-
In the box, add the /admin option to the end of the command line. For example:
\\ myServer\adminInstallPoint \setup.exe /admin
NOTE:The path in the box must conform to the Uniform Naming Convention (UNC) format and cannot include drive letters. Drive letters can cause problems if you try to use the shortcut on other workstations.
-
Rename the shortcut and save it on the desktop of your workstation.
Create a companion installer package
-
To start the Installation Customization Tool, double-click the shortcut on your workstation, and in the dialog box, select .
-
On the left pane, click , and specify the .
-
installs the file in a common folder so that the settings apply to all users of the machine.
-
installs the file in a personal folder so that the settings apply only to a single user.

-
-
On the left pane, click and then click in the box and type the rest of the path. If you previously selected , The final entry should be:
[PersonalFolder]\Micro Focus\Reflection\
NOTE:By default, this folder is a trusted location. If you use another folder, you will need to add it to the trusted location list and deploy that setting. Reflection does not open files unless they are in trusted locations.
-
Click the button, and browse to the file you added earlier.
-
From the navigation pane, click .
-
In the name box, type the package name to display in the Windows control panel.
-
In the name box, enter the name of your department.
-
-
From the menu, save the.msi file on the administrative installation point.
Now that you have created the companion MSI file, distribute a link to the file to users. When they run this MSI, the session document file is installed to their workstations in the location specified in the MSI.