Set up Productivity Features
Productivity features accelerate data entry and host navigation, maximizing user productivity, while reducing errors. Features such as Auto Complete, Auto Expand, Spell Check, Scratch Pad, Recent Typing, and Screen History enable users to save thousands of keystrokes throughout the day, freeing up time to serve customers more efficiently, and for more productive, revenue-producing activities.
note
VT sessions support only Office Tools integration, Scratch Pad, and the manual capture function of Screen History. Other productivity features are not available with VT sessions.
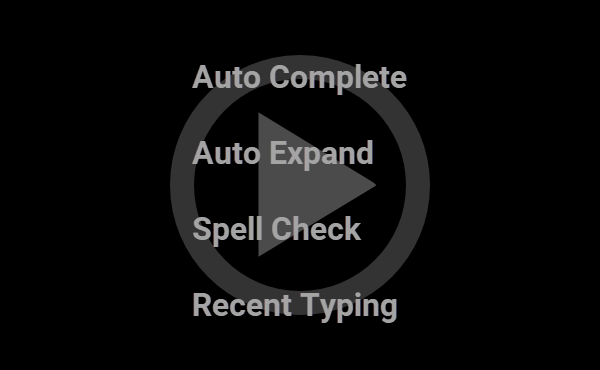 Using Productivity Features (2:28)
Customize Microsoft Office Productivity Features
To customize productivity features
-
Open the Settings window. The steps depend on your user interface mode.
User Interface Mode Steps Ribbon or Reflection Browser With a session open in Reflection, from the Quick Access Toolbar, click  .
.TouchUx Tap the Gear icon and then select Document Settings. -
Select the feature you want to customize.
Select To Productivity defaults Configure whether Recent Typing, Auto Complete, Auto Expand, and Spell Check are enabled by default. Screen History Set the maximum screens to capture, whether to capture manually only, and whether to clear screen history when disconnected. Office tools Specify PowerPoint presentation and Word templates. Note: If you specify templates, you will need to deploy the template files. Recent Typing Set the number of words to remember and whether to clear the list when disconnected. Auto Complete Configure Suggestions and whether to overwrite or insert suggestions. Auto Expand Set definitions for abbreviations you want to expand. Spell Checking Specify a custom dictionary and other options.
Integrate Host Data with Office Tools
You can send entire host screens or selected data directly to Microsoft Office products installed on your computer.
To copy and paste host screens or data, see Copy and Paste Host Data.
To send data from the current screen to an Office component
-
Navigate to the host data you want to send.
-
Select specific data to send.
-or-
To send the entire screen, don't select anything.
-
Do one of the following:
The steps depend on your user interface mode.
User Interface Mode Steps Ribbon Click the  Office Tools split button to open the Office Tools docking pane.
Reflection Browser On the Reflection menu, choose Send to. TouchUx On the toolbar, tap the Office Tools icon. -
Choose the Office component to receive the host data.
Choose To do this Email Message Create an Outlook e-mail message that includes the selected host data. Contact Create a new contact in Outlook that includes the selected host data in the Notes field. Appointment Create an Outlook appointment that includes the selected host data in the message field. Note Create an Outlook "sticky" note that includes the selected host data. Task Create an unscheduled Outlook task that includes the selected host data in the task body field. Word Processing Document Create a Word document that includes the selected host data.
To send host screens from screen history to an Office component
-
Open the Screen History task pane. The steps depend on your user interface mode.
User Interface Mode Steps Ribbon On the Session ribbon, click the  Screen History button.
Reflection Browser On the Reflection menu, choose View and then Screen History. TouchUx Tap the Wrench icon and then under View, choose Screen History. -
From the toolbar in the Screen History task pane, click the
Office Tools button. -
Select the screens that you want to send.
-
From the Document Type list box, select the type of Office document that you want to create:
Choose To do this Word processing document Create a Word document that includes the selected screens as text or images—specify which in the Insert screens list box. Presentation Create a PowerPoint presentation that includes the selected screens as bitmap images. Email message Create an Outlook e-mail message that includes the selected screens as text. Note Create an Outlook "sticky" note that includes the selected screens as text. -
Click OK.
More information
Enter Data with Recent Typing
Using the Recent Typing gallery or task pane, you can quickly view and select from a list of recently typed items, and send the selected string to the active document. This eliminates the need to manually re-enter information, saving time, and reducing errors when entering commonly-typed commands or field data.
note
-
This feature is not available with VT sessions.
-
Typing is not captured in hidden-text fields such as passwords.
To enter data with Recent Typing
-
Navigate to the host field where you want to input the data.
-
Open the Recent Typing gallery or task pane.
-
Double-click the string you want to input.
The following commands are also available from the toolbar in the Recent Typing task pane:
| Click | To do this |
|---|---|
 | Open a previously saved Recent Typing file. |
 | Save the contents of the Recent Typing task pane as a file (.RRTL). When you close your session, your recent typing items are not maintained unless you save them to a separate file. |
 | Delete the selected item. |
| Clear all of the contents at once. | |
 | Put the task pane into auto-hide mode. This collapses the task pane against the side of the application frame. (To re-open the task pane, mouse over the side of the frame.) |
note
You can use the keyboard to locate (and select) recently typed items in the list. For example, press the A key to locate the most recently typed item beginning with the letter A.
More information
Take Notes with Scratch Pad
Use the Scratch Pad to keep notes associated with a session. From the task pane you can print or save the Scratch Pad notes as .RTF or .TXT files.
To reopen the file later, it must be saved in a trusted location.
To take notes with Scratch Pad
-
Open the Reflection Scratch Pad. The steps depend on your user interface mode.
User Interface Mode Steps Ribbon On the Session ribbon, from the Productivity group, click the Scratch Pad button. Reflection Browser On the Reflection menu, choose View, and then Scratch Pad. TouchUx On the toolbar, tap the Wrench icon and then choose Scratch Pad. -
Type your notes into the Scratch Pad.
-
Save your notes by clicking the Save As toolbar button.
The following commands are also available from the toolbar in the Scratch Pad task pane (You can also use common keyboard shortcuts like CTRL+A, CTRL+C, and so on):
| Click | To do this |
|---|---|
| Save the contents of the Scratch Pad task pane as a Rich Text File (.RTF) or as plain text (.TXT). When you close your session, your Scratch Pad is not maintained unless you save it to a separate file. |
| Open any .RTF or .TXT file. The file must be in a trusted location. |
 | Print the contents of the Scratch Pad. |
 | Cut the selected item and copy it to the Clipboard. |
 | Copy the selected item to the Clipboard. |
 | Paste the contents of the Clipboard at the cursor location on the Scratch Pad. |
| Clear all of the contents at once. | |
| Put the task pane into auto-hide mode. This collapses the task pane against the side of the application frame. (To re-open the task pane, mouse over the side of the frame.) |
More information
Enter Data with Auto Complete
The Auto Complete feature recalls what you type, and automatically makes suggestions to help populate fields as it learns common commands that are repeated. By default, typing is saved with the screen location, and suggested when you type at that screen location again.
note
Auto Complete does not record typing in hidden-text fields such as passwords, nor does it offer suggestions to complete typing in such fields.
To enter data with Auto Complete, you must first have some suggestion data saved with your session. To generate suggestion data, type a string into a host field, followed by a Spacebaror a host key (Tab,field exit, AID key, and so on). The data is associated only with the field in which it was entered, unless you are configured to use field independent Auto Complete (select the Make Suggestions from All Screen Data option on the Configure Auto Complete dialog box).
This feature is not available with VT sessions.
To enter data with Auto Complete
-
Begin typing text into a host field.
A pop-up window may appear with one or more suggestions, depending on your Auto Complete configuration and previous data entry activity.
-
If the suggestion is correct, press the ENTER key to input the data.
-or-
If there are multiple suggestions, use the Up and Down Arrow keys on your keyboard to scroll through the suggestion list.
-
(Optional) To prevent the active suggestion from being suggested again in the current field, press the ESC key.
As you continue typing, the pop-up window will remain open until the word being typed no longer matches any previous suggestion data.
More information
Enter Data with Auto Expand
Use the Auto Expand feature to add acronyms or shortcuts for long words, phrases, or complex repeat commands. The shortcut, when typed and followed by the Spacebar, automatically expands to the full word or phrase.
note
-
This feature is not available with VT sessions.
-
Expansion does not occur in hidden-text fields such as passwords.
To enter data with Auto Expand
-
Build a dictionary in the Auto Expand Settings.
-
Open the Settings window. The steps depend on your user interface mode.
User Interface Mode Steps Ribbon or Reflection Browser With a session open in Reflection, from the Quick Access Toolbar, click .TouchUx Tap the Gear icon and then select Document Settings. -
On the Settings dialog box, under Productivity, click Configure Auto Expand
-
From the Configure Auto Expand dialog box, create the desired Auto Expand definitions.
-
Click OK.
-
-
To insert data using Auto Expand, in the host field where you want the expanded data, type the abbreviation for an entry, and then press the Spacebar key.
The abbreviation is replaced with the Auto Expand definition you specified.
More information
Find and Fix Spelling Errors
By default, spell check works as you type, using wavy underlines to indicate possible errors. If you prefer to wait until after you've finished entering content to make corrections, or you find the wavy underlines distracting, you can hide them.
note
This feature is not available with VT sessions.
To show or hide spelling corrections as you type
-
Open the Configure Spell Checking dialog box. The steps depend on your user interface mode.
User Interface Mode Steps Ribbon On the Tools ribbon, from the Tools group, click  Spell Check.
Reflection Browser In the search box, enter Sand then, under Actions, choose Spell Check Settings.TouchUx Tap the Gear icon and select Document Settings. Then, under Productivity, select Configure Spell Checking. -
From the Configure Spell Checking page, select or clear Check spelling as you type.
To correct spelling as you type
-
Open the Configure Spell Checking dialog box. The steps depend on your user interface mode.
User Interface Mode Steps Ribbon On the Tools ribbon, from the Tools group, click Spell Check.Reflection Browser In the search box, enter Sand then, under Actions, choose Spell Check Settings.TouchUx Tap the Gear icon and select Document Settings. Then, under Productivity, select Configure Spell Checking. -
From the Configure Spell Checking page, select Automatically correct spelling as you type.
Commonly misspelled words are corrected without prompt or indication as you type.
note
This feature is available only for English.
To correct an error
-
Right-click a word with a wavy underline, and then select the alternate spelling or correction you want.
-
If the spelling you want is not in the suggestion list, or if no suggestions appear, enter the correct spelling manually.
You can also add the item to a custom spell-check dictionary to make it available in the future. For more information, see Create a Custom Spell Check Dictionary.
note
If no suggestions appear, there aren't any available, or the suggestions available are too long to fit in the remaining space in the field.
Use the procedure below to check spelling on the entire screen, not just typed text.
To check and correct spelling on the whole screen
-
Select Check Screen. The steps depend on your user interface mode:
User Interface Mode Steps Ribbon On the Session ribbon, from the Productivity group, click  Check Screen.
Reflection Browser In the search box, enter Cand then, under Actions, choose Check Screen.Possible spelling errors are indicated with wavy underlines.
note
Check Screen is disabled if you have cleared the Check spelling as you type check box.
-
Right-click a word with a wavy underline, and then select the alternate spelling or correction you want.
More information
Create a Custom Spell Check Dictionary
To increase the usefulness of the spell check feature, it helps to create a custom spell check dictionary, and add words to it that may be specific to your business or industry that are not included in the main dictionary. When you use spell check, both the main dictionary and your custom dictionary will be used.
note
-
This feature is not available with VT sessions.
-
Spell check is not supported for Japanese.
-
The spell check dictionaries are not used to correct spelling as you type. Instead, that feature uses a separate file of commonly misspelled words.
To create a custom spell check dictionary
-
Open the Configure Spell Checking dialog box. The steps depend on your user interface mode.
User Interface Mode Steps Ribbon On the Tools ribbon, from the Tools group, click Spell Check.Reflection Browser In the search box, enter Sand then, under Actions, choose Spell Check Settings.TouchUx Tap the Gear icon and select Document Settings. Then, under Productivity, select Configure Spell Checking. -
In the Custom Dictionary File field, type the path and filename that you want for your custom dictionary file.
The filename must have an extension (we recommend
.tlx). -
Click OK.
The file is created for you.
To add items to your custom spell check dictionary
-
On a host screen, right-click an item marked as misspelled that you want to add to your dictionary.
-
From the list that appears, choose Add to Dictionary.
More information
Turn off Screen History, Office Tools, and Productivity Features for Specific Fields
You can turn off Screen History, Office Tools, and productivity features for fields that contain sensitive information (like user accounts) by setting Field Security for these fields.
When Field Security is on for a field, Screen History, Office Tools, and all of the productivity features are disabled for that field. These features still work for other fields where Field Security is off. Field Security settings are saved when you save your session files.
To Turn Field Security On
- In the program field you want to set, right-click and choose Field Security.
To Turn Field Security Off
- In a program field that has Field Security set to On, right-click and choose Field Security.