25.5 Assigning SecureLogin Client Settings for Administrators and Help Desk Groups
Now that you have assigned the correct Directory permissions to allow members of the administrators and help desk groups to read and write the protocom attributes, you need to assign the SecureLogin client settings (SecureLogin preferences) to allow them to see what they have permissions to access. This is required to override the more restrictive settings the user will inherit from their parent container.
To accomplish this, you can either directly modify the users individual settings. A viable approach if you have a few users who will be granted the elevated permissions. This said, many customers still choose the direct assignment approach, as it can reduce the steps when troubleshooting where someone is getting a specific client setting from. Alternatively, you might utilize SecureLogin group policies. In both cases, see step 8 for the recommended settings.
It assumed that you know how to assign individual user’s settings, and the information in this section focuses on the use of group policies (assuming the feature was enabled during the product installation). As stated previously, both methods have their merits and should be evaluated before deciding on an approach.
25.5.1 Creating the Group Policy
-
Log in to the Active Directory domain as a administrative level user.
-
On a workstation or server open Active Directory User and Computers, and browse to the OU that contains the groups that you created earlier. Right click it, select .
-
In the properties dialog that opens up, select the .
NOTE:In this example, the Group Policy Management snap-in has been installed. It can be downloaded from Microsoft
-
Click .
-
Select the container, right-click it, and click .
-
Enter a name for the GPO.
-
Right-click the new GPO and select .
-
Go to > . In the right pane, double-click SecureLogin.
-
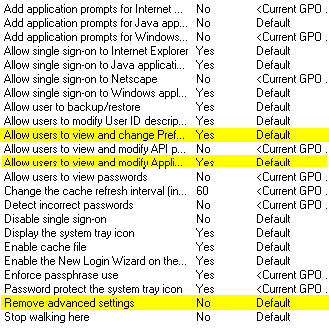
In the SecureLogin management interface, select the tab. Set each setting in accordance with what you want the users to do.
NOTE:The users referred in this example are administrators and help desk staff. They have full access to the SecureLogin client. Your configuration might differ slightly.
The preferences highlighted are the ones that are critical to ensure users are able to mange SecureLogin. Ensure that they are set as follows:
-
Click . This might take a minute to save.
-
Close the GPO editor.
-
In the GPM, select the new GPO you created, remove the Authenticated Users group, and add the admin and help desk groups you created in the previous two sections.
-
Link this policy to the OU where the users are located. Right-click and select .
-
Select the GPO you created, click OK.
-
Close the GPM. Click on the group policy tab.
-
Close Active Directory Users and Computers.
25.5.2 Testing the Configuration
If you chose to use individual assignment or GPO assignment, proceed with the following tests to confirm your updated configuration:
-
On a workstation with SecureLogin and the Active Directory Admin Pack, log in as a user who is a member of one of the groups you have configured as SecureLogin administrators or help desk.
-
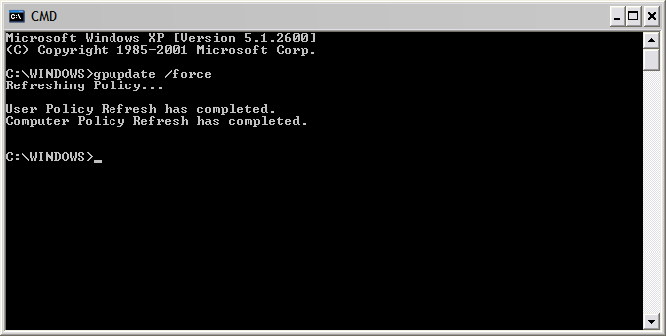
If your GPO refresh has not occurred, you can manually force the update by going to a command line and issuing the gpupdate /force command (Windows XP). You should see results similar to the following:
-
Launch Active Directory Users and Computers. Navigate to the container where you delegated control. As a member of the Admins group you should be able to manage the OU’s, and subordinate objects, applications and preferences.
As a member of the Help Desk group you should be able to only make changes to the users in the OU. It might appear that as a help desk user you can save changes to the OU, but that is not the case. And if you close the Single Sign-On properties and then open it back up, you will see the changes were not saved.