

| Data File Editor | Directory Facility | |
This chapter demonstrates how to use the main features of the Data File Editor. The Data File Editor is a tool for editing all file types supported by Micro Focus. The files can use either ASCII or EBCDIC character sets. You can edit them in unformatted mode or formatted against the record structure contained in a COBOL copyfile.
The tutorial uses an indexed personnel file containing employee records for a small business.
At the end of this tutorial you should be able to:
The tutorial uses the following files, which will have been copied to the directory $COBDIR/demo/dfed during installation of Server Express:
Before you begin the tutorial, you should copy these files to a working directory, set execute permissions on them, and set your default directory to the working directory.
To start the Data File Editor, start the Server Express Integrated Development Environment, select the Alternate menu, and select F4=data-file-editor.
To load the data file:
![]()
Figure 5-1: The Load File Menu
dfeddemo.dat
The records cannot be viewed formatted against a structure until you define that structure. To define the structure, you must load the dfeddemo.idy file that was created when dfeddemo.cbl was compiled (using the Compiler from Micro Focus COBOL Version 3 or later).
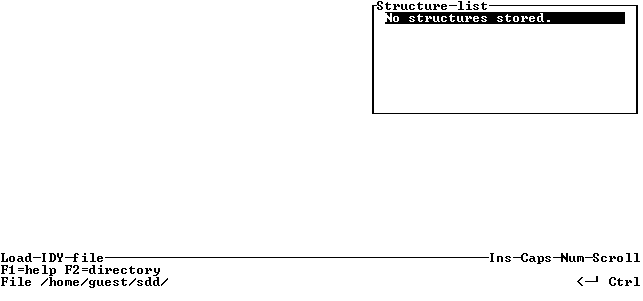
Figure 5-2: The Load IDY File Screen
dfeddemo
You do not need to type the .idy extension; it is added automatically.

Figure 5-3: The Loaded Structure Screen
The data file has three record types - employee, executive and manager.
These record types are defined by three structures: employee-rec,
executive-rec and manager-rec respectively.
You can define a default structure for one type (such as the employee
record - because there are more of those) and conditional structures for
the other types.
To define employee-rec as a default structure:
employee-rec in the .idy
file.
To define executive-rec as a conditional structure:
executive-rec further down the .idy
file.
executive-rec
structure has now been cut from the main body of definition and is
displayed alone. You must now define a condition to specify when this
record structure should be used.
In this file, all records have a field to indicate the type of employee. The values for this field are:
| E | executive |
| M | manager |
| 1 | grade 1 employee |
| 2 | grade 2 employee |
| 3 | grade 3 employee |
In the executive records, this field is called ex-position.
So, move your cursor to the ex-position field and
press Enter.
executive-rec, type:
E
and press Enter. The box is now hidden so that you can specify more conditions, if necessary.
Now repeat this process for the manager record.
manager-rec further down the .idy
file.
mn-position and press Enter.
M
and press Enter.
You have now defined a default structure and two conditional structures. To make a listing file of the details of these structures, suitable for printing:
dfeddemo
To save the structure file so that you do not need to define it each time you load the file:
dfeddemo
We need to be in formatted mode to use the structure file.
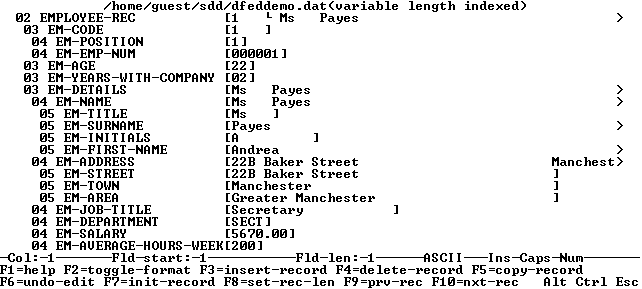
Figure 5-4: Formatted Display of a Record
To insert a record in your data file:
The word "Spaces" and a list of defined record structures is displayed. In this case, another executive has been appointed, so we want to add a record for that person.
A new executive-rec is inserted. It has "E"
in the ex-position field to define this record as an
executive-rec.
000003
in the ex-emp-num field.
You can also try other functions, for example:
The personnel file needs to be updated because Darren A. Hayes has left the company.
We will perform a search for the surname "Hayes" to find the record for Darren A. Hayes. All records have a surname field in the same position in each record. We will use an executive record to define the search argument, but you could use the employee or manager records because the search is based on the position of the field, not its name.
ex-surname
field.
ex-surname field is not a key field, you
need to search for the record on a string search.

Figure 5-5: Search Window
Hayes
The search is case-sensitive, so you must enter the surname exactly as shown.
The record for Darren A. Hayes is displayed.
The read key is used to sequence the records when the data file is displayed by the Data File Editor. You can resequence the file by changing to a different read key:
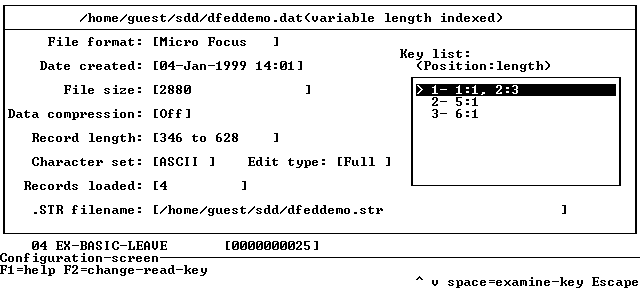
Figure 5-6: Configuration Screen
If you are displaying the file in unformatted mode, you can see the highlighted part of the file change when you change the key.
You can create a new file from within the Data File Editor. We will
create a file named yourdemo.dat, which is similar to
dfeddemo.dat
yourdemo and press Enter. This displays the Create
File screen, shown in Figure 5-7, and places your cursor on the file
organization box.
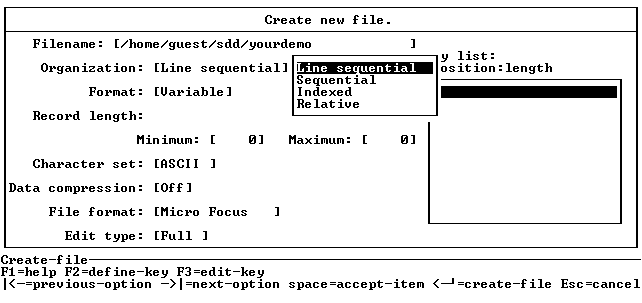
Figure 5-7: Create File Screen
When an indexed file is created, you must define its keys.
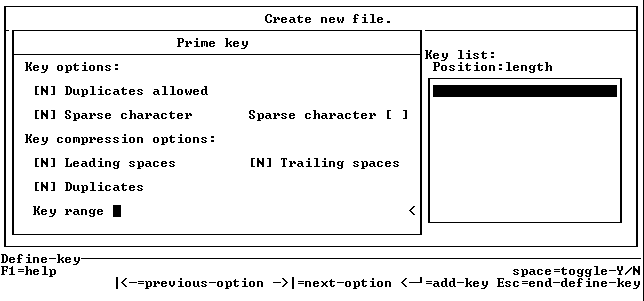
Figure 5-8: Define Key Screen
The type of key is displayed at the top of the window. The first key you define is the Prime Key, followed by First Alternate Key, Second Alternate Key, etc.
The format of the key range is:
key-component-start-position:key-component-length
For example, for a key starting at byte 1 and two bytes long, the key range would be 1:2.
For split keys you can repeat the parameters, using a comma to separate them. For example, in a split key with two components, when the first starts at byte 1 and is two bytes long and the second starts at byte 4 and is three bytes long, the key range would be 1:2,4:3.
Copyright © 2000 MERANT International Limited. All rights reserved.
This document and the proprietary marks and names
used herein are protected by international law.
| Data File Editor | Directory Facility | |