5.3 Staging Repositories
After the mirroring is finished, you can stage the mirrored repositories. In SMT, staging is a process where you create either testing or production repositories based on the mirrored ones. The testing repository helps you examine the repository and its packages before you make them available in a production environment. To make repositories available for staging, do the following:
-
From the repository list, select the line containing the name of the repository you want to manage.
-
Click on the selected line, highlighting it.
-
Click on the button in the lower left part of the window next to the button. In the column of the selected repository, a check mark appears. If the repository was already selected for staging before, the check mark will disappear, and the repository will not be available for staging.
-
Repeat steps 1 to 3 for all directory whose staging flag you wish to change.
IMPORTANT: Toggle Staging Button Not Active
You can only stage the repositories that were previously selected for mirroring. If it is not the case, the button will not be active.
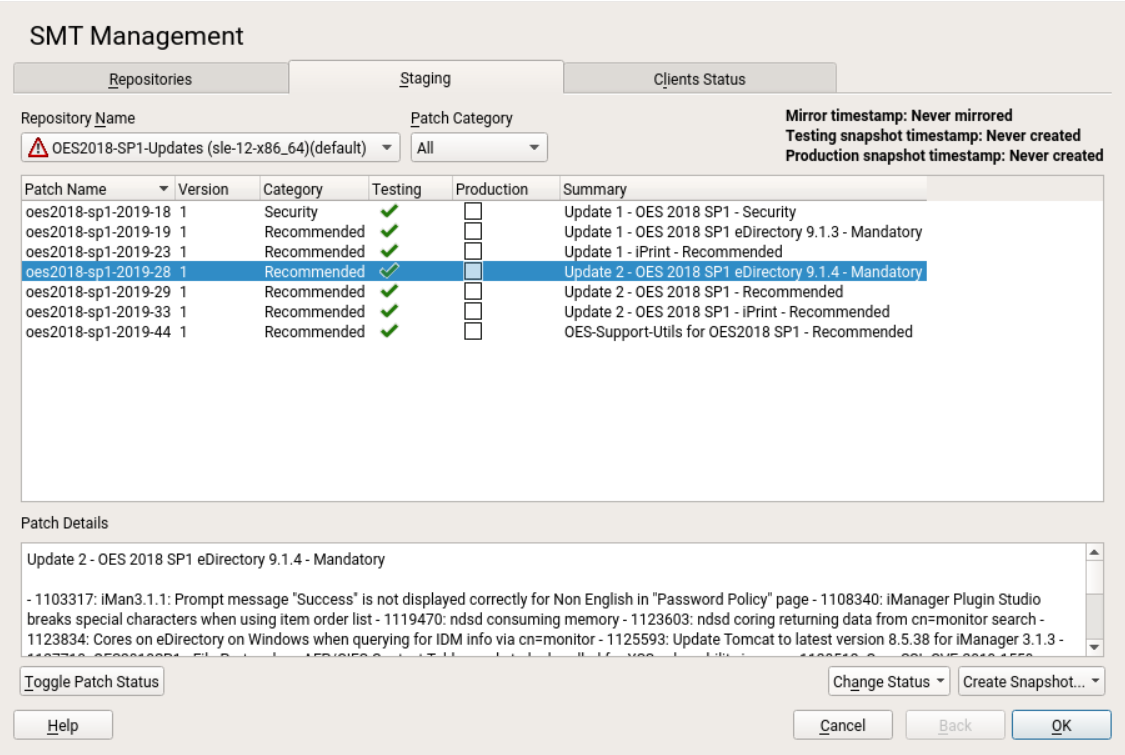
Once you mirror the repositories and make them available for staging, click on the tab. In the upper left part of the window, there is a drop-down list of all repositories which are available for staging. There the repository names have the name of the staging group attached in parentheses. Select the one you want to stage and a list of packages of this repository appears below. Information about the patch name, its version and category, testing and production flags, and a short summary is available for each patch.
Next to the drop-down list, there is a filter. It helps you to list only the patches that belong to one of the predefined categories.
If the selected repository allows for patch filtering, you can toggle the status flag for individual patches. Do so by clicking on the button in the lower left part of the window.
Before creating a repository of packages that are available in the production environment, you need to create and test the testing repository. Click on the drop-down menu and select menu item. A small pop-up window appears informing you about the staging process. After the testing repository snapshot is created, the relevant check marks in the column will be displayed.
Figure 5-3 Testing Snapshot Created
IMPORTANT: Creating a Production Snapshot
After you enable staging for an update repository, you have to create its production snapshot to make it available to the clients. Otherwise the clients will not be able to find the update repository.
After you have examined the newly created testing repository, you can safely create a production one. Click on the drop-down menu and select menu item. A small pop-up window appears informing you about the linking the testing repository to the production one. After the production snapshot is created, the relevant check marks in the column will be displayed. Also, a green check mark appears in the drop-down list.