Add Adis Support to the Project
Visual COBOL ships with a version of Adis that contains a configuration intended for modernizing RM/COBOL applications.
- In Solution Explorer, right-click the project name and select .
-
Browse to
%COBDIR%\etc\rm, then double-click
ADISCTRL.
Note: If the file is not displayed, to the right of the File name field, change the file type filter to display All Files (*.*).

The file is added to the project, and is displayed in the Solution Explorer.
Tip: You can drag the file into the project from Windows Explorer, and drop it on the project name to add it directly to the project. -
To verify that the correct Adis configuration is selected:
- Using a Visual COBOL command prompt, navigate to the project directory (that is, the directory containing ADISCTRL).
-
Enter
ADISCF.
The adiscf.exe window appears.
-
Press
F6, then ensure that the RM2VCOB configuration is selected.
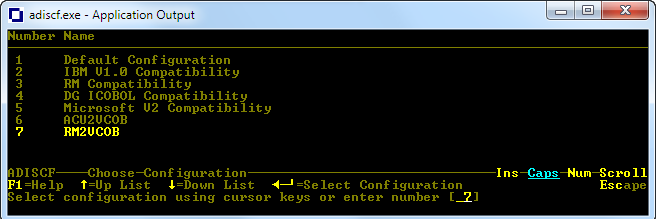
See Appendix B - ADISCTRL settings for RM2VCOB, Appendix C - Adis key mappings for RM2VCOB, and Appendix D - Adis key function mapping for RM2VCOB for a full list of the settings.
-
Press
Esc twice to exit.
Note: if you are prompted to exit without saving, press N, F4, then Esc twice again.
-
To verify the correct build properties are set for Adis:
-
In Solution Explorer, right-click
ADISCTRL and select
Properties.
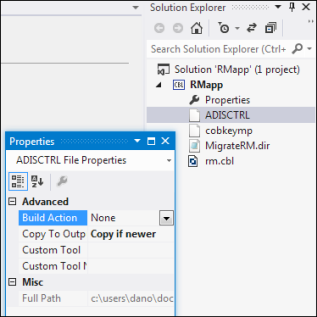
The properties for the file appear in the Properties pane.
-
Ensure that:
- Build Action is set to None.
- Copy to Output Directory is set to Copy if newer.
-
In Solution Explorer, right-click
ADISCTRL and select
Properties.
- Click to save the project.