Building
By default Eclipse is configured to perform a build whenever a file is saved. If you do not want this behavior you can turn it off by deselecting the Project > Build Automatically menu item.
The Run/Debug > Launching page in the IDE preferences (click Window > Preferences) has an option to perform a build before launching, if needed - see the General Options section on this preferences page.
Build Errors
Errors are shown in the Problems view as well as being embedded amongst all the other build output in the Console view.
If the error in the Console view has a link, click this for the IDE to open the source file and display the lines of code that are causing the error.
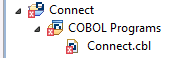
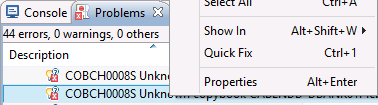
If the error in the Problems view has a line number, double-clicking it takes you to that line. In the editor, errors are shown by red squiggles under the code with the error (or yellow squiggles for warnings). Additionally, files with errors or warnings have an overlay on their icon in the COBOL Explorer, as do their parent directories and projects, enabling you to see at a glance where programs with errors are located.
Eclipse can fix some errors for you, and in the Problems view these errors are indicated by a light bulb. Using the context menu or pressing Ctrl+1 starts the Quick Fix process, as does pressing Ctrl+1 while on the error in the editor.
For example, if you try to build a program to 32 bit when your platform only supports 64 bit, then a message is displayed in the console log:
Building COBOL to 32 bit is not currently supported on this platform
To fix this, in the Problems view, press Ctrl+1. This opens the Quick Fix dialog box. In the Select a fix list, it gives you the following options:
- Change the target platform in the active build configuration
- Clone current build configuration and change target platform in the clone
If you have created a 64 bit build configuration that you are not currently using then an additional option is presented asking if you want the 64 bit build configuration to be the active configuration. Select the most appropriate option, and then click Finish.