Add Adis Support to the Project
Visual COBOL ships with a version of Adis that contains a configuration intended for modernizing RM/COBOL applications.
-
In your file system, browse to
$COBDIR/etc/rm.
The directory containing ADISCTRL appears.
-
Drag this file into Eclipse, and drop it on the project name when the cursor changes to
 .
.
The File Operation dialog box appears.
-
Ensure
Copy Files is selected (so that a copy of the original file is created in the project, and not simply a link to the original file),
then click
OK.
A copy of the file is added to the project.
-
To verify that the correct Adis configuration is selected:
- Using a Visual COBOL command prompt, navigate to the project directory (that is, the directory containing ADISCTRL).
-
Type
adiscf, then press
Enter.
The adiscf.exe window appears.
-
Press
F6, then ensure that the RM2VCOB configuration is selected.
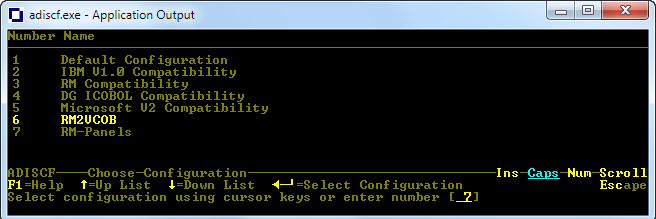
See Appendix B - ADISCTRL settings for RM2VCOB, Appendix C - Adis key mappings for RM2VCOB, and Appendix D - Adis key function mapping for RM2VCOB for a full list of the settings.
-
Press
Esc twice to exit.
Note: if you are prompted to exit without saving, press N, F4, then Esc twice again.
-
Right-click your project in the COBOL Explorer view and select
Properties.
The Properties for <project-name> dialog box appears.
-
In the left-hand pane, select
.
The Events appear in the right-hand pane.
-
In the Post-build event command line box, type
cp ${basedir}/ADISCTRL ${basedir}/New_Configuration.bin/ADISCTRL, then click
Apply.
Note: If your project builds to another location other than the default New_Configuration.bin directory, you will need to change the above command accordingly.
- Click OK.