| Fixing Date Problems | SmartFind Wizard |
This chapter outlines the reports you can create in SmartFind Plus.
The reports give details on the information in your local worksheet. The contents of the reports can be configured to suit your requirements.
You generate reports from your worksheet by clicking
![]() Reports and
selecting the type of report you want.
Reports and
selecting the type of report you want.
Tip: If you are an administrator, you can generate a group worksheet report, by loading the group worksheet as a local worksheet on your computer.
You select from the following:
The following report is available only when you click
![]() Apply
Fixes:
Apply
Fixes:
Note: If you select to output a report in HTML format, you need to have a suitable browser installed. The browser needs to be able to handle frames. For example, Internet Explorer V3.0 upwards and Navigator V3.0 upwards. The default browser provided with Windows NT V4.0 is unsuitable.
If you select to export to Access, you need Microsoft Access 97 (V8.0) or later.
These options provide instant reports on the current status of a project. You can also generate a set of relevant elements to manipulate using the analysis tools. For details see the section Refining the Worksheet in the Worksheet chapter.
The type of reports available are:
You can include removed statements and data items. These options are available by clicking Options.
After you have clicked Go to generate a report, a report window and a set view are generated.
In the report window you can view the generated results in a source code window. The results of the report can be saved as a text file. The set view can be manipulated with Analysis Tools. See the Finding Dates chapter.
Use status reports for an overview of a project's current status. You can report on only visible or on all points of interest (POIs) in a worksheet, including those on the removed list. The reports are in HTML or text format.
There are two types of reports:
You can then specify the options for the report. For help on these
options, click ![]() in
the top right corner of the dialog and click the item you want help on.
in
the top right corner of the dialog and click the item you want help on.
Figure 14-1 shows an example extract from an HTML Fix Status Report:

Figure 14-1: Fix Status Report
If the Microsoft Access database does not provide the worksheet information in a suitable form, you can write your own reporting program or export into an existing reporting system, and use the ASCII export file to provide the raw data. Use this type of report for final project reporting.
You export worksheet details to an ASCII tag file, which is similar in format to a Windows .ini file. Each section starts with a section header, enclosed in square parentheses, and contains one or more lines, each of which specifies a name and an associated value.
An ASCII tag file enables you to import worksheet details to another application. It contains the same information as that generated directly via the Export worksheet details to Access reporting option.
The tag file is saved by default in the current directory and called report.tag.
You can choose to produce a full report (all worksheet items are shown, including those marked as excluded) or to limit the report to just those items that are currently visible in the worksheet.
See the Help topic ASCII tag file for full details.
SmartFind Plus enables you to export full, local worksheet details, into a Microsoft Access database. Microsoft Access is a database product that can be used to design reports. Use these type of reports for final project reporting.
The default settings of a worksheet report provide very detailed information. You can modify the default reports or create your own customized reports. You can export any Access report, query, view or table in various, several industry-standard formats for further processing.
SmartFind Plus provides two default Microsoft Access database templates, consisting of empty tables, but with a full set of default queries, forms, macros and reports. One template is for verification results and one for remediation results.
When you select Export worksheet details to Access, the appropriate template is copied to the project directory as report.mdb. This becomes your new project report database. An outline of the project and full details on the POIs are copied to the new report database. You run the default reports or customize the queries, reports and macros to suit your own requirements.
For permanent changes to the template, you copy the default, make your modifications and set your new template as the one to use in the Export worksheet details to Access dialog. For full details on the contents of the Access tables, look up Access database in the index of the help.
If are working in Find and Fix mode and need more detail about the fixed code than just location, size and type, check Extended Details in the Export worksheet details to Access dialog. SmartFind then exports additional data into the report database including the original source code lines, fixed in-line source, fixed out-of-line source and generated working storage code. This may take extra time and create a significantly larger database. This option is not available in Find and Verify mode."
Tip: SmartFind Plus will automatically load the Fix or Verify template depending on the mode you are in.
The locations of the default database templates are:
You should not make any changes to either of these templates as your changes would be lost if you re-installed SmartFind Plus. If you want to create your own queries and reports, you should take a copy of this template and change the default value for the template identifier in the Database Identifier column of the Project table and select your new template in the Export to Access window. Your new template is now the default for your project.. You can then modify existing queries or reports or create new ones for your template.
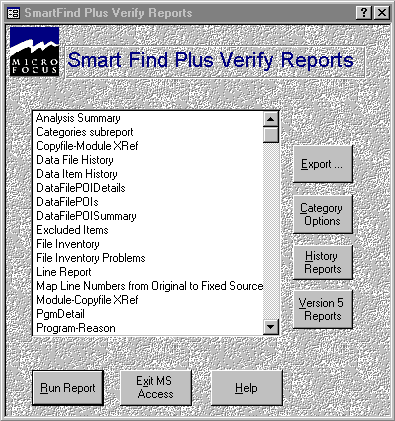
Figure 14-2 shows the default report database menu which lists the reports available and is displayed when you open the report in Microsoft Access.

Figure 14-2: SmartFind Plus Verify Reports
By default all POIs are included in a report. However, you can, to control the size of your report, decide what POIs categories to include.
Click ![]() Report
Categories from the Access Reports window to obtain the Categories
form and then work through the categories list. Uncheck Report Option
for any category you want to exclude from your reports.
Report
Categories from the Access Reports window to obtain the Categories
form and then work through the categories list. Uncheck Report Option
for any category you want to exclude from your reports.
Whenever you run a report, the category file is listed first, indicating which categories are selected and which are not. You can also obtain a category sub-report independently, if you want to document the categories you are using on your project. Figure 14-3 shows a part of a category sub-report.

Figure 14-3: Category Sub-report
Your report database provides full details on your project via the comprehensive array of reports and the capability to design additional ones. In addition, the database allows you to export both data and reports into any one of a number of industry-standard formats for further processing. For example, you may wish to export figures for inclusion within an Excel spreadsheet chart or to export a report summary for inclusion within a Word document:
Click ![]() Export
from the Access Reports window and then click:
Export
from the Access Reports window and then click:
in order to select from the various options available. Then click Export again to specify your export options.
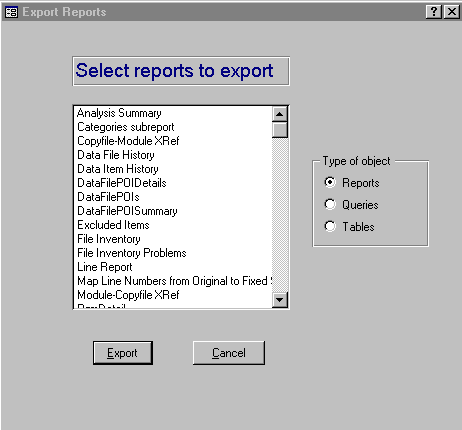
Figure 14-4 shows the export options that you can specify. For full details on these options, look up Exporting Access database in the index of the help.

Figure 14-4: Export Options
The export options allow you to produce format suitable for web browsers, word processors and spreadsheets. Delimited text signifies that the data is produced as comma-separated variables.
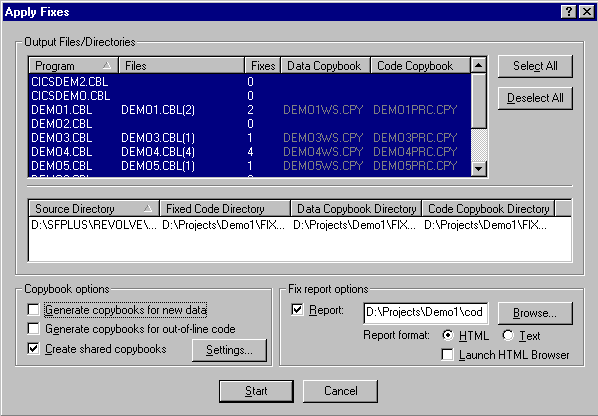
This report is only available if you are fixing your project. You can generate a report on all the fixes you have applied to your source code by checking Report on the Apply Fixes dialog, as shown in Figure 14-5:

Figure 14-5: Apply Fixes Dialog
By default, the report is created in the current project directory and is named:
You can overwrite the default name and directory or select an alternative using the Browse button.
For HTML format reports, you can check Launch HTML Browser in order to display your report in your default Web Browser immediately after the fixes have been applied.
The generated report includes:
Any warning messages output by SmartFix.
For each program, the number of fixes applied and any copybooks created.
For each program, the details of the fixes supplied as well as the original size of the file, the number of lines added and the number of lines commented out.
| Fixing Date Problems | SmartFind Wizard |