Creating a New User with a Sales Role
After you have created a user policy, only users provisioned with that policy can access the protected web resource. This section describes how to create a user that meets the conditions to be assigned the Sales role. These instructions assume that you are using the configuration store of Administration Console as the LDAP user store. If you are using a different server than the LDAP user store, you need to modify these instructions:
-
Click <user name> at the top right of the page and then click .
-
Click .
-
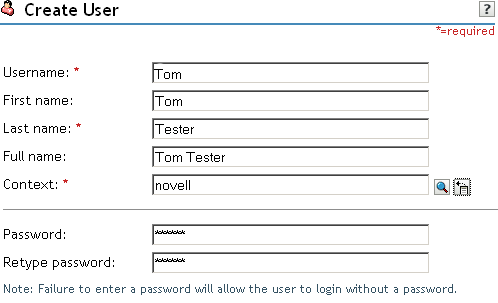
Click then fill in the following fields:
Username: Specify Tom.
First name: Specify Tom.
Last name: Specify Tester.
Context: Click the icon, then click . The user is automatically assigned the context of .
Password: Assign a password to the user.
Retype password: Retype the assigned password.
Your user entry must look similar to the following:
-
Scroll to the field, then click the icon.
-
In the text box, type Sales (initial uppercase), then click to return to the page.
-
On the page, click .
-
Click to close the task.
Tom meets the requirements to be assigned the Sales role when he logs in.
-
Continue with Creating the Identity Injection Policy for a Custom Header.