23.0 Upgrade Assistant
Online Update Service enables you to get the latest Access Manager product updates. The Upgrade Assistant feature simplifies the usage of this Update Service.
Using this feature, you can perform the following actions on Administration Console:
-
Register to Update Service for all devices
-
Receive updates when a new release of Access Manager is available.
-
View the list of all devices, available updates, their versions, and registration status
-
Invoke the Update Service registration for an individual device
-
Deregister Update Service
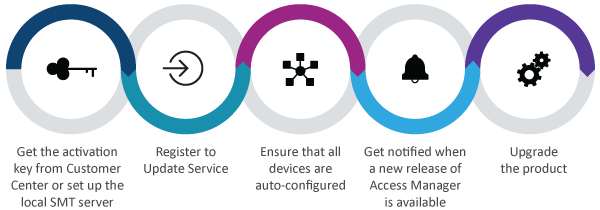
The following diagram illustrates how to use this feature:
Video
The following video demonstrates how to register to Upgrade Assistant and use it for upgrading the product:
NOTE:Upgrade Assistant supports the following upgrades:
-
A major release version to a service pack (such as 5.0 to 5.0 Service Pack 1)
-
A service pack to a service pack (such as 5.0 Service Pack 1 to 5.0 Service Pack 2)
-
A service pack to a major release version (such as 5.0 Service Pack 3 to 5.1)
Upgrade Assistant does not support a patch upgrade to a service pack or major release version.
In this section:
NOTE:For troubleshooting information, see Troubleshooting Upgrade Assistant.
How Upgrade Assistant Works
To use the Upgrade Assistant feature, you must register to one of the following services:
-
Micro Focus Customer Center on SLES
-
Register using Local Repository on RHEL
When you register to any of these services, all devices get registered to Update Service. The new devices are also auto-registered as part of the import process.
Auto-registration while adding a new device into Administration Console works only when the device and Administration Console have the same Access Manager versions installed. Auto-registration does not work in a hybrid environment.
If a device is not registered for the update, you can register it on the Device Status page. For more information, see Registering a Single Device to Update Service.
When a new Access Manager Release is available, you can view the release details in table.
Click to view various statuses of each device, such as whether the device is on the latest version or any update is pending.
If updates are pending on a device, you can update the device to the latest available Access Manager release version. Follow steps in Upgrading Access Manager through Upgrade Assistant.
You can de-register the service for all devices or an individual device by clicking on the Upgrade Assistant page or on the Device Status page respectively. After de-registering, you can re-register.
The Upgrade Assistant agent works with the default certificate. You can change this to the device certificate by re-pushing the certificate. Re-push the connector certificate of devices and keystore of Administration Console. After the certificates are re-pushed, restart the Upgrade Assistant agent by running the restart command to apply the certificate changes.
To restart the Upgrade Assistant agent, perform the following steps:
-
In Administration Console, click .
-
Click .
-
Select for devices.
-
Select for Administration Console.
-
Click .
-
Run the systemctl restart novell-ua-agent.service command.
Prerequisites before using Upgrade Assistant
-
Upgrade Assistant is enabled on licensed version of Access Manager.
-
The Tomcat service and JCC service are up and running on all the devices.
-
All devices are time synchronized for the registration and upgrade processes to get complete successfully.
-
The Upgrade Assistant agent service is up and running before you start the upgrade process using the systemctl status novell-ua-agent command.
-
A new port 9968 is opened in firewall and is only used to communicate internally (within Administration Console). This port must not be accessible from the external network due to security reason.
-
No zypper/yum process or zypper/yum cron job is running on the system during the registration or upgrade process.
-
To register to Micro Focus Customer Center: You must have obtained the activation key for the product from Micro Focus Customer Care.
-
To register by using local repository on RHEL: You must have access to a mirror repository of the Access Manager Product channel.
Important Notes
-
You can use Upgrade Assistant in Access Manager 5.0 and later only.
-
It is recommended to use Upgrade Assistant in the primary Administration Console only.
-
For SLES setups, it is recommended to open only one Administration Console tab in any browser. Opening Administration Console in multiple browsers at the same time might cause issues in managing the am.prod symbolic link. For more information about the am.prod symbolic link, see Managing the am.prod Symbolic Link on SLES.
-
Upgrading Access Manager 5.0.x to Access Manager 5.0 Service Pack 2 must be done from the command line only. For more information, see Registration in Access Manager 5.0 or 5.0 Service Pack 1.
-
Upgrading Access Manager 4.5.x to Access Manager 5.0.x must be done using tar.gz.
Registering to Micro Focus Customer Center on SLES
Ensure that you have obtained the activation code for Access Manager from Micro Focus Customer Center.
Perform the following steps to register to Micro Focus Customer Center:
-
On Administration Console Dashboard, click > .
-
Specify the following details:
Field
Description
Select .
Specify your email address to which the updates will be sent.
Specify the activation key that you have obtained for the product from Micro Focus Customer Care.
-
Click .
NOTE:If you are registering in Access Manager 5.0 or in Access Manager 5.0 Service Pack 1, you need to manage the am.prod symbolic link. For more information, see Managing the am.prod Symbolic Link on SLES.
Registration Using Local Repository on RHEL
On the RHEL system, you need to create a local repository of Access Manager. Perform the following steps to register to the local repository:
-
On Administration Console Dashboard, click > .
-
Specify the following details:
Field
Description
Default Repository Name is AM-5.0-Product.
Specify Access Manager’s local URL to which you want to register.
The valid URL format is:
https://<Mirror_ID>:<Repository_key>@nu.novell.com/repo/$RCE/AM-5.0-Product/sle-15-x86_64/
The URL is appended with ‘repodata/repomd.xml’ automatically and it is verified for its validity. An error is displayed on the user interface if the URL is invalid.
By default, Access Manager’s repository (AM-5.0-Product) used for getting Online Updates will be enabled post-registration.
By default, GPG check for Access Manager’s repository is disabled.
-
Click .
You can use Upgrade Assistant from Access Manager 5.0 Service Pack 2 onwards. To register in Access Manager 5.0 or 5.0 Service Pack 1 release, see Registration in Access Manager 5.0 or 5.0 Service Pack 1.
Registering using Local SMT on SLES
On SLES, you can register using local SMT.
Prerequisites to set up Local SMT
NOTE:Before performing the following steps, ensure that Access Manager is installed on the same machine.
Perform the following steps to setup Local SMT:
-
Navigate to > > > to enable Web Scripting repositories.
You can also enable Web Scripting repositories through CLI. Run the following commands:
SLES 12:
SUSEConnect -p sle-module-web-scripting/12/x86_64
SLES 15:
SUSEConnect -p sle-module-web-scripting/<version>/x86_64
-
Extract the tar ball and change the directory to smt_packages.
For example: cd /home/novell-access-manager-5.0.3.0-118/smt_packages
-
Run the ua_smt_packages.sh script as a root or root equivalent user.
Local SMT on SLES
On SLES system, you need to create a local repository of the Access Manager product.
Perform the following steps to register to the local repository:
-
On the Administration Console Dashboard, click > .
-
Select .
-
Provide the required host details and click .
Registration in Access Manager 5.0 or 5.0 Service Pack 1
If you are using Access Manager 5.0 or 5.0 Service Pack 1 on the RHEL server, perform the following steps on each device:
-
Create file /etc/yum.repos.d/nam.repo and update the following information:
[AM-5.0-Product]
name=AM-5.0-Product
baseurl=https://<Mirror_ID>:<Repository_key>@nu.novell.com/repo/$RCE/AM-5.0-Product/sle-15-x86_64/
enabled=1
gpgcheck=0
-
Assign the novlwww:novlwww ownership to the file by using the following command:
chown novlwww:novlwww /etc/yum.repos.d/nam.repo
-
Assign the following permission:
chmod 644 /etc/yum.repos.d/nam.repo
-
Verify if the Access Manager repository is added successfully by using the following command:
yum repolist
The AM-5.0-Product will be listed in the repository list.
-
Verify if AM-5.0-Product can fetch the available updates by using the following command:
yum list updates | grep AM-5.0-Product
Perform the following procedure if you have registered to Access Manager’s Online Update Service in Access Manager 5.0 or 5.0 Service Pack 1 and you have upgraded to Access Manager 5.0 Service Pack 2.
-
Verify /etc/yum.repos.d/nam.repo has nowlwww:novlwww ownership and 644 file permission by using the following command:
ll /etc/yum.repos.d/nam.repo
The sample output will look similar to the following:
-rw-r-----. 1 novlwww novlwww 143 Mar 11 10:35 /etc/yum.repos.d/nam.repo
-
If the /etc/yum.repos.d/nam.repo file ownership and file permission are not as expected, then run the following commands:
To assign expected ownership:
chown novlwww:novlwww /etc/yum.repos.d/nam.repo
To assign file permission on each device:
chmod 644 /etc/yum.repos.d/nam.repo
-
If a repository is created with a name such as xyz.repo instead of nam.repo, then delete the file from all devices.
-
Log in to Administration Console and register by using Upgrade Assistant by following the procedure mentioned in Registration Using Local Repository on RHEL. Use the same base URL that you used in Access Manager 5.0 or 5.0 Service Pack 1.
After successful synchronization of registration information into Administration Console, in the Access Manager 5.0 Service Pack 2 or later, you can use Upgrade Assistant to receive future Access Manager release updates and to update devices to the latest Access Manager version.
Registering a Single Device to Update Service
You can invoke the registration for an individual device in the following scenarios:
-
If a new secondary Administration Console is added.
-
An issue occurred during the auto-registration of a device.
Perform the following steps to register an individual device:
-
On Administration Console Dashboard, click > .
-
Click the icon associated with the device which you require to register to Update Service.
Upgrading Access Manager through Upgrade Assistant
Whenever a new Access Manager release is available, you can view the new release details, such as latest Access Manager release version and its description, on the Upgrade Assistant page. You can also view the latest available version for each device on > page.When Access Manager release updates are available for any of the devices, the Update icon ![]() on the page is enabled for the respective devices. Clicking the icon will start the update process in a new tab called Upgrade Console. Once the update process is complete successfully, the of the device will display as in green color on page.
on the page is enabled for the respective devices. Clicking the icon will start the update process in a new tab called Upgrade Console. Once the update process is complete successfully, the of the device will display as in green color on page.
When a user initiates an upgrade from Upgrade Assistant, a default backup of configuration is taken during the upgrade at /root/nambkup/ and the default certificate encryption password is password.
NOTE:When you are on 5.0 Service Pack 2, and if 5.0 Service Pack 3 updates are available in the repository, the still displays the description of the previous version. Ignore this description and consider the Version.
Upgrading from Access Manager 5.0 or 5.0 Service Pack 1
To upgrade from Access Manager 5.0 to Access Manager 5.0 Service Pack 2, follow steps 1 to 5.
To upgrade from Access Manager 5.0 Service Pack 1 to Access Manager 5.0 Service Pack 2, follow steps 2 to 5.
-
Navigate to the /opt/novell/channel directory. You can install meta.rpm for Administration Console, Access Gateway, Analytics Dashboard, and Identity server manually by using the following procedure. On the SLES setup, change the symbolic link to am.prod before proceeding with following steps. For more information, see Managing the am.prod Symbolic Link on SLES.
-
For Administration Console, run the command [SLES] zypper install nam-ac-channel-meta or [RHEL] yum install nam-ac-channel-meta
-
For Identity Server, run the command [SLES] zypper install nam-idp-channel-meta or [RHEL] yum install nam-idp-channel-meta
-
For Access Gateway, run the command [SLES] zypper install nam-ag-channel-meta or [RHEL] yum install nam-ag-channel-meta
-
For Analytics Dashboard, run the command [SLES] zypper nam-dashboard-channel-meta or [RHEL] yum install nam-dashboard-channel-meta. If you are upgrading from Access Manager 5.0 or Access Manager 5.0 SP1, remove the old RPM and install the new RPM. Remove the old meta RPM by using the command, zypper rm -y nam-dashboard-channel-meta for SLES and yum remove -y nam-dashboard-channel-meta for RHEL.
NOTE:After performing step 1, the /opt/novell/channel/upgrade_assistant folder is not available. This is an expected behavior. The folder will be ready after step 3.
-
-
The following upgrade procedure is identical for all components. After upgrading Administration Console, repeat the same process for Identity Server, Access Gateway, and Analytics Server. Open a terminal window and log in as the root user.
Navigate to the /opt/novell/channel directory.
-
Run the./upgrade_nam.sh command.
-
Follow the on-screen prompts to complete the upgrade.
Upgrading Access Manager using Major Version Update
You can update to the next major release using the option from Upgrade Assistant. For example, if you are on 5.0 Service Pack 3, using the option you can update to the next major release.
You can either update to the next major version or continue with the existing service pack.
NOTE:After you have updated to the next major version using the option, you cannot revert to the previous service pack. The option is enabled from 5.0 Service Pack 3.
To use the option, you have to first register your device using the Upgrade Assistant. See Registering to Micro Focus Customer Center on SLES and Registration Using Local Repository on RHEL.
After the registration is complete, you can view the and for each device.
Perform the following steps:
-
On the Administration Console, click > .
You can view if the registration is successful or not. The upgrades for the current and available version are displayed.
-
Click . The following instructions are displayed:
For SLES
Click to update the currently registered repository to a new repository. To register for the available major version of Access Manager, obtain the activation key from Micro Focus Customer Center. After you register to the major version, you cannot revert to the earlier version.
For RHEL
Click to update the currently registered repository to a new repository. After you register to the major version, you cannot revert to the earlier version.
-
Click .
After the release update is successful, a message Subscription to major available version is successful. Please reregister is displayed. You will be de-registered from the earlier version and redirected for registering to the new major version. See Registering to Micro Focus Customer Center on SLES and Registration Using Local Repository on RHEL.
Managing the am.prod Symbolic Link on SLES
Follow the procedure while upgrading using Upgrade Assistant from Access Manager 5.0 or Access Manager 5.0 Service Pack 1 to Access Manager 5.0 Service Pack 2.
-
Change the base product symbolic link to am.prod by using the following command:
ln -sf /etc/products.d/am.prod /etc/products.d/baseproduct
-
Register using Micro Focus Customer Center. For more information, see Registering to Micro Focus Customer Center on SLES.
-
Verify if any product upgrades are available.
-
Run the /opt/novell/channel/upgrade_nam.sh script.
-
After the upgrade is complete for all the devices, change the symbolic link to SLES.prod for all devices.
-
For using Upgrade Assistant for Access Manager 5.0 Service Pack 2, deregister and re-register from the user interface.
ln -sf /etc/products.d/SLES.prod /etc/products.d/baseproduct
-
View to see any updates and continue with the upgrade.
Upgrade Assistant Limitations
-
If the registration is already done successfully, but later the Access Manager product repository is deleted from the back- end, Upgrade Assistant continues to display status as registered. However, there might be disruptions in receiving updates from Access Manager Online Update Service. To start receiving the updates again, you must deregister and then re-register on the Upgrade Assistant page.
-
Upgrade Assistant is not support when Administration Console and Identity Server are deployed on the same machine.
-
Upgrade Assistant is not supported for Access Manager deployed using docker containers, Access Gateway Appliance, and Access Manager Appliance. For more information about how to upgrade Access Manager on docker and Access Gateway Appliance, see Upgrading Access Manager Appliance and Upgrading Access Manager Containers.
-
Identity Server details are displayed in Upgrade Assistant's device status page even after Identity Server is uninstalled using the uninstall.sh script.
To overcome this issue, you must delete Identity Server after uninstall.sh is executed successfully. To delete Identity Server, click > > > > .
After deleting Identity Server, details from Upgrade Assistant's device status page are removed.
-
Dashboard registration across operating system platforms is not supported. For example, a dashboard installed on RHEL cannot be registered to Access Manager Online Update Service if it is imported into a SLES Administration Console.